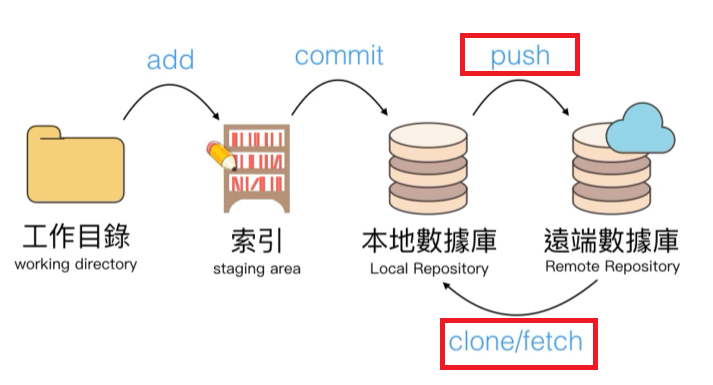
(1)建立新專案
命名新專案,並記錄網址
https://github.com/Crashoxo/gittest.git
(2)新增資料夾,並移動進去
mkdir "github"
cd github
(3)將該資料夾與github專案連結(clone)
git clone https://github.com/Crashoxo/gittest.git
目前為空,因為github上沒資料
(4)進入github(gittest)資料夾
cd gittest
(5)亂七八糟加東西
touch > git add . > git commit -m '備註'
(6)更新資料(推送數據庫到 Github)
git push
要輸入帳號密碼,確認是本人
(7)第一次推
git remote add 數據庫名稱 https://github.com/Crashoxo/gittest.git
git branch -M 分支名稱
git push -u 數據庫名稱 分支名稱
工程師把好用的插件放Github,利用查詢找出使用
(1)利用搜尋引擎
https://github.com/search?q=slider
(2)查看星星 + 更新時間Updated on(半年內)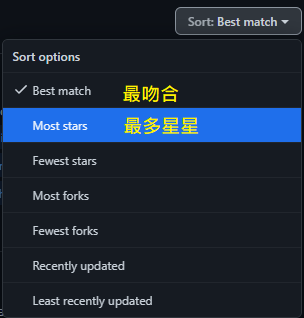
(3)觀看commit可以得知更新甚麼
(4)Issues 觀看有何錯誤(ex:不支援IE)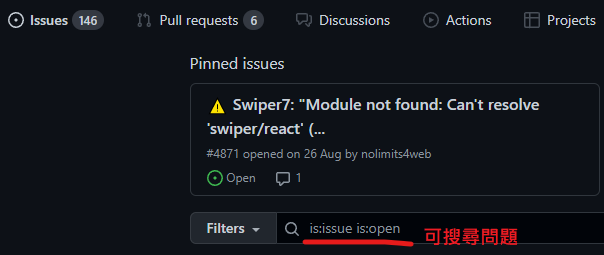
Github 專案不公開要錢,需要私人扣儲存可用bitbucket
(限制:5人內團隊才免費)
https://bitbucket.org/
使用時機 遮隱密碼 SSH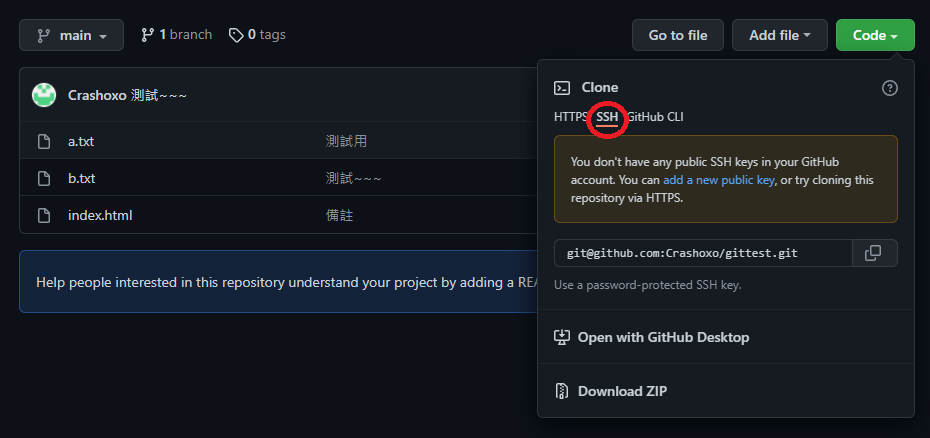
https://docs.github.com/cn/authentication/keeping-your-account-and-data-secure/creating-a-personal-access-token
申請完亦可刪除,會失效
SSH
除了可以使用個人令牌(Token)解決 GitHub 改版的問題之外,
若同學想使用 SSH 的方式的話,則可以參考 Ray 助教的文章來設定哩
https://hsiangfeng.github.io/git/20210709/1381487661/
git init
git add .
git commit -m '備註'
(1)將github與本地資料夾連結
git remote add ‘數據庫名稱’ https://github.com/Crashoxo/gittest.git
(2) 新增branch
git branch -M 'branch名稱'
(3) 資料推到main
git push -u ‘數據庫名稱’ 'branch名稱'
HEAD預設都會指向最新的commit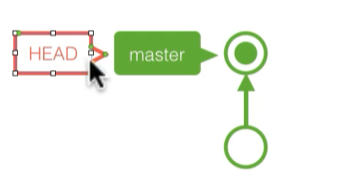
git checkout 可以指向以前的commit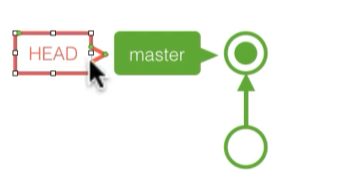
舉例:
(1) 瀏覽目前分支
git branch
(2) 把資料回朔到以前的commit,確認當時的資料狀態
git checkout '前四碼'
(3) 確認完資料後,復原
git checkout "master(看(1)在哪個分支就輸入哪個分支)"
https://backlog.com/git-tutorial/tw/stepup/stepup1_1.html
分支用途:
分支是為了將修改記錄的整體流程分開儲存,讓分開的分支不受其他分支的影響,
所以在同一個數據庫裡可以同時進行多個不同的修改。
分開的分支還是可以和其他分支合併的。
(1)建立分支
git branch 'feature1(分支名稱)'
(2) 瀏覽目前分支
git branch
(3) 移動到該分支
git checkout 'feature1(分支名稱)'
(4) 進入該分支後,才能編輯分支內的資料、並查看更新
git status
(5) add + commit
git add .
git commit -m '備註'
案例:沒變更主要branch(main),變更 更新branch(feature1)
(1)先把HEAD移動到主要專案上
git checkout 'main(分支名稱)'
(2)接著合併想合併的版本(兩版本皆須已commit完成)
git merge 'feature1(分支名稱)'
案例:有 變更主要branch 及變更 更新branch

(a)先把HEAD移動到主要專案上
git checkout 'main(分支名稱)'
(b)接著合併想合併的版本(兩版本皆須已commit完成)
git merge 'feature1(分支名稱)'
會跳出警告,關掉即可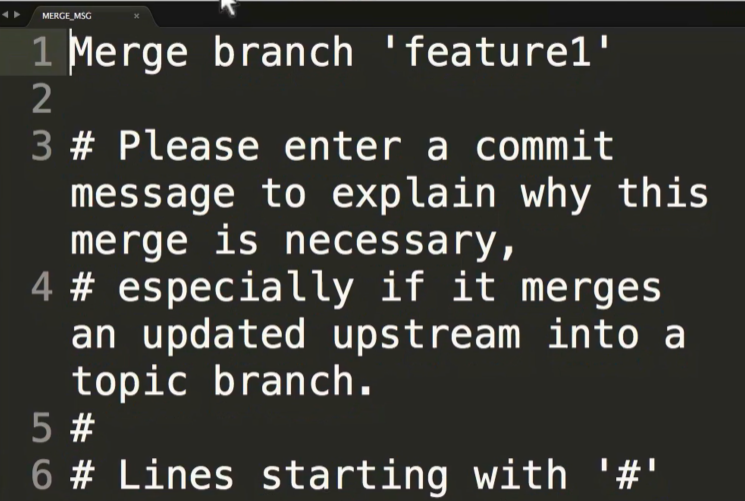
此時branch(main)內已經包含更新branch(feature1)
但更新branch(feature1)仍為原更新branch(feature1)
(git checkout feature1)
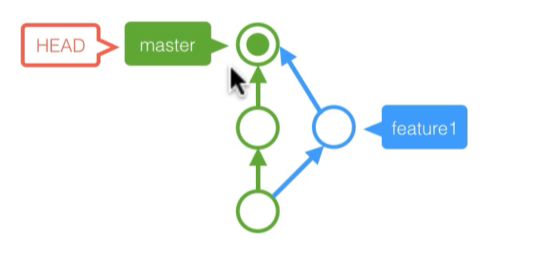
main、feature1同一行不同內容
(a) 先把HEAD移動到主要專案上
git checkout 'main(分支名稱)'
(b) 接著合併想合併的版本(兩版本皆須已commit完成)
git merge 'feature1(分支名稱)'
(c) 解決上圖問題,無法自動合併故改為 手動合併
看要保留誰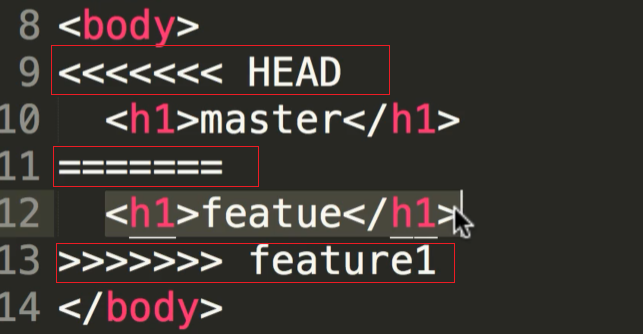
(d) add . + commit -m '備註'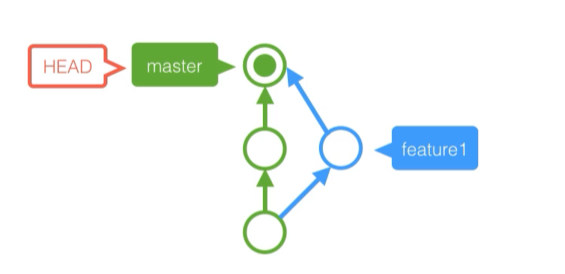
標籤是用於標記特定的點/提交的歷史
通常會用來標記發布版本的名稱/號碼(如:v1.0)。
(1)新增輕量標籤( 只新增標籤 )
git tag '標籤名稱'
(2)新增標示標籤( 新增標籤 + 標籤詳細資料 )
git tag -am ''詳細資料'' '版本名稱'
(3)查詢標籤
git tag
(4)切換到該標籤的commit
git checkout '版本名稱'
切換回原本的
git checkout '分支名稱'
(5)查詢詳細標籤
git tag -n
(6)刪除標籤
刪除標籤不會影響commit的內容
git tag -d '標籤名稱'
主要branch
更新branch(很多commit,也可以下tag)
用法
1.主要branch 與 更新branch merge 後 下tag (v1、v2)之後就可以回來看版本
2.每個commit都可以下tag,供之後參考(原本commit也可以回去查詢,但使用四位數,不方便)
3.使用git checkout HEAD跳該commit 亦可下tag ,因此可以回以前的commit下tag
情境:資料寫到一半做別的事情,很快就要回來繼續寫
(之前有commit過,但目前無需再更新commit)
(1)暫時儲存當前目錄
git stash
此時 git status 不會有東西(因非commit)
(2)瀏覽 git stash 列表
git stash list
(3)還原暫存
git stash pop
step1.回之前暫存過的分支
step2.還原 暫存檔案(git stash)
(4)清除最新暫存
git stash drop
(5)清除全部暫存
git stash clear
把暫存紀錄帶到其他branch作法:
git stash
git checkout '其他branch名稱'
git stash pop
1.branch 製作分支,不影響主版本用
(查詢 git branch,git checkout branch)
2.commit 回去之前的commit
(查詢 git log,git checkout '前四碼')
3.tag 製作版本用
(查詢 git tag,git checkout '版本名稱')
4.stash 暫存,很快就回來寫
(查詢 git stash list,git stash pop)
