工作上用到 Microk8s,因架設在 Hyper-V 上,當電腦重新開機後 Hyper-V IP會浮動,導致 microk8s 指令無法正常運作,因此想到了使用固定IP來解決這個問題。
在 Windows 10 先安裝好以下工具:
安裝Kubernetes
microk8s install
執行完後
Launched: microk8s-vm
2022-01-19T15:40:30+08:00 INFO Waiting for automatic snapd restart...
microk8s (1.22/stable) v1.22.5 from Canonical✓ installed
microk8s-integrator-windows 0.1 from Canonical✓ installed
MicroK8s is up and running. See the available commands with `microk8s --help`.
會在 Hyper-V 管理員看到 microk8s-vm 的虛擬機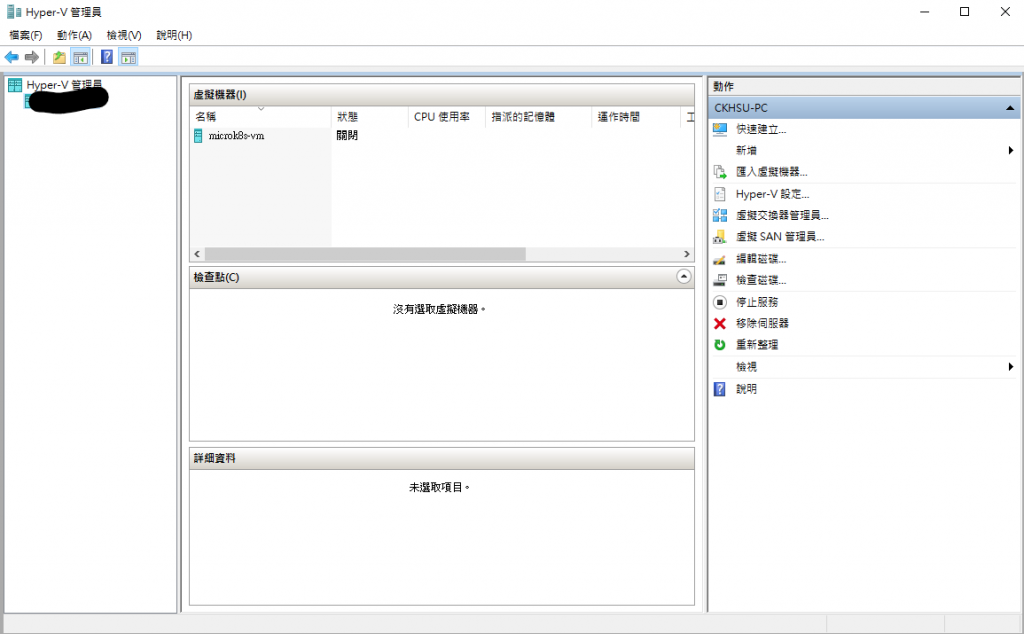
查看 Microk8s 狀態
microk8s status
microk8s is running
high-availability: no
  datastore master nodes: 127.0.0.1:19001
  datastore standby nodes: none
addons:
  enabled:
    ha-cluster           # Configure high availability on the current node
  disabled:
    ambassador           # Ambassador API Gateway and Ingress
    cilium               # SDN, fast with full network policy
    dashboard            # The Kubernetes dashboard
    dns                  # CoreDNS
    fluentd              # Elasticsearch-Fluentd-Kibana logging and monitoring
    gpu                  # Automatic enablement of Nvidia CUDA
    helm                 # Helm 2 - the package manager for Kubernetes
    helm3                # Helm 3 - Kubernetes package manager
    host-access          # Allow Pods connecting to Host services smoothly
    ingress              # Ingress controller for external access
    istio                # Core Istio service mesh services
    jaeger               # Kubernetes Jaeger operator with its simple config
    kata                 # Kata Containers is a secure runtime with lightweight VMS
    keda                 # Kubernetes-based Event Driven Autoscaling
    knative              # The Knative framework on Kubernetes.
    kubeflow             # Kubeflow for easy ML deployments
    linkerd              # Linkerd is a service mesh for Kubernetes and other frameworks
    metallb              # Loadbalancer for your Kubernetes cluster
    metrics-server       # K8s Metrics Server for API access to service metrics
    multus               # Multus CNI enables attaching multiple network interfaces to pods
    openebs              # OpenEBS is the open-source storage solution for Kubernetes
    openfaas             # openfaas serverless framework
    portainer            # Portainer UI for your Kubernetes cluster
    prometheus           # Prometheus operator for monitoring and logging
    rbac                 # Role-Based Access Control for authorisation
    registry             # Private image registry exposed on localhost:32000
    storage              # Storage class; allocates storage from host directory
    traefik              # traefik Ingress controller for external access
建立虛擬交換器
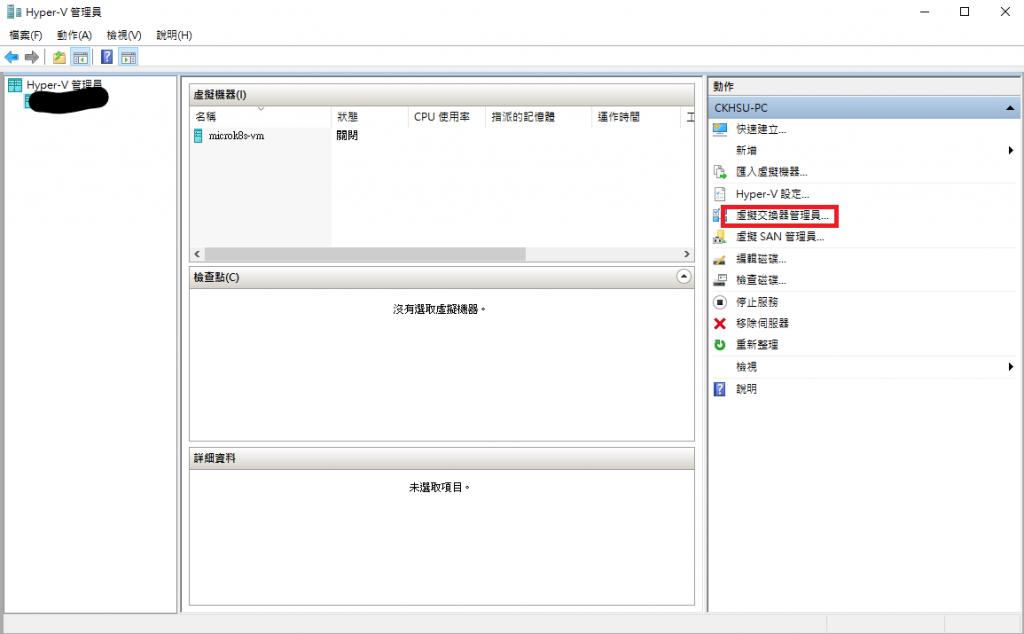
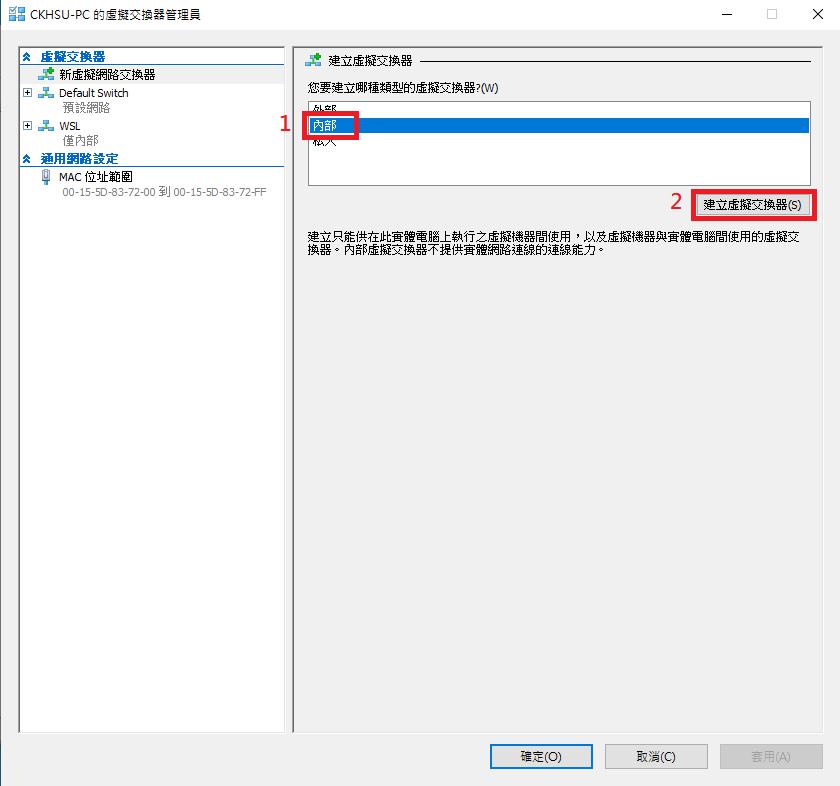
填入名稱 LANBridge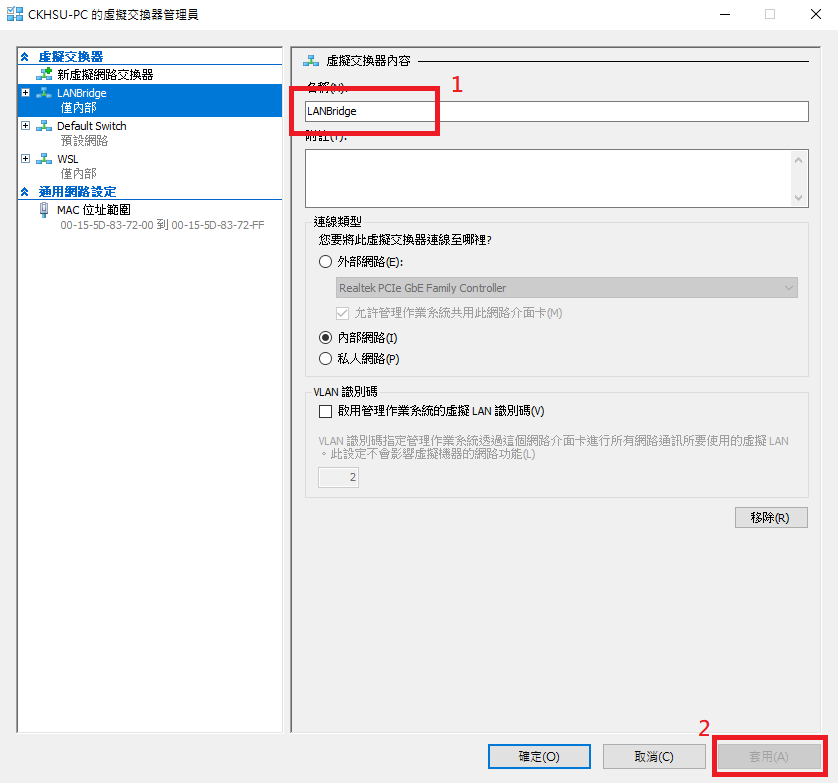
設定交換器
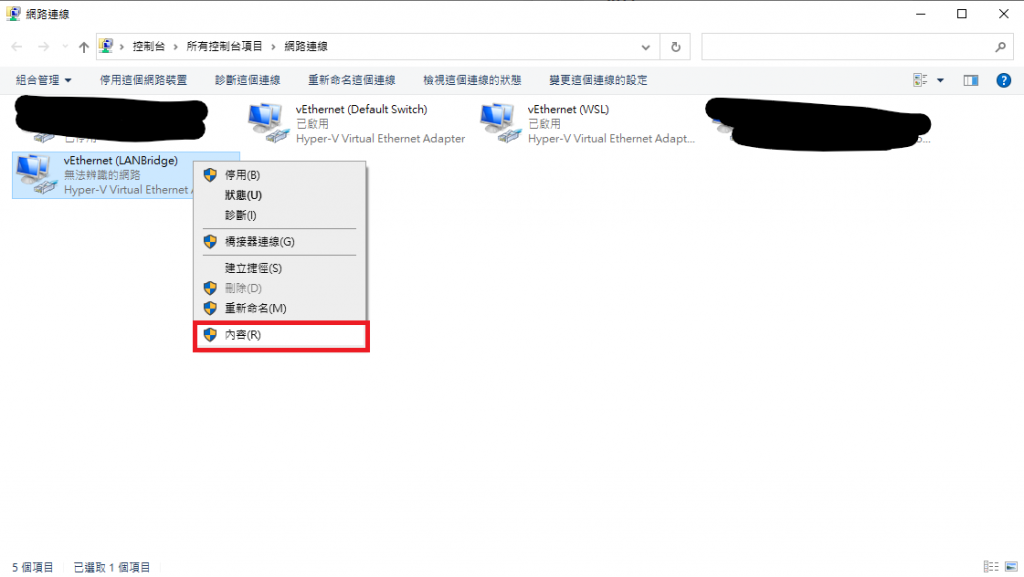
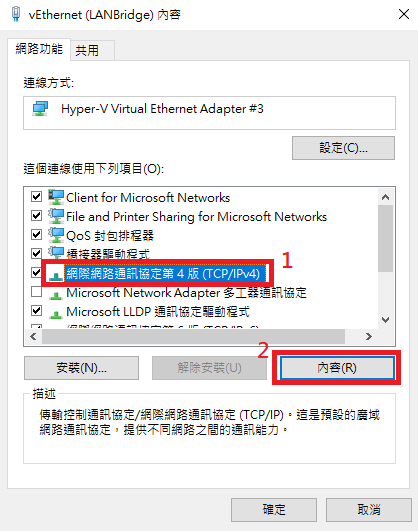
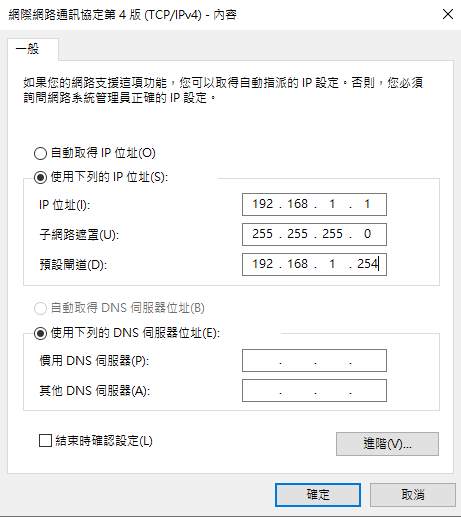
停止 Microk8s
microk8s stop
設定 microk8s-vm 虛擬機網路介面卡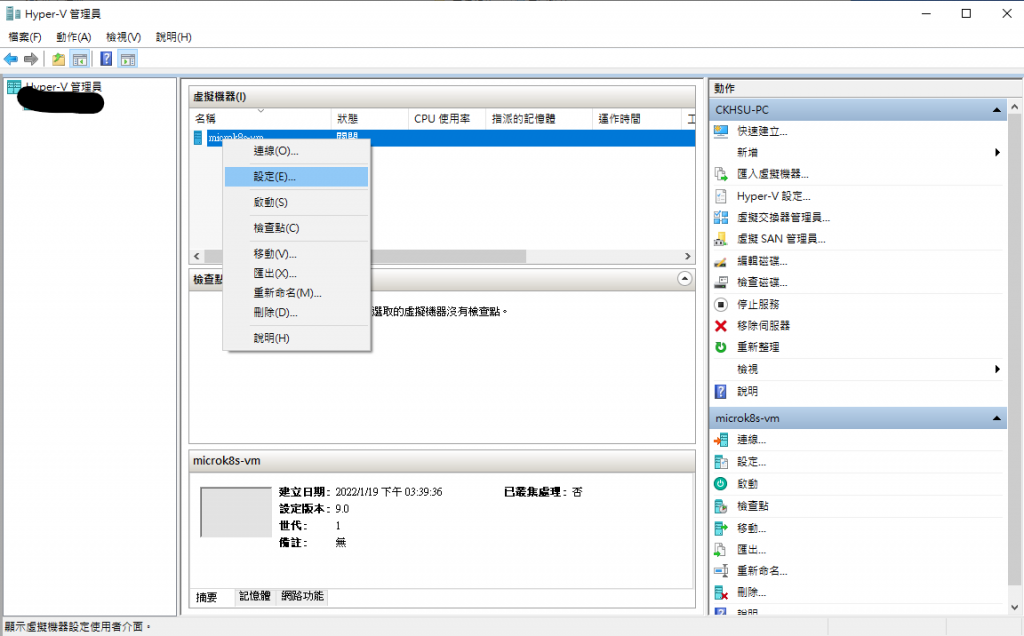
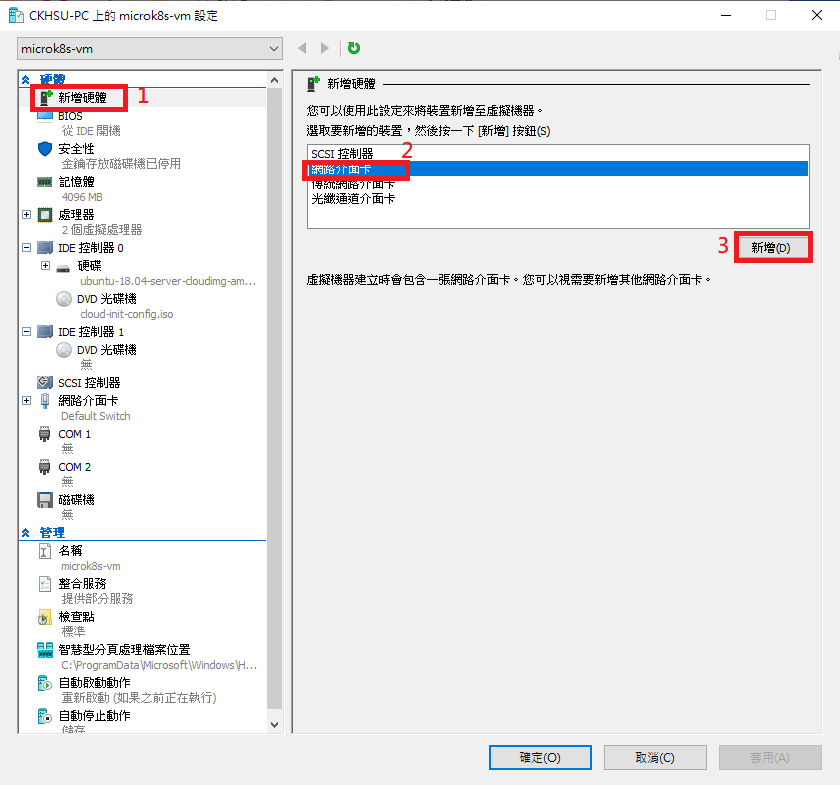
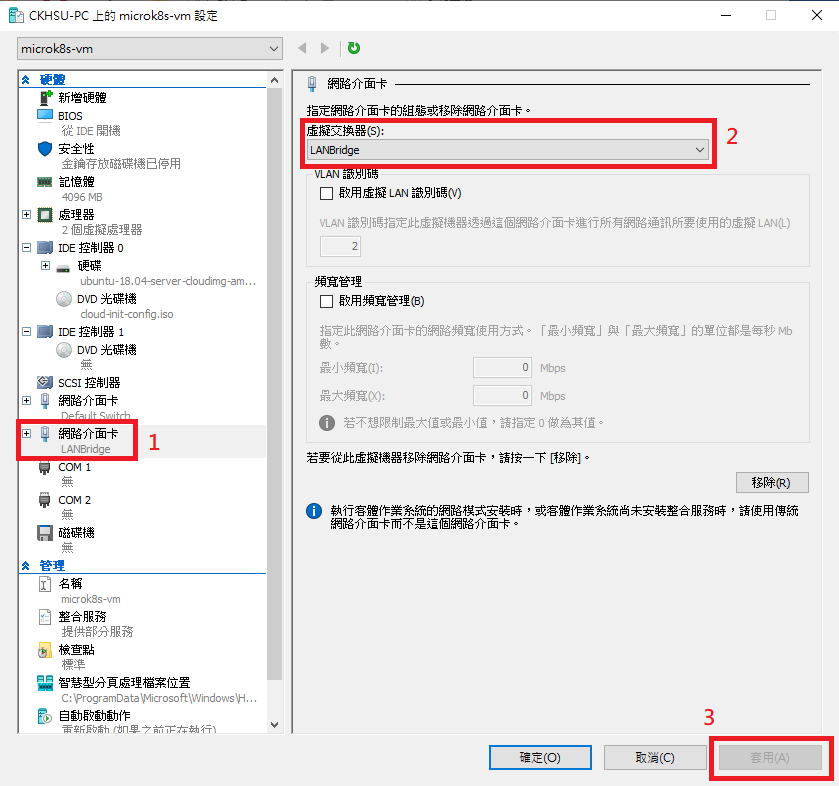
啟動 Microk8s
microk8s start
查看 microk8s-vm 訊息
multipass info microk8s-vm
Name:           microk8s-vm
State:          Running
IPv4:           172.21.68.80
                10.1.254.64
Release:        Ubuntu 18.04.6 LTS
Image hash:     7bd21b98e344 (Ubuntu 18.04 LTS)
Load:           0.69 0.53 0.37
Disk usage:     2.3G out of 48.3G
Memory usage:   1.3G out of 3.9G
Mounts:         --
透過 multipass 編輯 microk8s-vm 網路設定
multipass exec microk8s-vm -- sudo vi /etc/netplan/50-cloud-init.yaml
Vi 文字編輯器
原有設定
network:
    ethernets:
        eth0:
            dhcp4: true
            match:
                macaddress: 52:54:00:5e:ec:bd
            set-name: eth0
    version: 2
修改後設定
network:
    ethernets:
        eth0:
            dhcp4: true
            match:
                macaddress: 52:54:00:5e:ec:bd
            set-name: eth0
        eth1:
            addresses: [192.168.1.101/24]
    version: 2
配置網路設定
multipass exec microk8s-vm -- sudo netplan apply
查看 microk8s-vm 訊息
multipass info microk8s-vm
Name:           microk8s-vm
State:          Running
IPv4:           172.21.68.80
                192.168.1.101
                10.1.254.64
Release:        Ubuntu 18.04.6 LTS
Image hash:     7bd21b98e344 (Ubuntu 18.04 LTS)
Load:           0.78 0.59 0.41
Disk usage:     2.3G out of 48.3G
Memory usage:   1.3G out of 3.9G
Mounts:         --
確認可以連到該主機
ping 192.168.1.101
Pinging 192.168.1.101 with 32 bytes of data:
Reply from 192.168.1.101: bytes=32 time<1ms TTL=64
Reply from 192.168.1.101: bytes=32 time<1ms TTL=64
Reply from 192.168.1.101: bytes=32 time<1ms TTL=64
Reply from 192.168.1.101: bytes=32 time<1ms TTL=64

Ping statistics for 192.168.1.101:
    Packets: Sent = 4, Received = 4, Lost = 0 (0% loss),
Approximate round trip times in milli-seconds:
    Minimum = 0ms, Maximum = 0ms, Average = 0ms
更改 microk8s 主機IP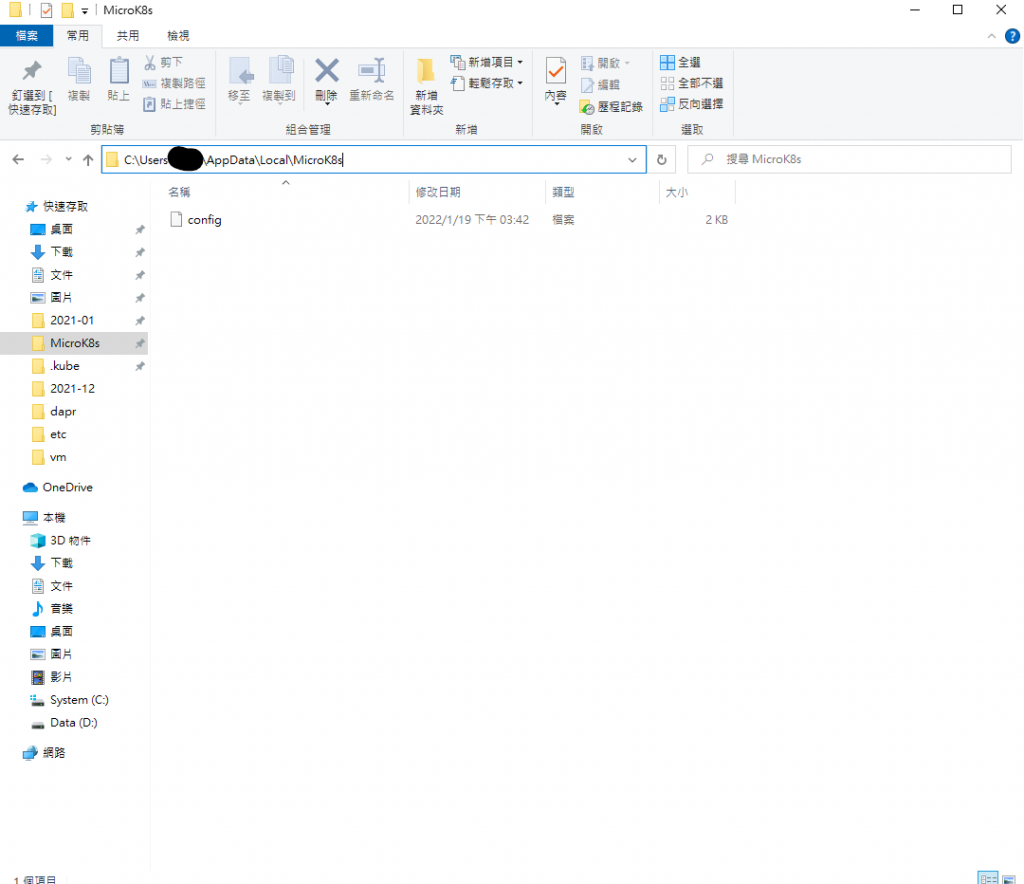
修改為 192.168.1.101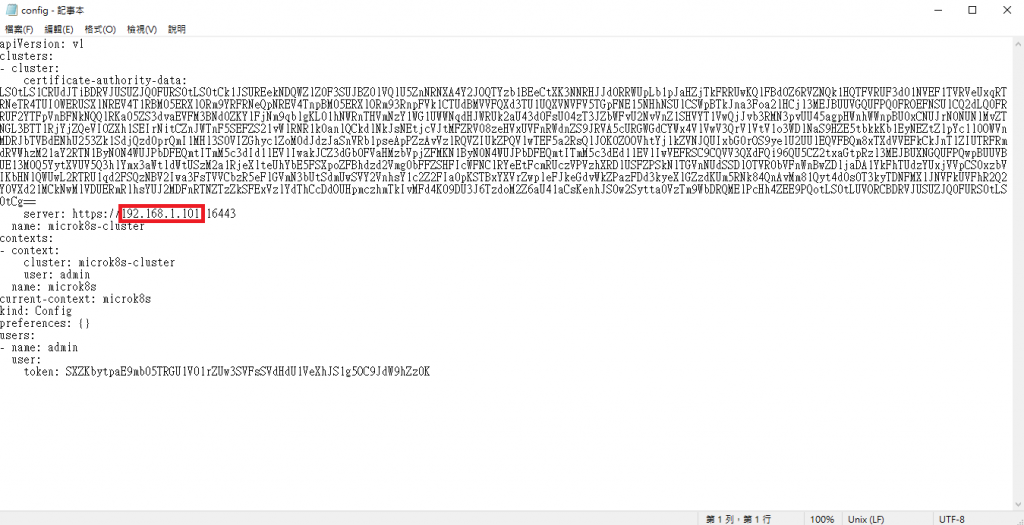
重新開機後輸入指令,可以正常顯示訊息就成功了
microk8s status
參考文章
使用 MicroK8s 架設 Kubernetes 叢集的完整過程解析
