PVE 虛擬機 Ubuntu Server 20.04 伺服器版本 安裝 LibreNMS
PROXMOX Virtial Environment 先安裝一台 Ubuntu Server 20.04 起來
IP:192.168.254.18
英文安裝
要記得安裝 OpenSSH Server 使用 telnet ssh 我是覺得比較方便
安裝好 Ubuntu Server 之後
telnet ip
先檢查 date 日期時間對不對
這很重要
因為時間時區不對會影響等一下的 LibreNMS 安裝
我們在台灣
sudo -s 之後
timedatectl set-timezone Asia/Taipei
之後就可以照這份文件安裝
https://docs.librenms.org/Installation/Install-LibreNMS/#install-php-dependencies
裡面說明很清楚
需要修改的部分我們說明如下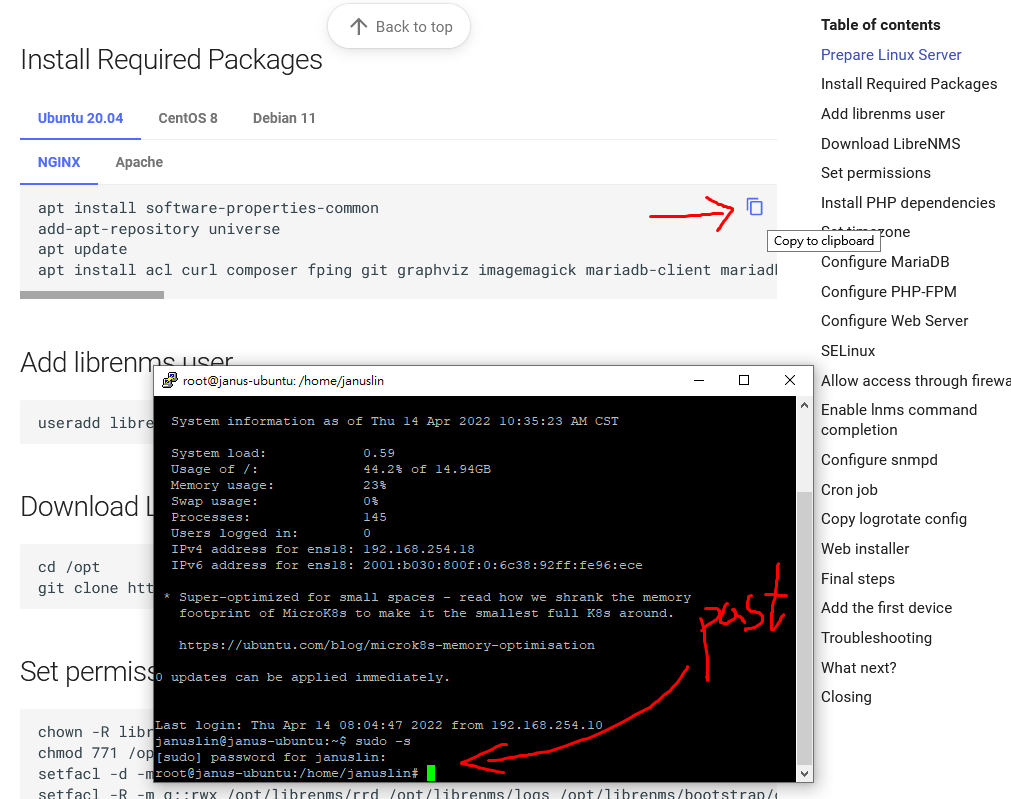
Install Required Packages
apt install software-properties-common
add-apt-repository universe
apt update
apt install acl curl composer fping git graphviz imagemagick mariadb-client mariadb-server mtr-tiny nginx-full nmap php7.4-cli php7.4-curl php7.4-fpm php7.4-gd php7.4-gmp php7.4-json php7.4-mbstring php7.4-mysql php7.4-snmp php7.4-xml php7.4-zip rrdtool snmp snmpd whois unzip python3-pymysql python3-dotenv python3-redis python3-setuptools python3-systemd python3-pip
Add librenms user
useradd librenms -d /opt/librenms -M -r -s "$(which bash)"
Download LibreNMS
cd /opt
git clone https://github.com/librenms/librenms.git
Set permissions
chown -R librenms:librenms /opt/librenms
chmod 771 /opt/librenms
setfacl -d -m g::rwx /opt/librenms/rrd /opt/librenms/logs /opt/librenms/bootstrap/cache/ /opt/librenms/storage/
setfacl -R -m g::rwx /opt/librenms/rrd /opt/librenms/logs /opt/librenms/bootstrap/cache/ /opt/librenms/storage/
Install PHP dependencies
su - librenms
./scripts/composer_wrapper.php install --no-dev
exit
Set timezone
vi /etc/php/7.4/fpm/php.ini
vi /etc/php/7.4/cli/php.ini
找到這一行[Date] 把時區改為 Asia/Taipei
timedatectl set-timezone Asia/Taipei
Configure MariaDB
vi /etc/mysql/mariadb.conf.d/50-server.cnf
Within the [mysqld] section add:
innodb_file_per_table=1
lower_case_table_names=0
存檔後退出 vi
systemctl enable mariadb
systemctl restart mariadb
執行
mysql -u root
看你要不要把 password 改掉後你要記得
CREATE DATABASE librenms CHARACTER SET utf8mb4 COLLATE utf8mb4_unicode_ci;
CREATE USER 'librenms'@'localhost' IDENTIFIED BY 'password';
GRANT ALL PRIVILEGES ON librenms.* TO 'librenms'@'localhost';
FLUSH PRIVILEGES;
exit
Configure PHP-FPM
cp /etc/php/7.4/fpm/pool.d/www.conf /etc/php/7.4/fpm/pool.d/librenms.conf
vi /etc/php/7.4/fpm/pool.d/librenms.conf
Change [www] to [librenms]:
[librenms]
Change user and group to "librenms":
user = librenms
group = librenms
Change listen to a unique name:
listen = /run/php-fpm-librenms.sock
Configure Web Server
vi /etc/nginx/conf.d/librenms.conf
新增 librenms.conf 裡面的 server_name 改成你要的,如果不知道
直接填入 Ubuntu Server IP
server {
 listen      80;
 server_name 192.168.254.18;
 root        /opt/librenms/html;
 index       index.php;

 charset utf-8;
 gzip on;
 gzip_types text/css application/javascript text/javascript application/x-javascript image/svg+xml text/plain text/xsd text/xsl text/xml image/x-icon;
 location / {
  try_files $uri $uri/ /index.php?$query_string;
 }
 location ~ [^/]\.php(/|$) {
  fastcgi_pass unix:/run/php-fpm-librenms.sock;
  fastcgi_split_path_info ^(.+\.php)(/.+)$;
  include fastcgi.conf;
 }
 location ~ /\.(?!well-known).* {
  deny all;
 }
}
存檔退出執行下面命令
rm /etc/nginx/sites-enabled/default
systemctl restart nginx
systemctl restart php7.4-fpm
SELinux
Allow access through firewall
因為 Ubuntu Server 安裝時就沒有打開
所以不需要調整
Enable lnms command completion
ln -s /opt/librenms/lnms /usr/bin/lnms
cp /opt/librenms/misc/lnms-completion.bash /etc/bash_completion.d/
Configure snmpd
cp /opt/librenms/snmpd.conf.example /etc/snmp/snmpd.conf
Edit the text which says RANDOMSTRINGGOESHERE and set your own community string.
編輯聯絡資訊改成你的資料
我是沒有改
vi /etc/snmp/snmpd.conf
退出 vi 後執行
curl -o /usr/bin/distro https://raw.githubusercontent.com/librenms/librenms-agent/master/snmp/distro
chmod +x /usr/bin/distro
systemctl enable snmpd
systemctl restart snmpd
Cron job
cp /opt/librenms/librenms.nonroot.cron /etc/cron.d/librenms
Copy logrotate config
cp /opt/librenms/misc/librenms.logrotate /etc/logrotate.d/librenms
Web installer
http://192.168.254.18/install
跑完由左到右四個項次就完成了
之後輸入
http://192.168.254.18/
打完帳號密碼就可以登入了
右邊車輪旁邊的人頭
點 My Setting
Preferences
Language
就可以把它改為節省哥JSJSS的繁體中文版本了
以上
先來拜神
順道問一下
可以在LXC裡面裝嗎?
還是一定要用VM裝
剛試了一下
裝起來了
感謝Jason Cheng (節省哥)
 林門神JanusLin
