這次要建立互動的功能,讓我們動作可以很快在 .js 檔案中運作,並且轉譯(render,之前叫做「渲染」,感覺「轉譯」比較合理,先以「轉譯」為主)到畫面。
目標做到按下按鈕,可以讓畫面的數字增加,達到每次按鈕數字都會增加 1。
.jsx建立一份我們要轉譯的樣式,有著標題、按鈕以及計數器。因此我們有個 times 記錄點擊的次數,以及建立一個 button 物件。
function Counter() {
  let times = 0; //計算次數

  return (
    <div id="counters">
      <h1>This is a counter!</h1>
      <div>
        <button
          onClick={() => {
            console.log(`times-before: ${times}`);
            times++;
            console.log(`times-finished: ${times}`);
          }}
        >
          按我
        </button>
      </div>
      <div>times: {times}</div>
    </div>
  );
}

export default Counter;
從上列程式碼中,建立用 let 建立一個可改變的 times 的變數;並用 console.log 顯示變動的內容。其中,使用「`」符號把要用的字串放進去,這時可以把用「$」錢字符號和大括號組「{}」把變數放進去,就不用改冗長的組合字串。
所以執行後,會成這樣:
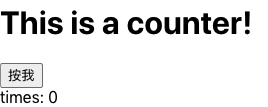
點擊按鈕後,雖然數值 times 有改變,但是卻不會反映在頁面上,這時需要 useState 的方式解決。
因為對於 React 而言,資料的狀態(status)沒有改變,所以需要通知 React 說「我們有改變值喔!」因此我們需要使用 useState 進行告知。
在使用 useState 前,需要把資料放入檔案中:
import { useState } from "react";
需要定義好我們要的參數,並且給他一個預設值為「0」,並且提供一個告知值被更動的功能-setTime:
let [times_2, setTime] = useState(0); //計算次數
之後的運算邏輯一樣,就是用「++」方式增加數值,不過需要一個通知,也就是需要呼叫剛剛命名的 setTime,所以需要增加這句:
setTime(times_2);
結合這兩個計數器後,就會變成這樣(保留之前的是用來比較有加上 useState 的差異)(檔案:Counter.js):
import { useState } from "react";

function Counter() {
  let times = 0; //計算次數
  let [times_2, setTime] = useState(0); //計算次數

  return (
    <div id="counters">
      <h1>This is a counter!</h1>
      <div>
        <button
          onClick={() => {
            console.log(`times-before: ${times} and ${times_2}`);
            times++;
            times_2++;
            console.log(`times-finished: ${times} and ${times_2}`);
            setTime(times_2);
          }}
        >
          按我
        </button>
      </div>
      <div>times: {times}</div>
      <div>times2: {times_2}</div>
    </div>
  );
}

export default Counter;
這樣就大功告成囉!
index.js最後修改作為入口的 .js 的程式碼,不僅僅是使用這個
component,也修改用另一種的轉譯方法:
const root = ReactDOM.createRoot(document.getElementById("root"));
root.render(<Counter />);
在這邊沒有使用先前運用的 React.StrictMode:
root.render(
  <React.StrictMode>
    <Counter />
  </React.StrictMode>,
);
差別在於, React.StrictMode 會提供更為嚴謹的模式檢查程式碼。在這篇文章〈What is StrictMode in React?〉提到 Strict Mode 可以更嚴謹的讀程式碼,協助我們處理程式碼中一些如沒有用到的參數、提供錯誤訊息、判斷是否有衍生問題等等
更多資料可以參考官網-Strict Mode說明 Strict Mode 的好處:
- Identifying components with unsafe lifecycles
- Warning about legacy string ref API usage
- Warning about deprecated findDOMNode usage
- Detecting unexpected side effects
- Detecting legacy context API
- Ensuring reusable state
最後結果就會這樣,有一個不會變,一個會變:
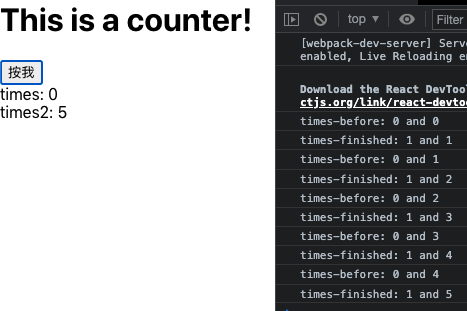
終於可以讓他動了,原來 React 有使用狀態的特性,看來運用這種特性可以保護資料,讓資料可以更為清楚哪些會變動、哪些不會。實際上更多的運用仍需繼續體驗,這就讓我們繼續看下去,可以做到多少事情吧!