
受控識別(Managed Identity)是Azure雲端用來取代傳統連線字串(Connection String)裡寫使用者ID/密碼或API Key之類的雲端服務授權(Authorization)方式:先建立「受控識別(Managed Identity)」的雲端資源,然後該「受控識別」綁定至一個或多個Azure服務,當該Azure服務需要存取其他Azure服務時,使用這個受控識別的權限來存取其他資源。
使用受控識別的雲端架構時,當某個應用程式要存取保護的Azure資源時,其連線設定,只需指定服務所在的URL和Azure受控識別的Client ID,而不需要寫明密碼/API Key,這樣就可以避免被盜用的風險,也不需要在程式中寫入這些資訊密碼,避免在基礎Infra運營設定或程式撰寫時用了過高的存取權限,讓運營在Azure雲上的後端系統更加安全。
受控識別的Azure服務分為系統指派的身分識別(System Assigned Managed Identity)和使用者指派的身分識別(User Assigned Managed Identity)這兩種,後者為開放給開發者自行設計指派之用。
要在非雲端的環境(例如dev team開發者的開發機上)使用已有受控識別設定過存取權限的Azure服務時,得在Azure Active Directory建立一個服務主體(Service Principal),該服務主體再於需要存取的Azure服務中設定正確的權限角色(Role)。如此就能在應用程式中,使用和雲端環境中套用受控識別相同的配置程式碼來存取該Azure服務資源(不過在非雲端環境執行應用程式時時要手動用環境變數指定服務主體建立時的Client ID)。
這樣能運作的因為是,受控識別(Managed Identity)其實組成上就是Azure Active Directory的企業應用程式(Enterprise Application)加上由該企業應用程式負責維護/更新的服務主體(Service Principal)所組成,因此可以使用相同的認證函式庫和呼叫程式碼來存取Azure資源。
.NET 應用程式使用受控識別存取Azure資源的方式,可以參考官方教學和這個 Azure .NET SDK的說明。
使用Azure CLI,建立一個Azure Active Directory的應用程式,並取得該應用程式的Client ID:
az ad sp create-for-rbac --name CounterApi_dev
執行之後,會得到類似以下的輸出: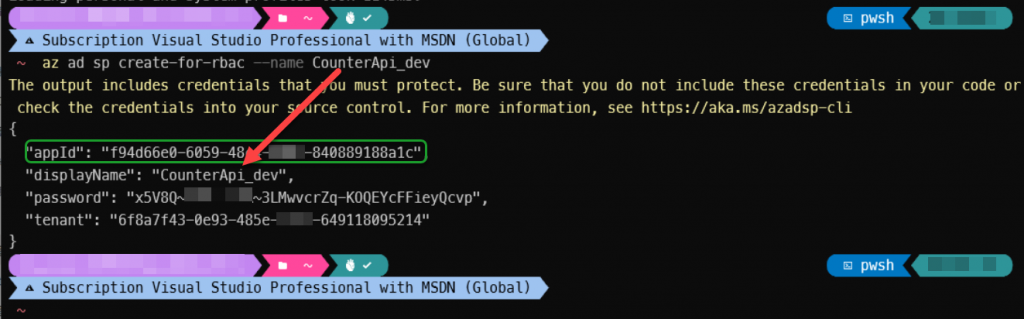
其中 appId 就是之後會在程式中需要的Client ID。而 password 只會在這裡顯示一次,之後就無法再查看,所以要記得把它存起來。
使用Azure CLI,建立一個Azure Storage Account服務:
(此處的範例參數:儲存帳戶為 demo001counterapi,資源群組為 demo_ms_orleans)
az storage account create --name demo001counterapi --resource-group demo_ms_orleans --sku Standard_LRS
執行成功之後的json輸出會有類似:
"id": "/subscriptions/744c067b-5cfa-aabb-ooxx-8e83cd838d22/resourceGroups/demo_ms_orleans/providers/Microsoft.Storage/storageAccounts/demo001counterapi",

//other properties

"primaryEndpoints": {
    "blob": "https:// blob serving url...",
    "table": "https:// table serving url...",
    //other endpoints
},
的key-value值,這些值會在後續的程式碼設定和Azure CLI建立服務存取權限的指令中用到。
然後綁定Azure Active Directory的服務主體(Service Principal)到Azure Storage Account服務:
az role assignment create --assignee $my_service_principal_appId --role "Storage Account Contributor" --scope $my_storage_account_id;
az role assignment create --assignee $my_service_principal_appId --role "Storage Blob Data Contributor" --scope $my_storage_account_id;
az role assignment create --assignee $my_service_principal_appId --role "Storage Table Data Contributor" --scope $my_storage_account_id;
上面的三個Azure CLI指令中, $my_service_principal_appId 是前面建立的Azure Active Directory的應用程式的Client ID值,$my_storage_account_id 是剛剛建立的Azure Storage Account服務的id值。
設定好權限的Azure Storage Account服務,就可在Azure Portal中看到以下畫面: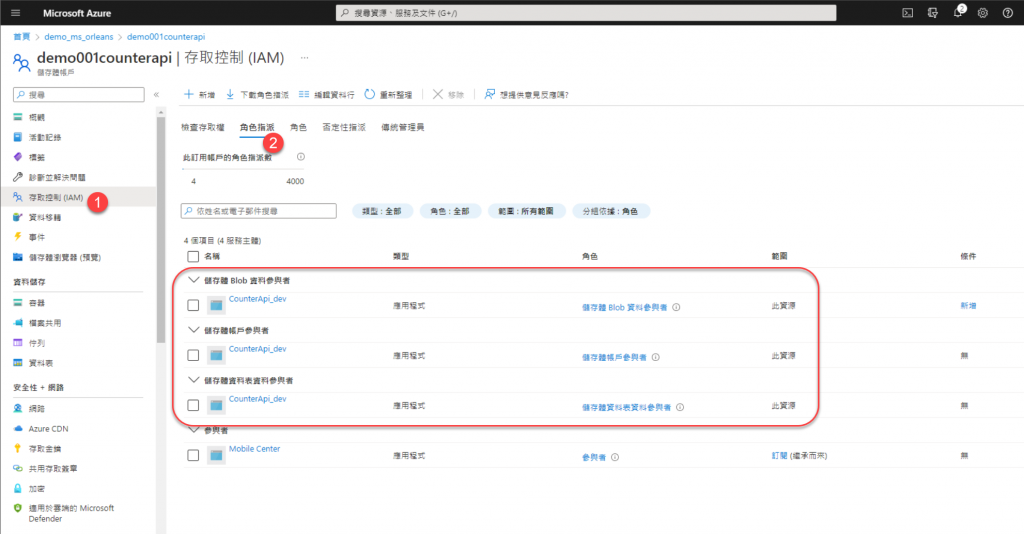
using Azure.Identity;
using Orleans.Hosting;

var builder = WebApplication.CreateBuilder(args);
// Add Orleans co-hosting
builder.Host.UseOrleans(siloBuilder =>
{
    siloBuilder.UseLocalhostClustering();
    siloBuilder.AddAzureBlobGrainStorage(
        name: "demo_counters", options =>
        {
            options.ConfigureBlobServiceClient(new Uri("Blob serving url just created..."), new DefaultAzureCredential());
        });
});

/*
other builder & app code...
*/
new Url(...),是剛剛建立完Azure Storage Account後看到JSON輸出結果的 primaryEndpoints 節區內 blob 的值。"name": "Launch WebApi" 區塊的環境變數設定,修改如下:
"env": {
    "ASPNETCORE_ENVIRONMENT": "Development",
    "AZURE_CLIENT_ID": "Azure Service Principal appId",
    "AZURE_CLIENT_SECRET": "Azure Service Principal Password",
    "AZURE_TENANT_ID":"Azure Active Directory Tenant Id"
}
此時在Visual Studio Code的 Run And Debug 功能,選取 "Launch WebApi",讓WebApi專案跑起來,跳出的Swagger網頁可以在沒有地端的Azure Storage Emulator服務的情況下進行手動呼叫WebApi進行測試。
而對應使用 TableClient 建立方式,也是類似的修改方式:
    using Azure.Identity;
    using Orleans.Hosting;

    var builder = WebApplication.CreateBuilder(args);
    // Add Orleans co-hosting
    builder.Host.UseOrleans(siloBuilder =>
    {
        siloBuilder.UseLocalhostClustering();
        siloBuilder.AddAzureTableGrainStorage(
            name: "demo_counters", options =>
            {
                options.ConfigureTableServiceClient(new Uri("Table serving url just created..."), new DefaultAzureCredential());
            });
    });

    /*
    other builder & app code...
    */
同樣的程式碼,要改接地端的測試用Azurite服務,也是可以的,不過Azurite需要設定啟用HTTPS。
使用昨天介紹的 mkcert 命令列程式,產生一組本機的憑證,並將憑證安裝到本機的信任憑證庫(Certificate Store):
mkcert -install
假如有跳出是否要信任憑證的話,選擇是(Yes):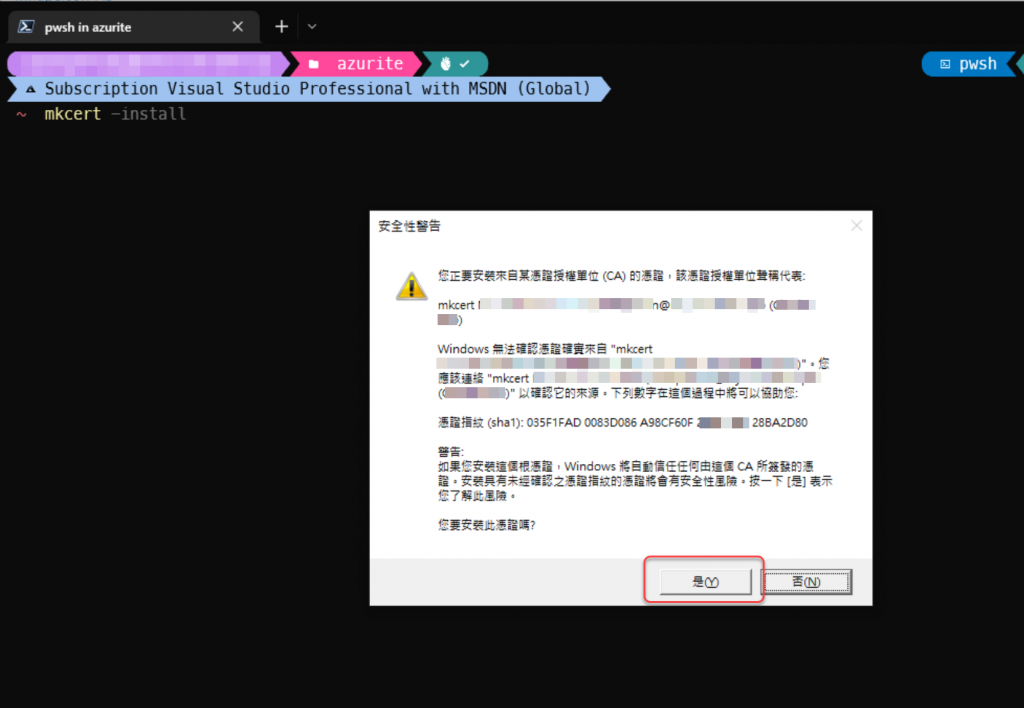
安裝完後如下圖: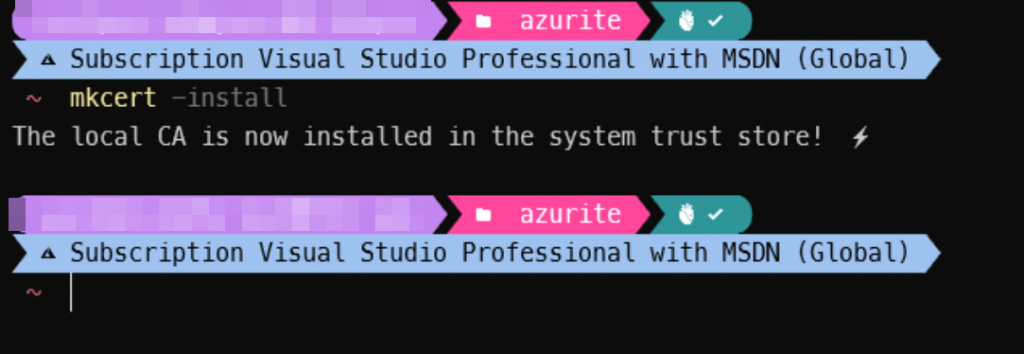
然後將工作目錄切換到azurite的目錄(ex: D:\azurite),產生一組Azurite用的本機憑證檔:
mkcert 127.0.0.1
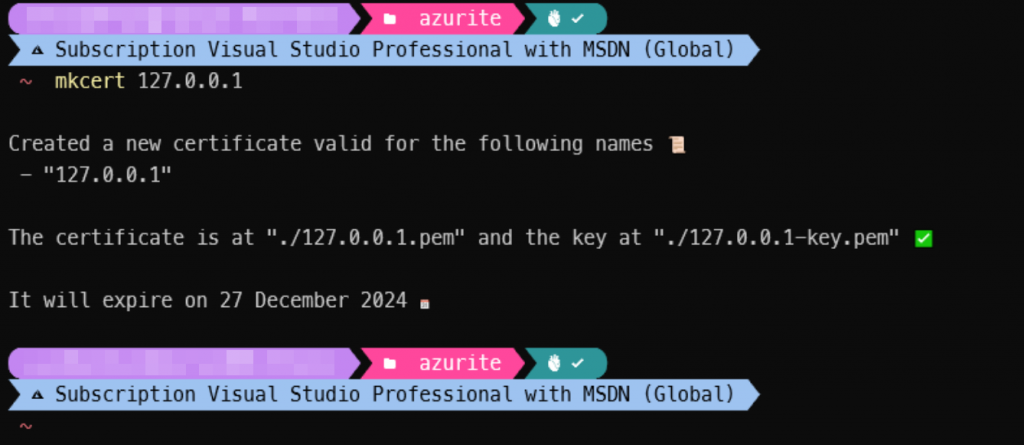
然後以下列指令啟動Azurite,就會是以HTTPS的方式提供storage emulator服務:
azurite --location data --debug debug.log --oauth basic --cert 127.0.0.1.pem --key 127.0.0.1-key.pem
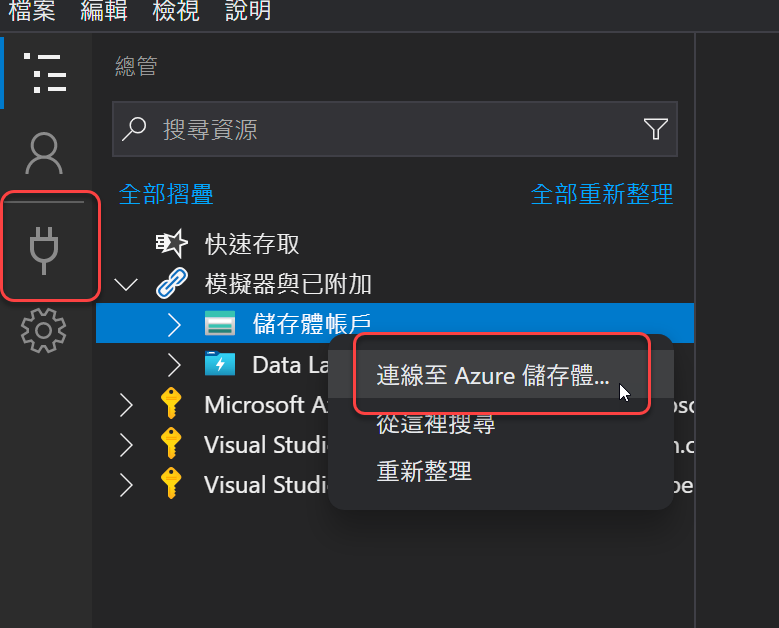
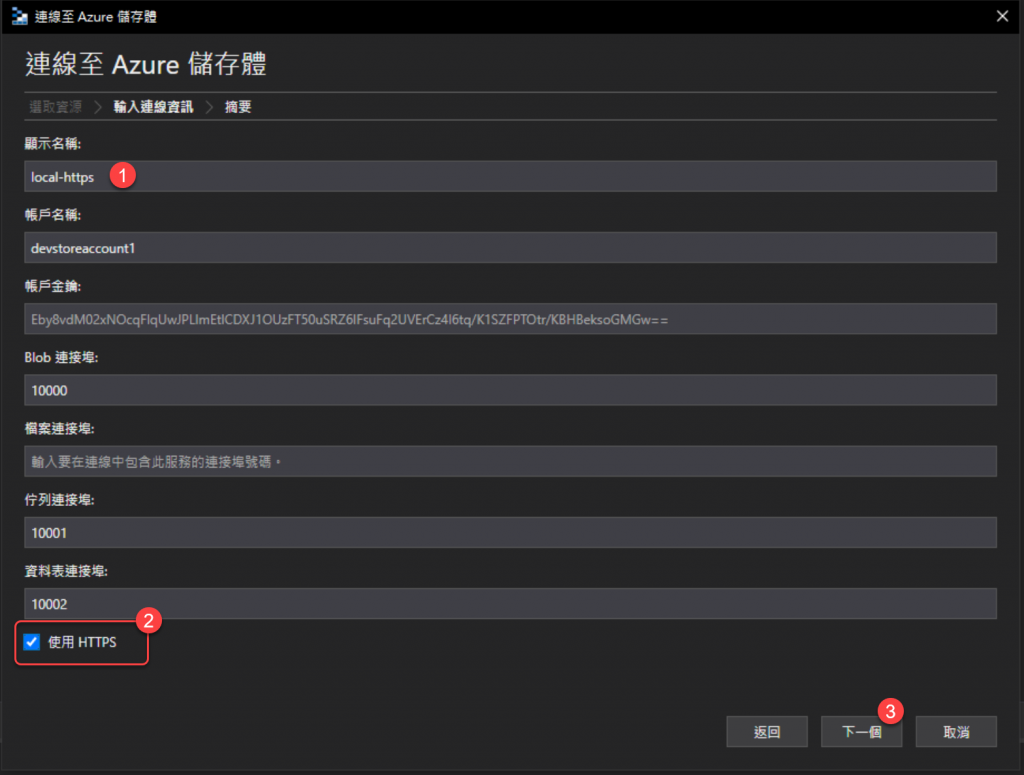
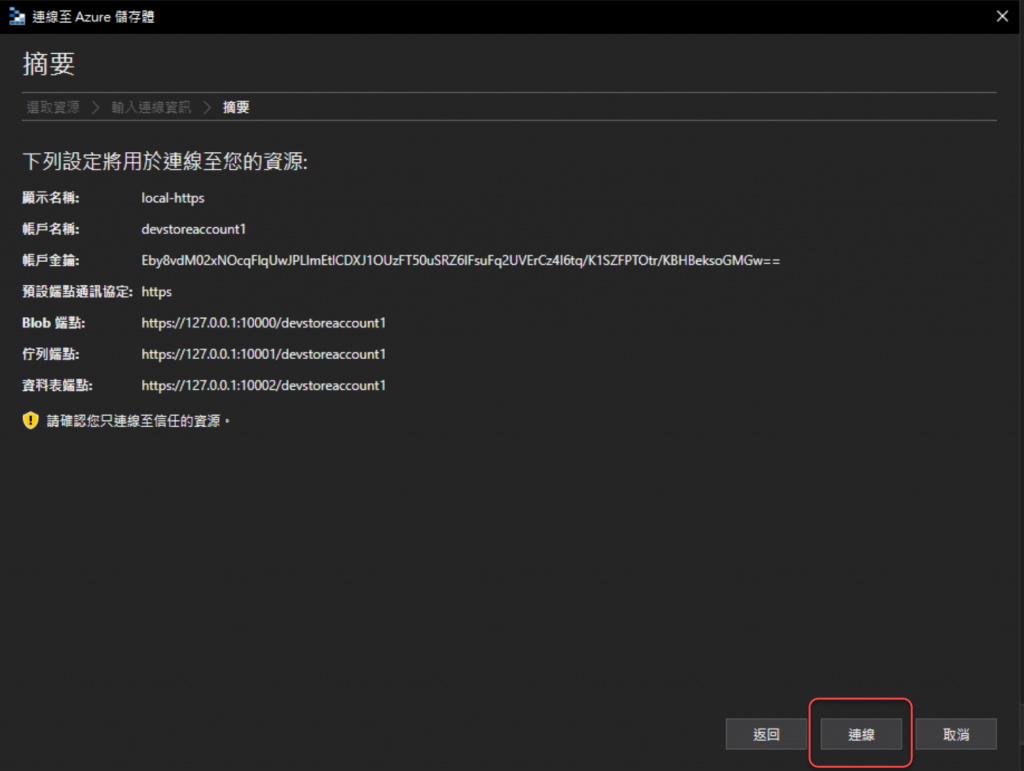
這個時候如果要用Azure Storage Explorer來連線Azurite,需要匯入剛剛使用mkcert產生的本機憑證檔,作法如下:
mkcert -CAROOT 指令取得mkcert產生之根憑證檔所在的目錄位置:


之後在程式碼中只需要將Url改成地端Azurite emulator的位置,就可以使用了:
using Azure.Identity;
using Orleans.Hosting;

var builder = WebApplication.CreateBuilder(args);
// Add Orleans co-hosting
builder.Host.UseOrleans(siloBuilder =>
{
    siloBuilder.UseLocalhostClustering();
    siloBuilder.AddAzureBlobGrainStorage(
        name: "demo_counters", options =>
        {
            options.ConfigureBlobServiceClient(new Uri("https://127.0.0.1:10000/devstoreaccount1"), new DefaultAzureCredential());
        });
});

/*
other builder & app code...
*/
而使用Table Storage的配置程式碼則是修改成如下:
using Azure.Identity;
using Orleans.Hosting;

var builder = WebApplication.CreateBuilder(args);
// Add Orleans co-hosting
builder.Host.UseOrleans(siloBuilder =>
{
    siloBuilder.UseLocalhostClustering();
    siloBuilder.AddAzureTableGrainStorage(
        name: "demo_counters", options =>
        {
            options.ConfigureTableServiceClient(new Uri("https://127.0.0.1:10002/devstoreaccount1"), new DefaultAzureCredential());
        });
 });

/*
other builder & app code...
*/
明天再來介紹使用SQL資料庫儲存Grain State的方法。

 iThome鐵人賽