React component 有一些特殊的方法,那就是 Lifecycle(生命週期),它提供了在特定時間點做特定的操作的功能,例如:允許在特定時間點抓取需要的component。可以是在被渲染之前,也可以是在它們更新之前、在它們接收props之前、以及在它們卸載之前。
了解了生命週期主要都在做些什麼之後,我們今天就要來介紹生命週期(componentWillMount() componentDidMount() shouldComponentUpdate() componentDidUpdate() componentWillUnmount()的其中兩個
WillMount、componentDidMount。
註:componentWillMount方法會在 16.X 的未來版本中棄用並在版本 17 中刪除,所以我們這邊就不介紹了!
componentWillMount
class MyComponent extends React.Component {
  constructor(props) {
    super(props);
  }
  componentWillMount() {

  console.log('123456');

  }
  render() {
    return <div />
  }
};
當component被掛載到dom時,componentWillMount()方法會比render方法先被調用,並且將我們輸入的內容記錄到控制台,所以當我們打開控制台的時候可以看到我們所輸入的內容。
componentDidMount
使用生命週期方法componentDidMount()來進行調用API或是對server的任何調用在react中是很好用的。該方法在component掛載到 DOM 後調用。這時候setState()方法會對所以調用的東西進行重新渲染。當在此方法中調用 API 並使用 API 返回的數據設置狀態時,只要收到數據,他就會自動更新
class MyComponent extends React.Component {
  constructor(props) {
    super(props);
    this.state = {
      Users: null
    };
  }
  componentDidMount() {
    setTimeout(() => {
      this.setState({
        Users: 3
      });
    }, 100);
  }
 render() {
    return (
      <div>
        <h1> Users: { this.state.Users }</h1>
      </div>
    );
  }
}
它在0.1 秒後設置狀態以來更新輸出,所以我們要做的事就是當我們要改變user的數量的時候,只需要直接打上需要改變的數量,服務器將會按照你設定的時間自動更新輸出。
這是我的實作連結: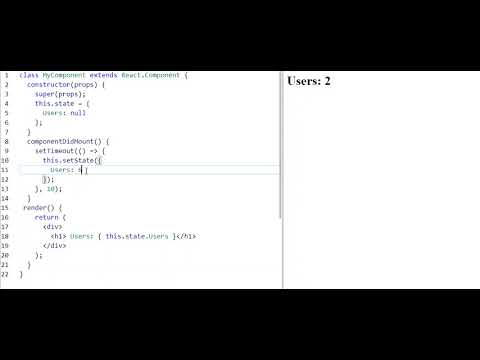
參考連結:freecodecamp