
如果 OpenStack LB 做不到 L7 的 Load Balancer,那我們就自己建立一個,把上面的工具兜起來,理解這當中的原理,組合出 HTTP L7 Load Balancer 吧!
要做到 HTTP L7 Load Balancer 就需要設定 DNS,還有 TLS 金鑰可以建立 HTTPS 連線。
DNS 這裡是掛上 Cloudflare,TLS 金鑰也是使用 Cloudflare。
Cloudflare 會採用的是加密模式為 完整 (嚴格),這個會使用 Cloudflare 的原點憑證 (Origin Certificates)。
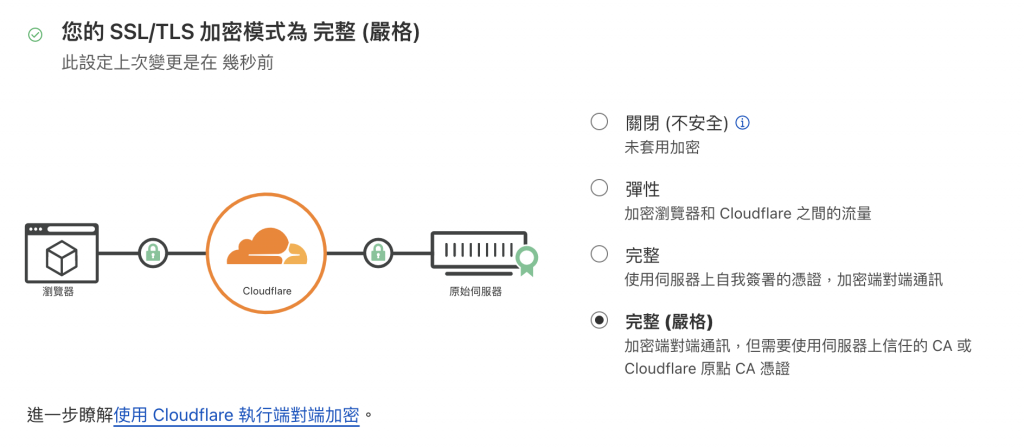
(不一定要直接套用此格式,上面選擇彈性也是可以,Cloudflare 會去自動檢測。)
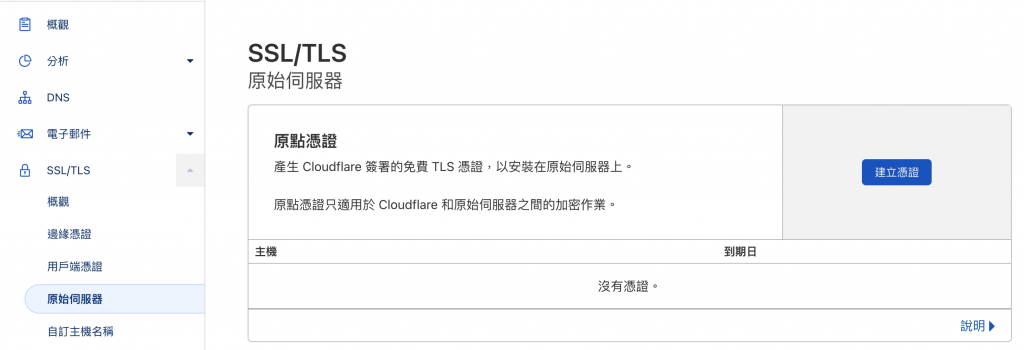
進去 Cloudflare > SSL/TLS > 原始伺服器 點擊 建立憑證
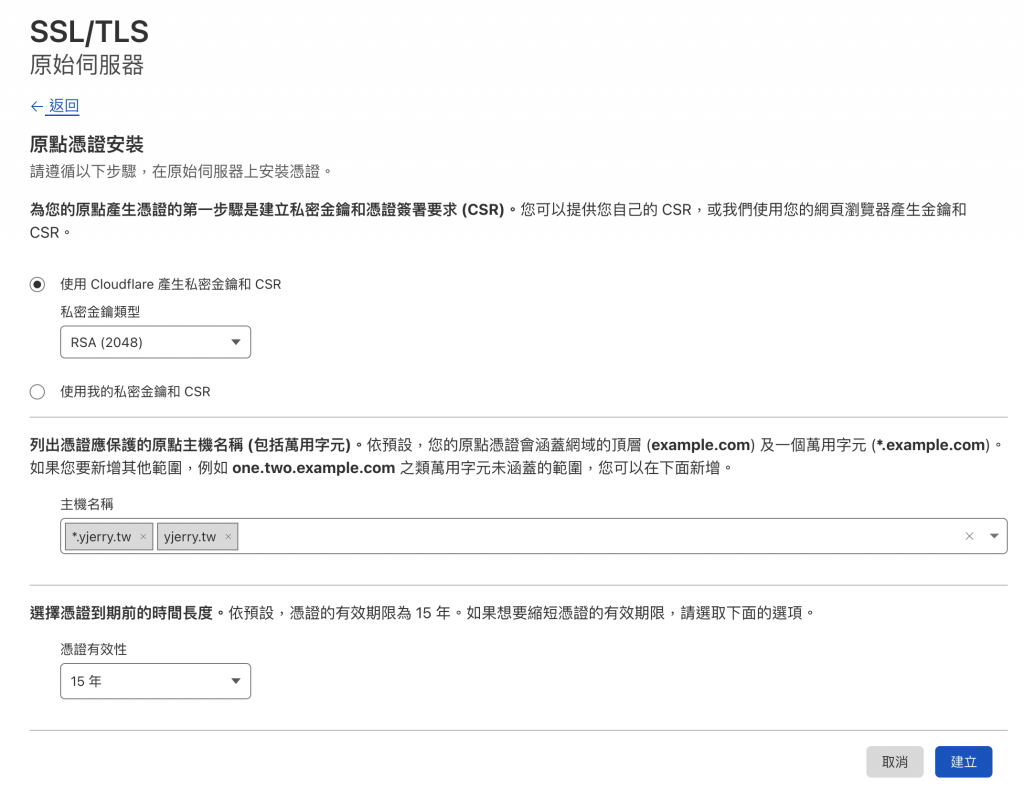
RSA (2048)
yjerry.tw 跟 *.yjerry.tw
15 年
Cloudflare 會產生原點憑證跟私密金鑰,原點憑證跟私密金鑰的內容都複製到 bastion-host 上面,儲存為 example.com.pem 跟 example.com.key。
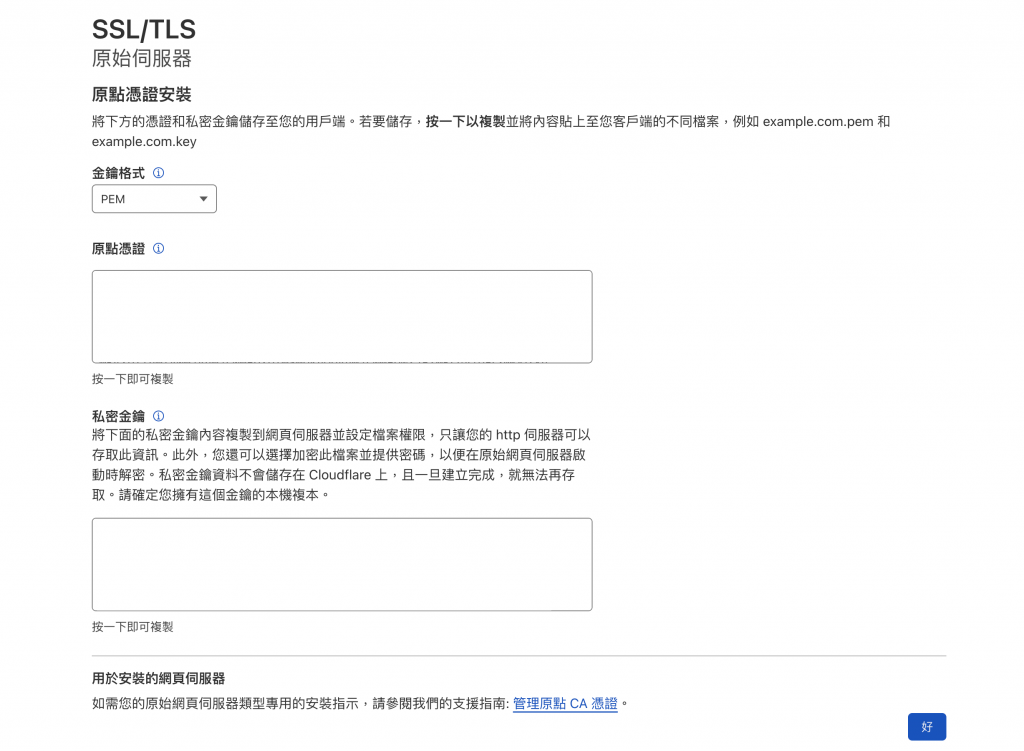
像我的 Domain 就會複製為 yjerry.tw.pem 跟 yjerry.tw.key。

接下來就把憑證放到 Kubernetes 的 Secret 裡面。
這裡把原點憑證放入 Secret,建立 TLS 類別:
kubectl create secret tls yjerry-tw-cert \
  --cert=./yjerry.tw.pem \
  --key=./yjerry.tw.key \
  -n istio-ingress
# 命名為 yjerry-tw-cert
# cert 放公鑰的路徑
# key 放私鑰的路徑

這樣就加完 TLS 了,就可以跟 Cloudflare 連線就會是安全被加密的。
接下來把上次的 Gateway 設定檔加入 HTTPS 認證
# 1. Save as `my-ingressgateway.yaml`
# 2. In bash, `kubectl apply -f my-ingressgateway.yaml`
# 3. If you want to remove, `kubectl delete -f my-ingressgateway.yaml`
apiVersion: networking.istio.io/v1beta1
kind: Gateway
metadata:
  name: my-ingressgateway
  namespace: istio-ingress
spec:
  selector:
    istio: ingressgateway # 選擇
  servers:
  - port:
      number: 80 # 開啟 HTTP Port
      name: http2
      protocol: HTTP2
    hosts:
    - "*.yjerry.tw" # 這些 DNS 進來的都會套用
  - port:
      number: 443 # 開啟 HTTPS Port
      name: https-443
      protocol: HTTPS
    hosts:
    - "*.yjerry.tw" # 這些 DNS 進來的都會套用
    tls:
      mode: SIMPLE # 使用標準 TLS 連線
      credentialName: yjerry-tw-cert # 使用的 K8s Secret
接下來就套用設定進去:
kubectl apply -f my-ingressgateway.yaml

這樣就設定完成了!
接下來會使用 Apache 還有 Nginx 兩個不同的服務,使用同一組 IP,用不同的 Domain 去區分。
https://apache.yjerry.tw
https://nginx.yjerry.tw
先來幫兩個服務個別建立 Namespace,把相關資源都放在這裡:
kubectl create namespace apache
kubectl create namespace nginx

接下來建立 Apache 的 Deployment
apiVersion: apps/v1
kind: Deployment
metadata:
  name: apache-deployment
spec:
  selector:
    matchLabels:
      app: apache
  replicas: 1
  template:
    metadata:
      labels:
        app: apache
    spec:
      containers:
      - name: apache
        image: httpd:2.4.54
        ports:
        - containerPort: 80
還有 Apache 的 Service
apiVersion: v1
kind: Service
metadata:
  name: apache-svc
  labels:
    app: apache
spec:
  ports:
  - port: 80
    protocol: TCP
  selector:
    app: apache
最後把 Apache Service 對外出去的 VirtualService
apiVersion: networking.istio.io/v1beta1
kind: VirtualService
metadata:
  name: apache-vs
spec:
  hosts:
    - apache.yjerry.tw
  gateways: # 選定的 Ingress Gateway
    - istio-ingress/my-ingressgateway # istio-ingress Namespace 下的 my-ingressgateway
  http:
    route:
    - destination:
        host: apache-svc # Service 名稱
        port:
          number: 80 # Service Port
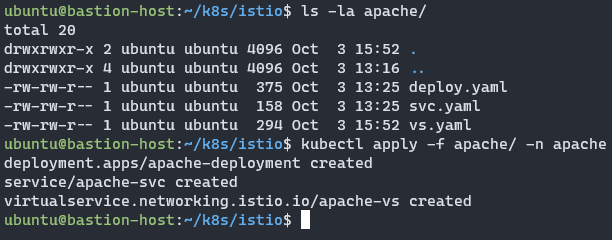
可以把這些檔案都放在同一個資料夾 apache,最後再用 apply 套用進去:
kubectl apply -f apache/ -n apache
繼續建立 Nginx 的 Deployment
apiVersion: apps/v1
kind: Deployment
metadata:
  name: nginx-deployment
spec:
  selector:
    matchLabels:
      app: nginx
  replicas: 1
  template:
    metadata:
      labels:
        app: nginx
    spec:
      containers:
      - name: nginx
        image: nginx:1.14.2
        ports:
        - containerPort: 80
還有 Nginx 的 Service
apiVersion: v1
kind: Service
metadata:
  name: nginx-svc
  labels:
    app: nginx
spec:
  ports:
  - port: 80
    protocol: TCP
  selector:
    app: nginx
最後把 Nginx Service 對外出去的 VirtualService
apiVersion: networking.istio.io/v1beta1
kind: VirtualService
metadata:
  name: nginx-vs
spec:
  hosts:
    - nginx.yjerry.tw
  gateways: # 選定的 Ingress Gateway
    - istio-ingress/my-ingressgateway # istio-ingress Namespace 下的 my-ingressgateway
  http:
    route:
    - destination:
        host: nginx-svc # Service 名稱
        port:
          number: 80 # Service Port
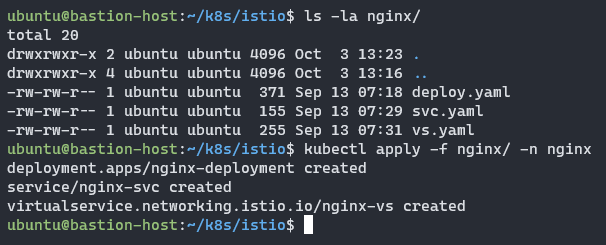
可以把這些檔案都放在同一個資料夾 nginx,最後再用 apply 套用進去:
kubectl apply -f nginx/ -n nginx
接下來設定好兩組 DNS 就可以測試連線了

連線到 Apache https://apache.yjerry.tw

連線到 Nginx https://nginx.yjerry.tw

這樣就組合出 HTTP L7 Load Balancer + TLS 功能,最基礎的網站建置就完成了!
VirtualService 其實還可以很多變化,可以根據不同的 Route 跑去相對應的服務,這部分有需求就留給大家去看文件啦!
講到監控工具以前,先來說說儲存的部分,之前講 Storage 章節的時候,有說可以用工具讓 PVC 產生相對應的 PV 空間,下一篇就帶大家來看這部分。
本系列內容也會同步貼到我的 Blog https://blog.yangjerry.tw 歡迎來我的 Blog 點一下 RSS 追蹤,那我們就下一篇文章見啦!
