我要來教大家使用 Google Colab 自製一個屬於自己的雲端 Minecraft 1.21 插件伺服器
沒安裝 Colaboratory 到 Google Drive 的人按我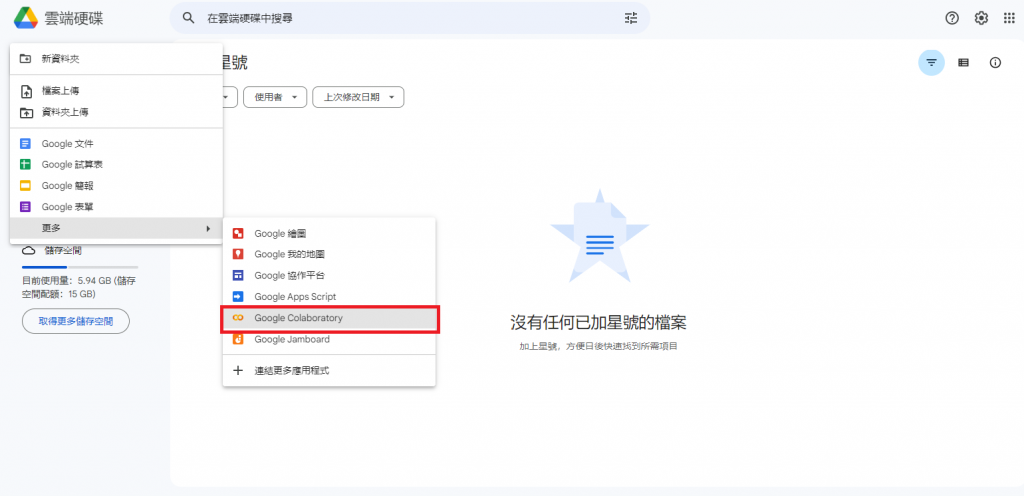
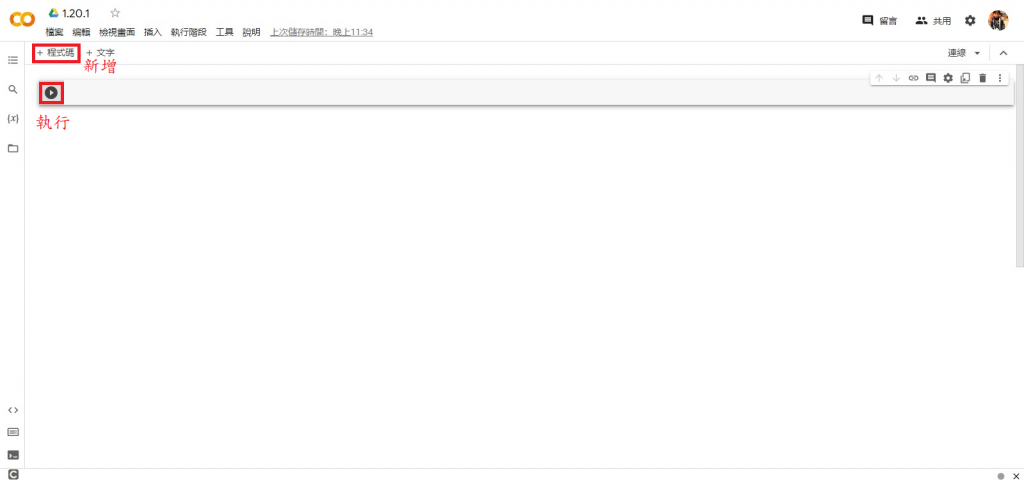
在第一欄打入下面的程式碼
from google.colab import drive
drive.mount('/content/drive')
!apt-get update && apt-get upgrade
!apt install openjdk-21-jre
!wget https://download.getbukkit.org/spigot/spigot-1.21.jar && mv /content/spigot-1.21.jar /content/drive/MyDrive/server-spigot
!cd /content/drive/MyDrive/server-spigot && java -jar spigot-1.21.jar
!cd /content/drive/MyDrive/server-spigot && sed -i 's/.*eula=false.*/eula=true/' eula.txt
!cd /content/drive/MyDrive/server-spigot && sed -i 's/.*online-mode=true.*/online-mode=false/' server.properties
!cd /content/drive/MyDrive/server-spigot && java -jar spigot-1.21.jar
按下執行,稍後點選"連線至Google 雲端硬碟"
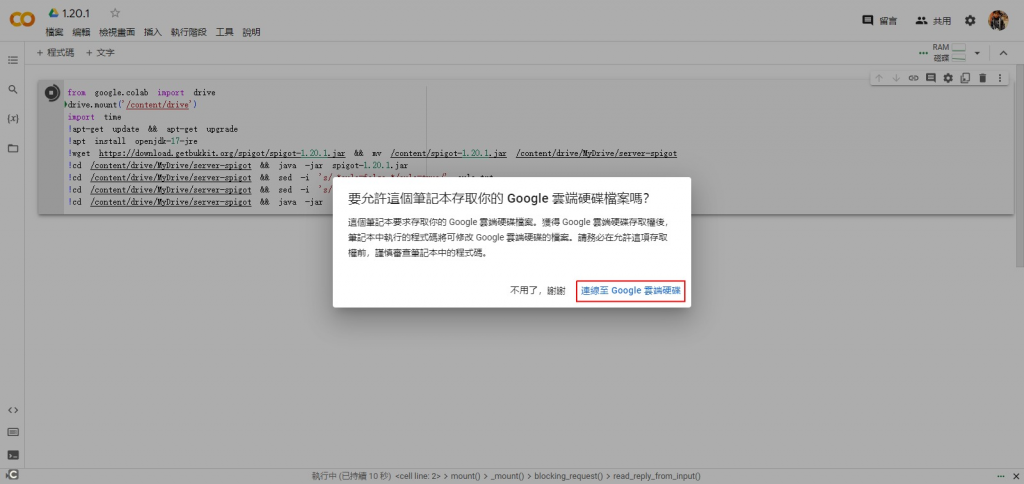
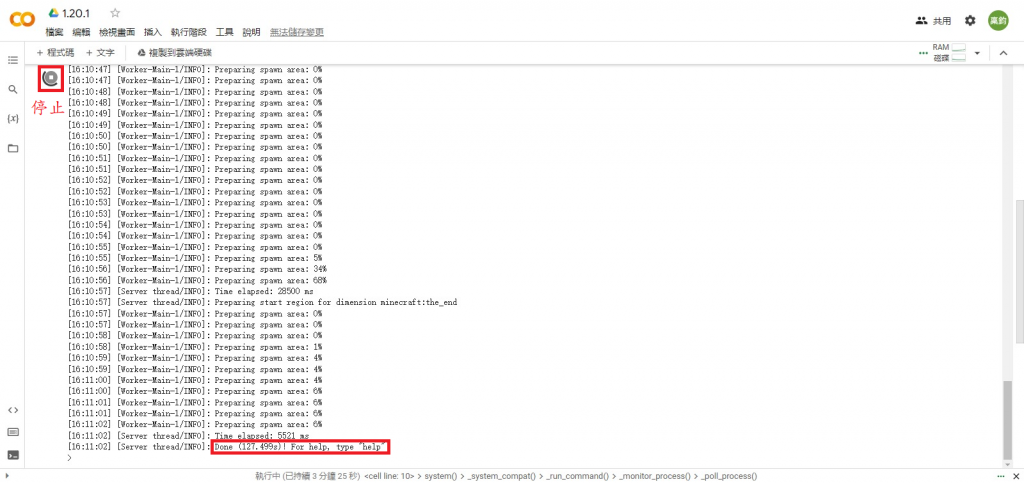
等待(約5分鐘,第一次較久)出現文字 Done (xxx.xxx s)! For help, type "help" 時按下停止鈕
新增第二欄程式碼(按左上角的"+程式碼")
在第二欄打入下面的程式碼
!wget https://github.com/playit-cloud/playit-minecraft-plugin/releases/latest/download/playit-minecraft-plugin.jar  && mv /content/playit-minecraft-plugin.jar /content/drive/MyDrive/server-spigot/plugins
!cd /content/drive/MyDrive/server-spigot && java -jar spigot-1.21.jar
按下執行
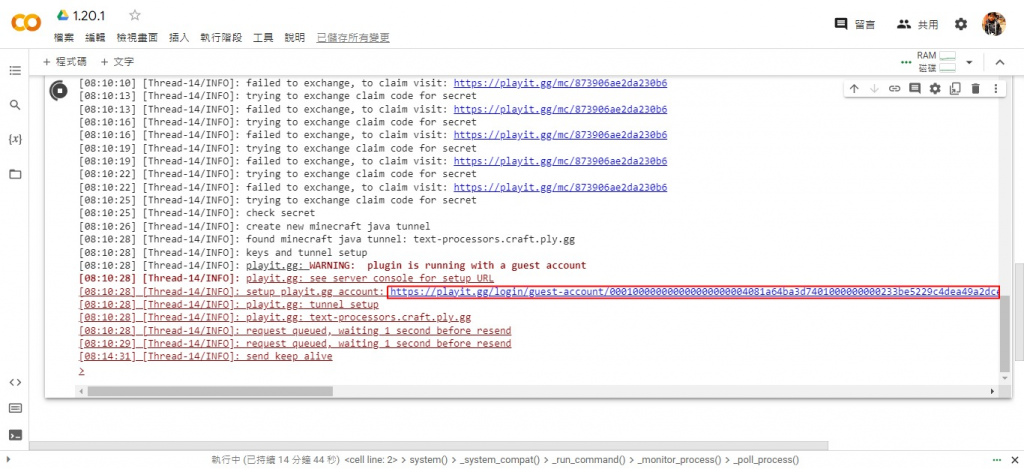
等待大約1分鐘後點下會一直出現的連結(點開前要先登入帳戶--包括使用訪客帳號,並使跳出網頁保持英文狀態,勿用Google 翻譯翻成中文,否則無法連接)
依照網頁指示完成設定
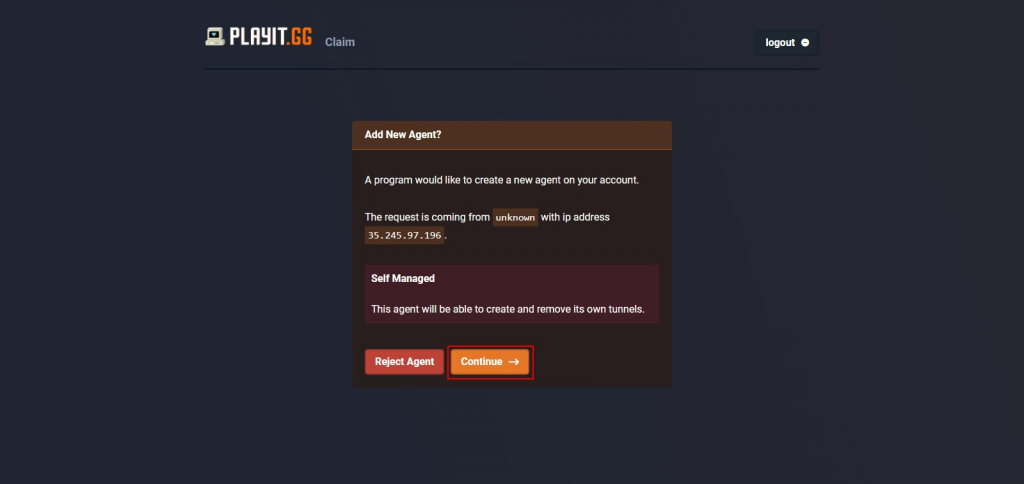
接下來要獲得伺服器的IP,有兩種方式
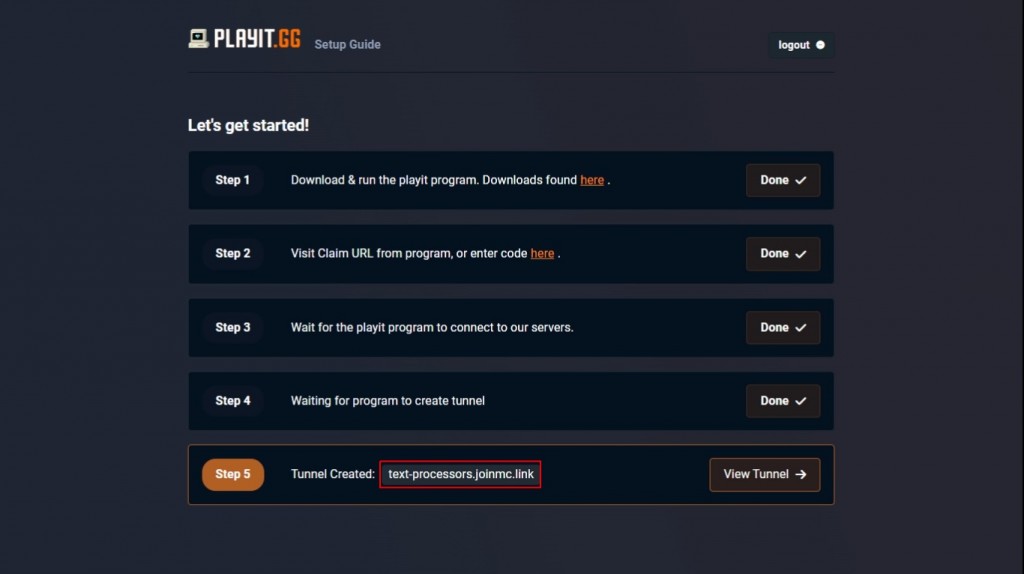
or
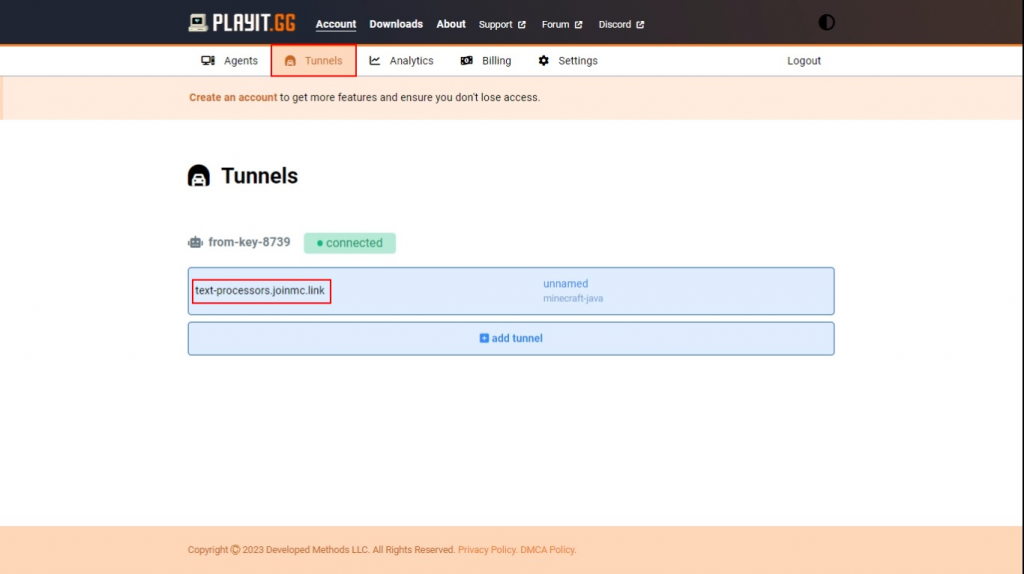
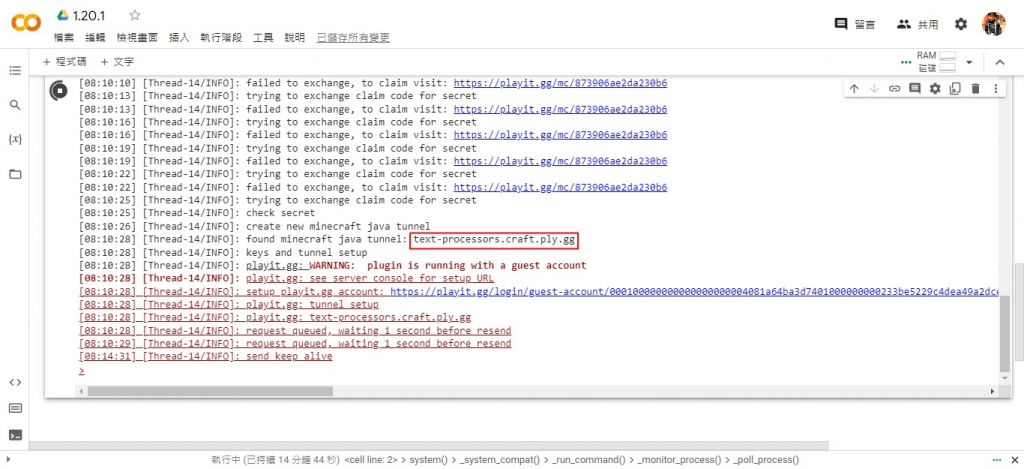
訪客帳號可使用此連結管理IP,每次開啟伺服器都會給一次且會變動,不需保留
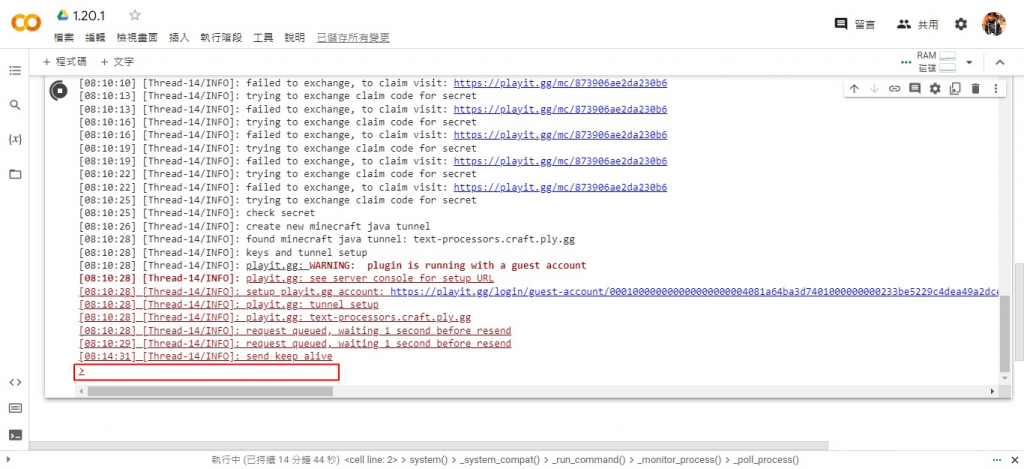
可再此打入伺服器指令
※op -----
趕快打開 Minecraft 連看看吧!!!
新增第三欄程式碼(按左上角的"+程式碼")
在第三欄打入下面的程式碼
from google.colab import drive
drive.mount('/content/drive')
!apt-get update && apt-get upgrade
!apt install openjdk-21-jre
!cd /content/drive/MyDrive/server-spigot && java -jar spigot-1.21.jar
以後如果要開啟伺服器,可以使用上面的指令
前兩行指令僅使用於安裝伺服器
這次的教學就到這邊
有問題也可以直接留言訊問或寄信(andrewcho365@gmail.com)給我
喜歡話可以幫忙按個Like幫我加個油

安安你好:
在進行第二欄的程式時發現了錯誤:
/bin/bash: line 1: X-Amz-Date=20231007T083220Z: command not found
/bin/bash: line 1: X-Amz-Expires=300: command not found
/bin/bash: line 1: X-Amz-SignedHeaders=host: command not found
/bin/bash: line 1: response-content-disposition=attachment%3B%20filename%3Dplayit-minecraft-plugin.jar: command not found
/bin/bash: line 1: X-Amz-Signature=1d87059d9bfd46d83a26caa7f20f4043a84085ddc1572ee646b95e6d3d56d86f: command not found
/bin/bash: line 1: X-Amz-Credential=AKIAIWNJYAX4CSVEH53A%2F20231007%2Fus-east-1%2Fs3%2Faws4_request: command not found
/bin/bash: line 1: response-content-type=application%2Foctet-stream: command not found
--2024-05-21 03:36:07-- https://objects.githubusercontent.com/github-production-release-asset-2e65be/542929341/e094e4bc-bd68-4e13-812d-baf70aa0a6b9?X-Amz-Algorithm=AWS4-HMAC-SHA256
Resolving objects.githubusercontent.com (objects.githubusercontent.com)... 185.199.109.133, 185.199.108.133, 185.199.111.133, ...
Connecting to objects.githubusercontent.com (objects.githubusercontent.com)|185.199.109.133|:443... connected.
HTTP request sent, awaiting response... 401 Unauthorized
Username/Password Authentication Failed.
不過我上網爬了一下似乎HTTP 401的錯誤有點難處理,而且這篇文章也是一年多前了,所以關於這個問題請作者大大不用花太大心力在上面,畢竟我也只是想稍微做個嘗試而已
感謝!
安安你好:
抱歉晚看到了
能先告訴我你使用的是Google cloab嗎?
第二段的指令是有關安裝類似內網穿透的Minecraft插件,
我不確定是不是因為官方的插件更新而造成的問題,
我會再嘗試更新指令,
包括更新的到最新的1.20.6版本,
我也會再加上所以用到的檔案的官方載點,
並教大家如何手動安裝伺服器和插件,
我已大致更新完畢,
測試後我會再留言告知,
我預計會在5/30 17:00前完成更新,
如果你有看到我的回覆或需要幫助,
希望你能留言告訴我。
你也可以嘗試自行手動下載並移動插件檔案到Google雲端硬碟,
移動的位置是server-spigot/plugins,如果看不懂可以直接查詢插件伺服器的安裝方法,謝謝您。
這個是插件的官方網站喔⬇️
https://playit.gg/download/plugins
成功了!不過在執行的過程中我有更改一個東西
在執行第一欄的時候似乎openjdk的版本不對,因此須將
!apt install openjdk-17-jre 改成
!apt install openjdk-21-jre
這樣版本就沒問題了
另外第三欄!cd /content/drive/MyDrive/server-spigot && java -jar spigot-1.20.4.jar應改成1.20.6才能符合版本
最後再感謝大大的分享
抱歉,我疏忽了1.20.6需要使用的Java版本上升到java21(提醒一下啟動器也是需要java21,所以電腦也要裝喔!),第三欄是我粗心沒更新到☺
謝謝您對我的文章的支持