iT邦幫忙

2023 iThome 鐵人賽

DAY 2
0
自我挑戰組

Vue In Your Area系列 第 4

建立Github Repository並Clone到你的桌面上

  • 分享至 

  • xImage
  •  

今天讓我們繼續Github的設定,在這裡我想假定你知道Github是什麼,並且已經有了Github的帳號,所以我們就在這樣的前提下,繼續進行下去。

01.建立一個新的Repository:

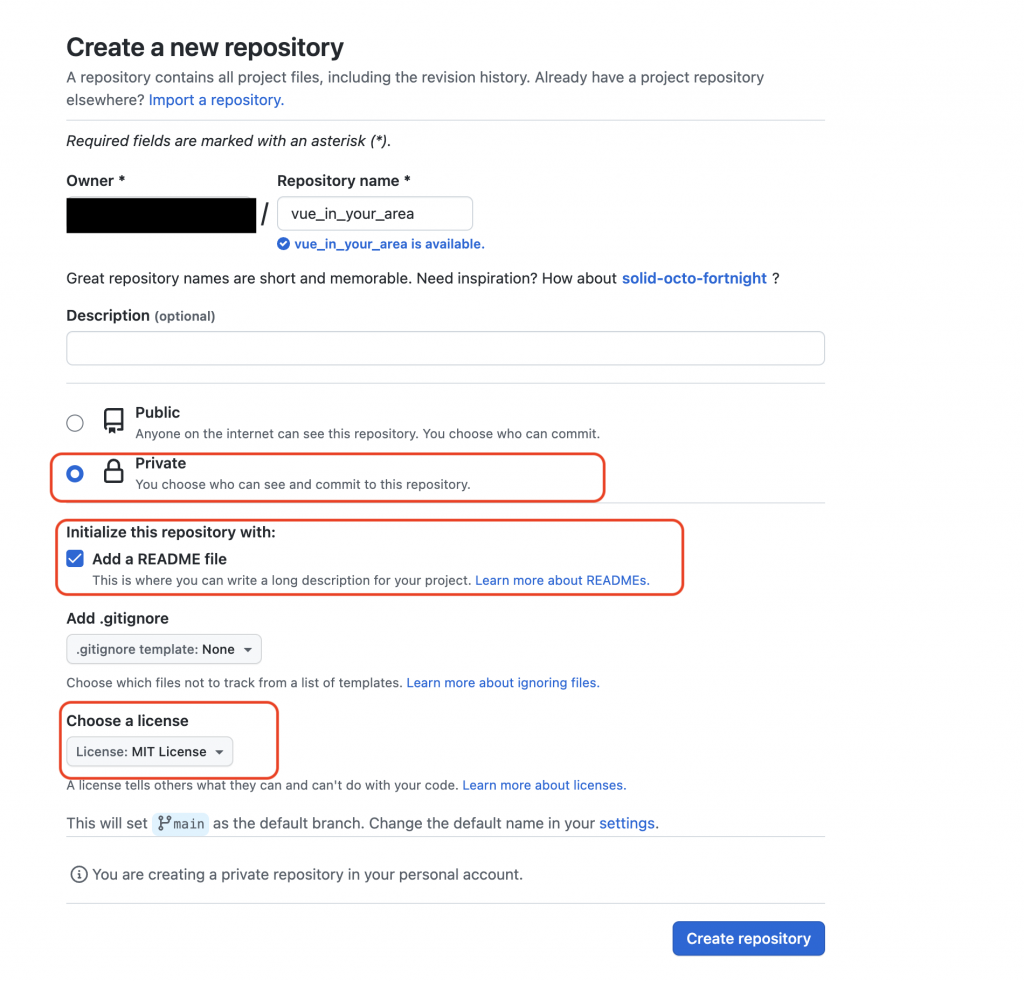
首先,我們先到自己的Github頁面上去建立一個新的Repository,也就是找到下圖的”New”的地方去新增一個Repository。

https://ithelp.ithome.com.tw/upload/images/20230906/20124035qasqnahoYi.png

如果你已經很熟悉這個流程的話,請按照自己的想法去做設定就可以了,如果沒有的話,可以像我一樣除了填入你想要的Repository name之外,便按照”Private”、”Add a README file” 還有 “MIT License”。

這些都設定好了之後,就可以按下右下角的”Create Repository”。
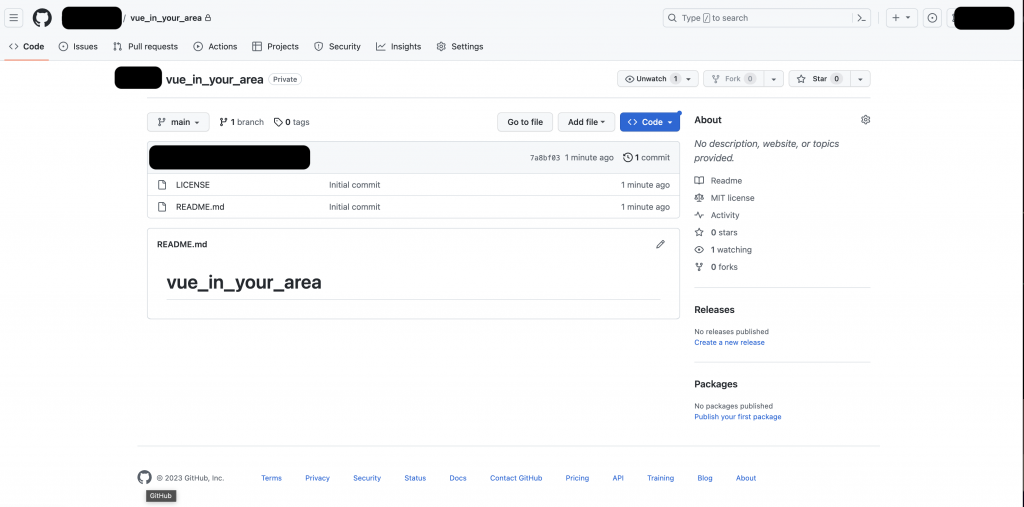
![https://ithelp.ithome.com.tw/upload/images/20230906/20124035jXNIijD72G.png

之後你便會得到以下的畫面:

https://ithelp.ithome.com.tw/upload/images/20230906/20124035cro0pDNBwD.png

02.在桌面上初始化 git init:

接下來,我們要進入資料夾,並且初始化這個資料夾,讓這個資料夾可以去Clone Github頁面:

cd Desktop
git init

接下來,我們將Repository給複製下來:

https://ithelp.ithome.com.tw/upload/images/20230906/20124035ddcw6Hvklu.png

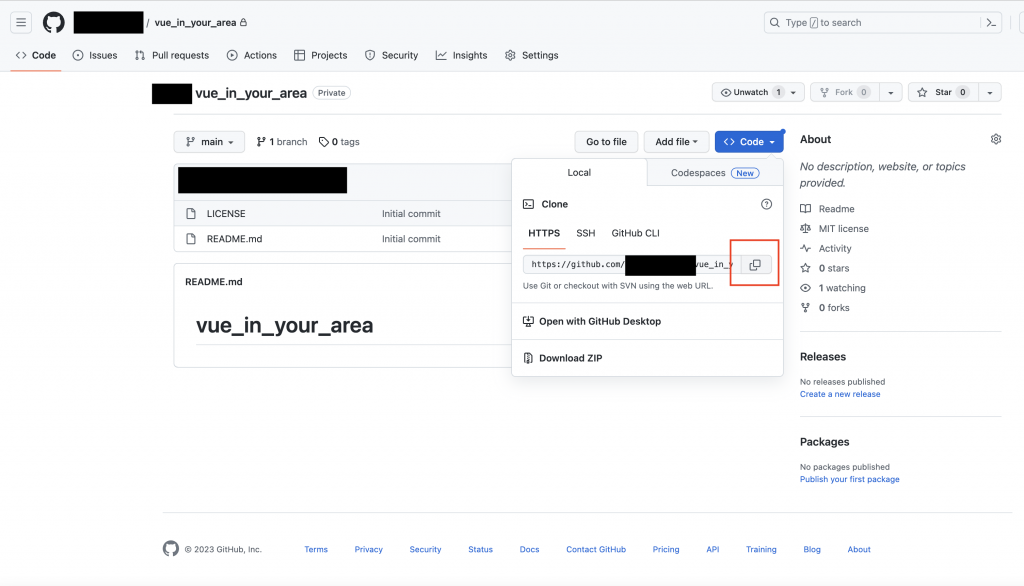
然後繼續在終端機中輸入,你從網頁上複製的網址,並鍵入:

git clone https://github.com/<your repository>/vue_in_your_area.git

這時候我們如果看到接收物件成功的時候,代表我們桌面的資料夾已經和Github連接在一起了。

https://ithelp.ithome.com.tw/upload/images/20230908/20124035TPNL3wYFAX.png


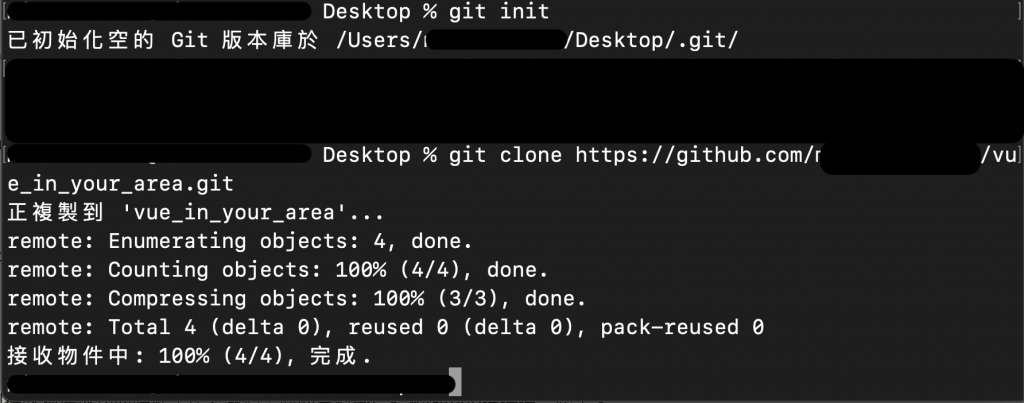
修正:不在桌面建立資料夾,直接在桌面git init然後在桌面git clone.


上一篇
小白的起手式..... 讓我們開始從頭 Re-Vue 一下!
下一篇
利用Yarn與Vuetify來搭建Vue3前端Server
系列文
Vue In Your Area5
圖片
  直播研討會
圖片
{{ item.channelVendor }} {{ item.webinarstarted }} |
{{ formatDate(item.duration) }}
直播中

尚未有邦友留言

立即登入留言