開始使用 Pulumi 之前,建議可以先註冊一個 Pulumi Cloud 的帳號,個人使用 Pulumi Cloud 不需要額外付費。
Pulumi Cloud 是 Pulumi 公司推出的 SaaS 服務,這也是 Pulumi 主要用來賺錢的平台。
Pulumi Cloud 的服務其實與 Terraform Cloud 類似,都是提供一個平台,讓使用者可以管理 IaC 的 State。使用者也可以在這個平台上進行多人協作,邀請其他使用者加入團隊、組織。
與 Terraform 不同的地方在於 Pulumi 預設會希望使用者可以有一個 Pulumi Cloud 的帳號,並將所有 State 都自動上傳至 Pulumi Cloud 中管理。當然如果想要自己管理狀態,也可以選擇不同的 State Backend。不過一開始我們先使用 Pulumi Cloud 來儲存 State。
除了 State 管理、Secret 管理、協作功能外,Pulumi Cloud 還提供了 Pulumi Insights 的功能。透過 Pulumi Insights 可以看到整個組織/帳號中所有的 Project 的資源,並可以透過 Query Syntax 查詢雲端資源。最新的版本還有提供 AI 查詢功能。例如輸入 Show my VPC,即可產生查詢語法:type:"aws:ec2/vpc:Vpc",列出所有 Project 中的 AWS VPC。
建立 Pulumi Cloud 的帳號後,預設會是個人版(Individual Edition)。Pulumi Cloud 的個人版是不需要額外付費。如果需要多人協作的話,才需要建立其他 Organization。這就會需要額外付費。
Pulumi 的收費方式與現在新的 Terraform Cloud 類似,都是使用管理資源的數量來收費。在 Team 方案中,免費額度大概是 200 個資源左右。
Pulumi 的計價方式是使用 Credit 計算,在 Pulumi Cloud 中每個資源一小時會消耗一個 Credit,每個 Credit 的價格是 $0.0005 美元。算起來在 Pulumi Cloud 中超過免費額度後,每個資源每個月的平均花費大概是 $0.366 美元。
要註冊 Pulumi Cloud 帳號的第一步驟就是到 Pulumi 的官網 (https://www.pulumi.com/) 點擊 Sign in (登入) 按鈕。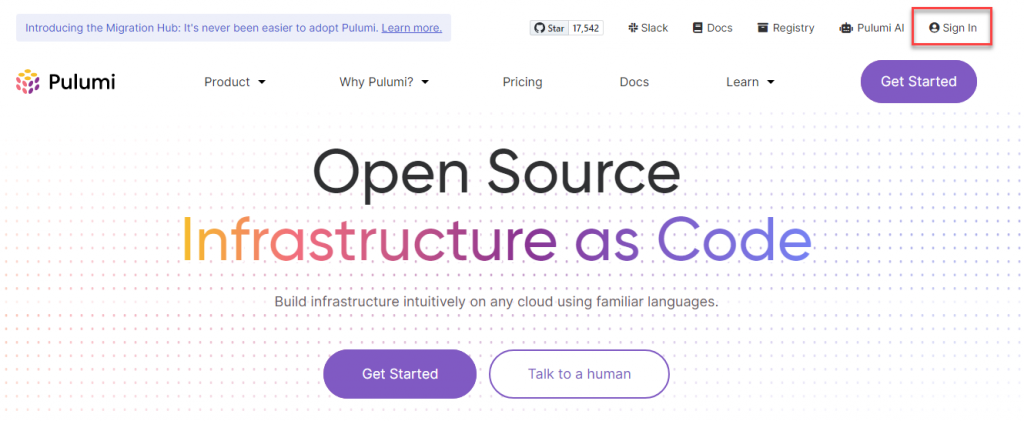
在登入頁面中選擇 Create an account 連結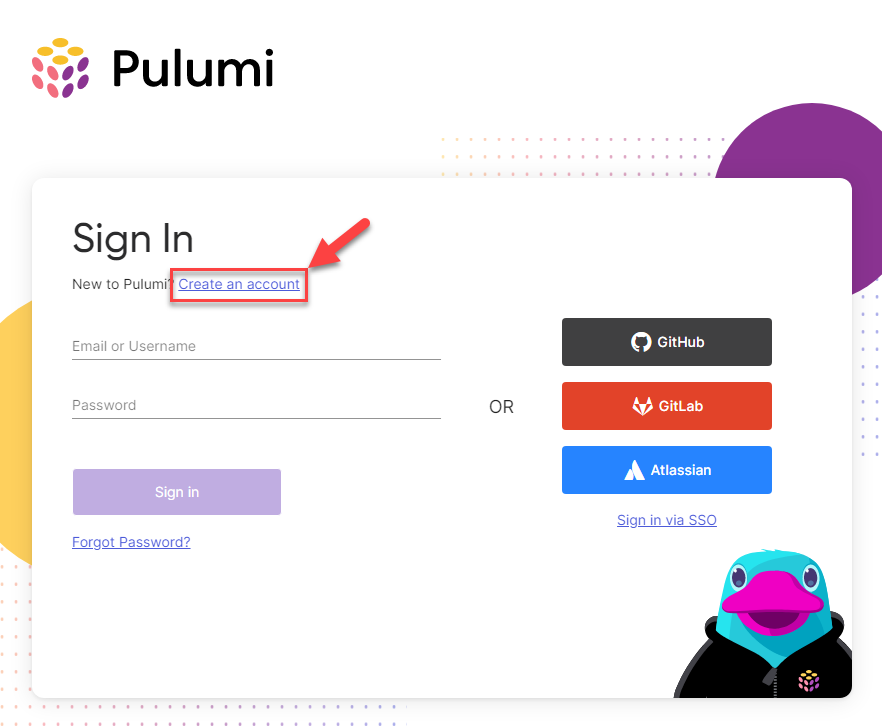
填寫使用者名稱、Email、密碼,並通過 Google reCAPTCHA 後,點擊 Create account (註冊帳號) 按鈕。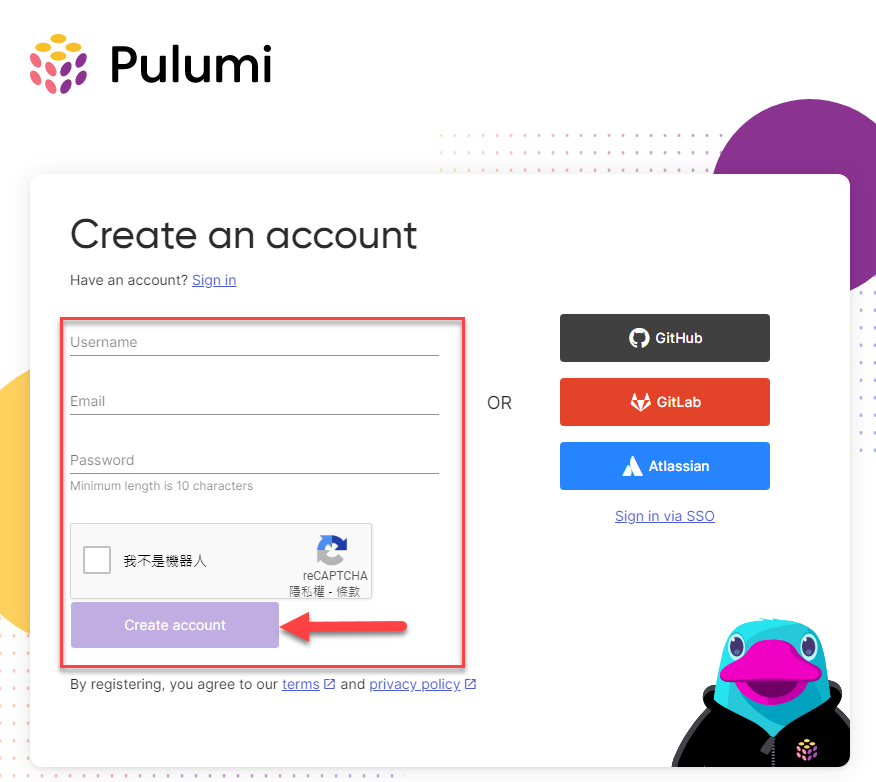
註冊完後,記得到 Email 信箱中,驗證 Pulumi 帳號,點擊 Verify Email 即可驗證。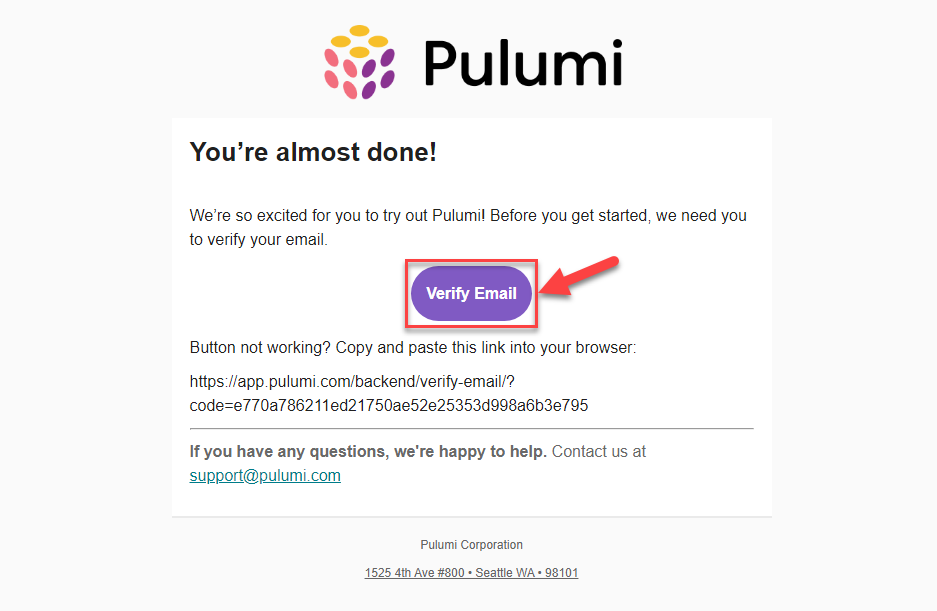
驗證完後就可以進入 Pulumi Cloud Dashboard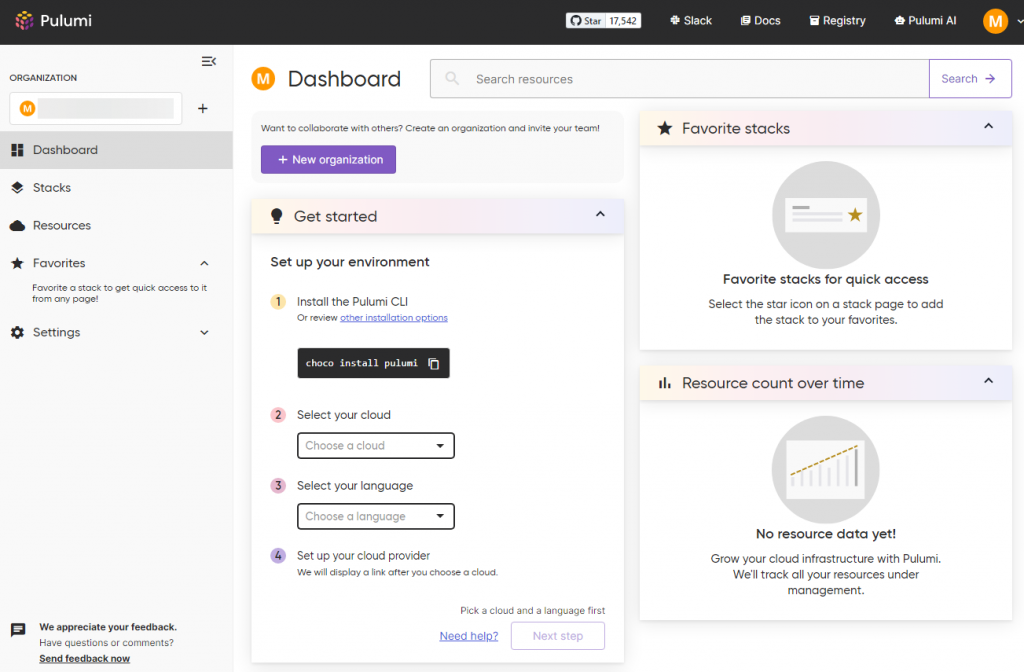
註冊完 Pulumi Cloud 帳號進入 Dashboard 後,可以在 Get started 區塊中選擇雲平台、程式語言。面板會提供安裝與設定的方式。
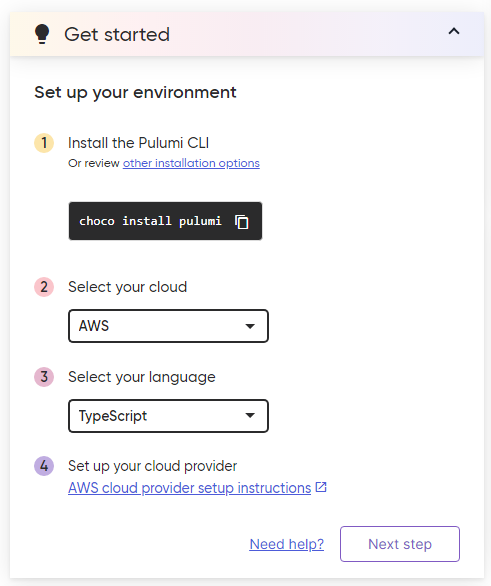
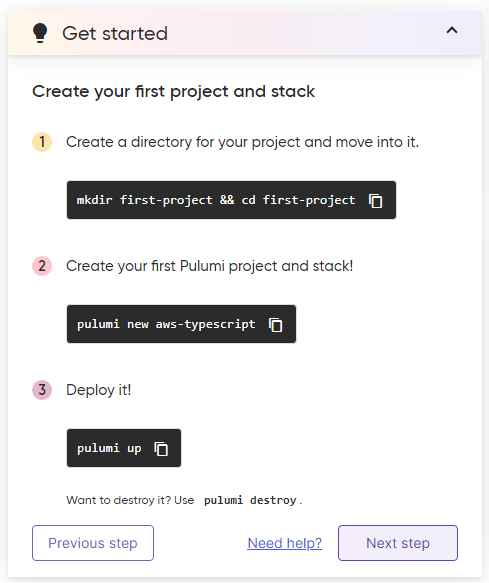
要使用 Pulumi,我們至少需要安裝 3 種軟體:
以下分別介紹在不同平台安裝 Pulumi 的方法,這邊假設你清楚知道怎麼在該作業系統安裝程式語言的開發環境、雲端供應商 CLI。
Pulumi 支援 Windows 8 以上的版本,如果你不是使用最新版的 Windows 11,建議透過 Chocolatey 安裝,或是到 pulumi 文件中,下載 msi 檔案手動安裝。
Pulumi 預設在 Windows 是使用 choco 安裝 pulumi,但我們也可以透過 windows 11 內建的 winget 來安裝 Pulumi。
C:\Users\User-ws> winget install pulumi
找到 Pulumi [Pulumi.Pulumi] 版本 3.83.0
此應用程式已由其擁有者授權給您。
Microsoft 不負任何責任,也不會授與協力廠商封裝的任何授權。
正在下載 https://github.com/pulumi/pulumi-winget/releases/download/v3.83.0/pulumi-3.83.0-windows-x64.msi
  ██████████████████████████████   152 MB /  152 MB
已成功驗證安裝程式雜湊
正在啟動套件安裝...
已成功安裝
如果是第一次使用 winget 安裝程式,可能會出現 Microsoft Store 的使用條款需要同意,輸入 Y,按下 Enter 同意條款即可。
`msstore` 來源要求您必須先檢視下列合約,再使用。
Terms of Transaction: https://aka.ms/microsoft-store-terms-of-transaction
來源需要將目前電腦的 2 個字母地理區域傳輸到後端服務,才能正確(例如"US")。

是否同意所有來源合約條款?
[Y] 是  [N] 否:
Pulumi 在 macOS 中,支援 macOS Sierra (10.12) 以上的版本。
最快的安裝方式就是使用 Homebrew 安裝:
brew install pulumi/tap/pulumi
另外一種安裝方式是透過手動安裝,可以到pulumi 文件中下載 .tag.gz 壓縮檔,手動解壓縮,並設定 PATH 環境變數,讓 Shell 可以存取 pulumi 執行檔。
在 Linux 中,Pulumi 提供了一個 script 協助安裝 Pulumi。可以透過以下指令直接安裝:
curl -fsSL https://get.pulumi.com | sh
另外一種安裝方式是透過手動安裝,可以到pulumi 文件中下載 .tag.gz 壓縮檔,手動解壓縮,並設定 PATH 環境變數,讓 Shell 可以存取 pulumi 執行檔。
安裝完 Pulumi 後,可以透過 pulumi version 指令查看所安裝的 Pulumi 版本。如果可以在輸出看到版本號,就代表 Pulumi 安裝成功了。
C:\Users\User-ws>pulumi version
v3.83.0
開始建立專案之前,我們需要先設定 Pulumi Backend,這邊就會需要用到前面註冊的 Pulumi Cloud 帳號了
pulumi login 指令C:\Users\User-ws>pulumi login
Manage your Pulumi stacks by logging in.
Run `pulumi login --help` for alternative login options.
Enter your access token from https://app.pulumi.com/account/tokens
or hit <ENTER> to log in using your browser :
點擊 CLI 中輸出的連結:https://app.pulumi.com/account/tokens,並建立 token
點擊「Create token」建立 Personal access token
輸入 Description,然後點擊「Create token」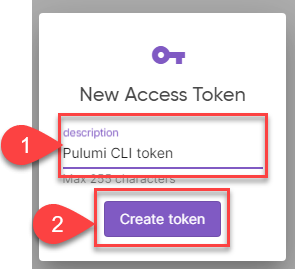
複製產生的 token,並貼回 CLI 中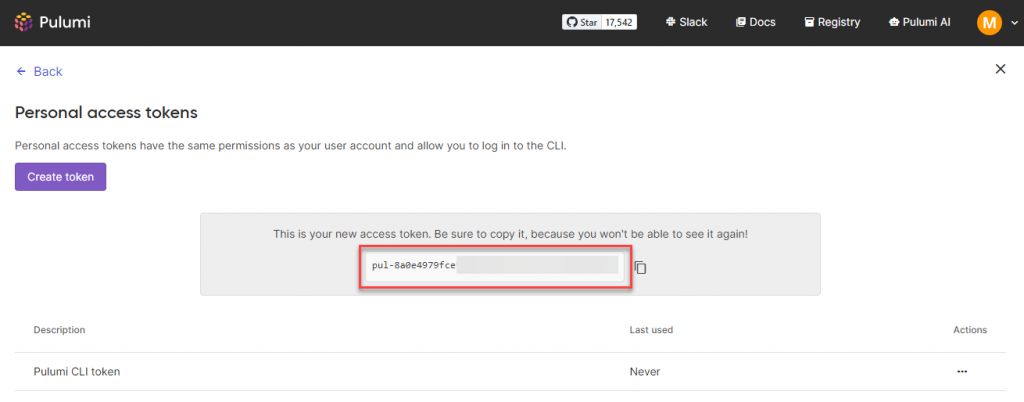
當 token 正確時,就能看到以下歡迎訊息
Enter your access token from https://app.pulumi.com/account/tokens
    or hit <ENTER> to log in using your browser                   : ********************************************

  Welcome to Pulumi!

  Pulumi helps you create, deploy, and manage infrastructure on any cloud using
  your favorite language. You can get started today with Pulumi at:

      https://www.pulumi.com/docs/get-started/

  Tip: Resources you create with Pulumi are given unique names (a randomly
  generated suffix) by default. To learn more about auto-naming or customizing resource
  names see https://www.pulumi.com/docs/intro/concepts/resources/#autonaming.


Logged in to pulumi.com as xxxxxx (https://app.pulumi.com/xxxxxx)
設定好了 Pulumi CLI、Pulumi backend 後,接著就可以開始建立一個 hello, world 的專案了。以下我會使用 mac 來做示範。
pulumi-hello-world 並切換至該資料夾內$ mkdir pulumi-hello-world
$ cd pulumi pulumi-hello-world
pulumi new typescript 指令,建立 Pulumi 專案。這邊的 typescript 為專案的 template,如果是使用 python 的話,可以輸入 pulumi new python。接著輸入 project name、description。預設的 stack 直接保持 dev 即可。$ pulumi new typescript
This command will walk you through creating a new Pulumi project.
Enter a value or leave blank to accept the (default), and press <ENTER>.
Press ^C at any time to quit.
project name (pulumi-hello-world):
project description (A minimal TypeScript Pulumi program):
Created project 'pulumi-hello-world'
Please enter your desired stack name.
To create a stack in an organization, use the format <org-name>/<stack-name> (e.g. `acmecorp/dev`).
stack name (dev):
Created stack 'dev'
Installing dependencies...
added 193 packages, and audited 194 packages in 11s
65 packages are looking for funding
run `npm fund` for details
found 0 vulnerabilities
Finished installing dependencies
Your new project is ready to go!
To perform an initial deployment, run `pulumi up`
$ npm install @pulumi/command
這邊我們會 import @pulumi/command 這個 package,並建立一個 local.Command 資源。new local.Command 的第一個參數是 Resource name,在 Pulumi 中,不管我們建立的是什麼資源,第一個參數永遠都是這個資源的名稱。
這個名稱是用來讓開發人員可以識別 Pulumi 程式碼中的資源用的,並不代表是雲端上資源真正的名稱。
第二個參數為這個資源所用到的所有參數,例如這邊我們希望 local.Command 在資源建立時執行 echo 'Hello World'。就可以將指令設定在 create 上。
最後一行是將 helloWorld 資源的 stdout 結果變成 Output。這個 Output 與 terraform 的 output 類似,都是未來其他專案、模組可以參考的值。
import { local } from '@pulumi/command'

const helloWorld = new local.Command('hello-world', {
    create: `echo 'Hello, World'`
})

export const helloWorldOutput = helloWorld.stdout
pulumi up 指令,這個指令會比對目前的 state 去判斷需要做哪些異動來達成任務這邊可以看到,Pulumi 會建立兩個資源,一個是 pulumi:pulumi:Stack,另一個是 command:local:Command。
我們之後介紹 Pulumi 的術語的時候會再講到 stack,這邊先關注 command:local:Command 這個資源。
這個就是我們在程式碼中所定義的資源,當我們選擇 yes 去執行 Pulumi 程式後,hello-world 這個資源就會被建立,並且會產生一個 output,
該 output 的值就是 hello-world 這個 command 的輸出。
$ pulumi up
Previewing update (dev)

View in Browser (Ctrl+O): https://app.pulumi.com/xxxxxxx/pulumi-hello-world/dev/previews/d389614a-b165-45b5-9a7c-da270946bcfc

     Type                      Name                  Plan
 +   pulumi:pulumi:Stack       pulumi-hello-world    create
 +   └─ command:local:Command  hello-world           create

Outputs:
    helloWorldOutput: output<string>

Resources:
    + 2 to create

Do you want to perform this update?  [Use arrows to move, type to filter]
  yes
> no
  details
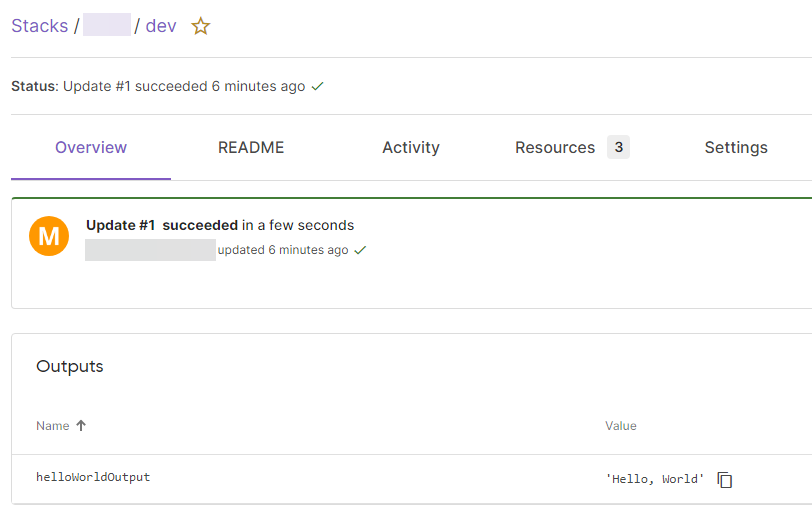
我們輸入 yes,並按下 Enter 讓 Pulumi 執行完成後,就能看到 hello-world 指令的輸出被儲存到了 helloWorldOutput 中。
Do you want to perform this update? yes
Updating (dev)

View in Browser (Ctrl+O): https://app.pulumi.com/xxxxxxx/test2/dev/updates/1

     Type                      Name         Status
 +   pulumi:pulumi:Stack       test2-dev    created (1s)
 +   └─ command:local:Command  hello-world  created (0.29s)

Outputs:
    helloWorldOutput: "'Hello, World'\r"

Resources:
    + 2 created

Duration: 3s
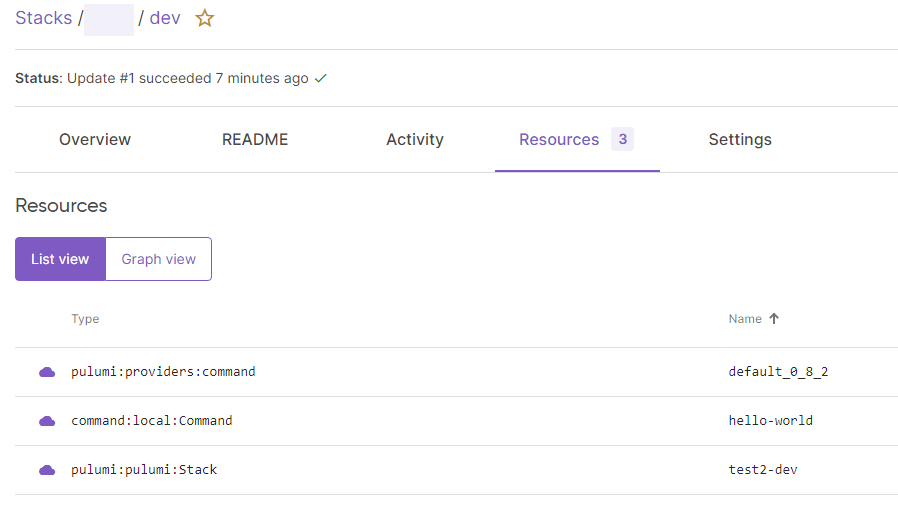
以上就是我們第一個 Pulumi 程式,我們也可以透過輸出中的超連結從 Pulumi Cloud 中看到我們所擁有的資源與輸出
最後 HelloWorld 專案的 Python 與 TypeScript 版本已經更新在 GitHub 上了,如果有想看不同語言版本的 Hello World,可以到這看:https://github.com/a60814billy/pulumi-in-30days/tree/main/day03
