Middleware 在網頁應用程式中的角色,猶如機場的安檢機制。每當我們在機場搭乘飛機時,必須經過嚴格的安檢程序,以確保旅程的安全和暢通。同理,每一個進入網頁應用的請求都會經過 Middleware 的審查。如同安檢員確保旅客不帶違禁品登機,Middleware 檢查每一個請求的有效性和安全性,並根據結果決定允許、修改還是拒絕該請求。這樣的過程確保了整個網頁應用的安全性和效能。
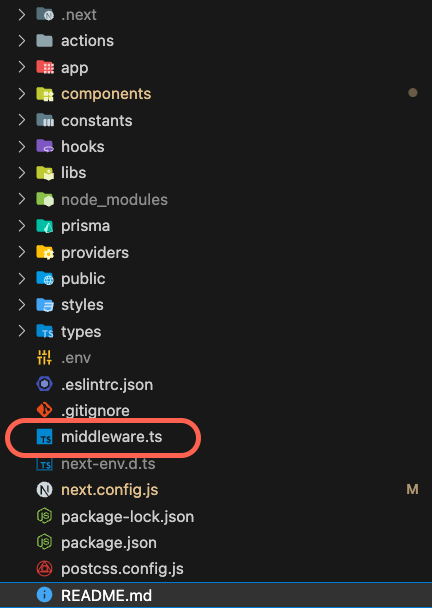
/old-path,但 server 回傳的是 /new-path 的內容,但網址欄中依然顯示 /old-path。/old-url 時,server 會使瀏覽器改為訪問 /new-url,網址欄也會更新為新的 URL。在 Next.js 12 版本中,新增了 middleware 的功能。這項功能運用了 Next.js file base 的特性。只要在專案的根目錄中建立 middleware.ts 檔案,當應用的任何頁面收到請求時,這些請求都會首先通過 middleware.ts 中的邏輯進行處理和過濾。
在 middleware 中,預設是專案中的所有路徑都需要經過過濾,我們也可以以 Matching Paths 的機制決定只有特定的路徑才需要過濾。
指定路徑的方法有兩種:
可以在 middleware.ts 檔案中定義一個含有 matcher 屬性的 config:
當使用者請求 http://my-domain.com/portal/basic 時,就會啟動過濾判斷。
export const config = {
  matcher: '/portal/basic'
}
除了一般的路徑設定,還有一些特定的規則和細節需要注意:
/ 開頭:所有的 matcher 都必須以斜線 / 開頭,例如:'/portal/basic'
: 定義:例如 /**portal/:path ,可以 match /portal 下的任何子路徑。* (/portal/:path*):/portal 和它所有的子路徑,不限深度? (/portal/:path?):/portal 和一層子路徑 /portal/123,但不 match /portal/123/details
+ (/portal/:path+):/portal 少一層子路徑,但不包含自己 /portal
/portal/(.*)
了解完規則後,我們所看到的都只有單一路徑,如果專案中有多個路徑或是只想排除特定路徑呢?讓我們看下去:
單一路徑:
export const config = {
  matcher: '/portal/:path*'
}
多種路徑:可以使用 array 的方式設定多重路徑。
export const config = {
  matcher: ['/portal/:path*', '/dashboard/:path*'],
}
使用正則表達式排除特定路徑
export const config = {
  matcher: [
		// matche 不以 api、_next/static、_next/image 或 favicon.ico 開始的所有路徑
		// 以 (?!) 表示排除
    '/((?!api|_next/static|_next/image|favicon.ico).*)',
  ],
}
除了設定自定義的 matcher 之外,也可以在 middleware function 中以判斷式的方法,並通過 request.nextUrl.pathname 得到的值進行判斷,以下為範例:
import { NextResponse } from "next/server";
import type { NextRequest } from "next/server";

export function middleware(request: NextRequest) {
  // 判斷路徑是否為 "/portal"
  if (request.nextUrl.pathname === "/portal") {
    // 重新導向 URL 到 "/portal/basic"
    return NextResponse.redirect(new URL("/portal/basic", request.url));
  }

  // 如果路徑開頭為 "/dashboard"
  if (request.nextUrl.pathname.startsWith("/dashboard")) {
    // 重寫 URL 到 "/dashboard/user"
    return NextResponse.rewrite(new URL("/dashboard/user", request.url));
  }
}
在設定完需要過濾的路徑後,終於可以進入判斷的環節,只需要定義 middleware 的 function 後,在 function 中調用參數 request 進行一系列的執行判斷。包括上一段判斷式定義中看到的 Rewrite 及 Redirect 等 Response 及 Request 的預處理,接下來會帶幾個 Cookies 設定、Headers 設定、權限檢查範例:
不論是從 Request 和 Response 中取得 Cookies 資訊,或是修改 Cookies 都可以在 middleware 中做操作:
提供 get、getAll、set 以及 delete cookies,也可以使用 has 檢查 cookie 是否存在,或使用 clear 移除所有的 cookies。
假設請求中有一個名為 nextjs 值為 fast 的 headers
export function middleware(request: NextRequest) {

  let cookie = request.cookies.get('nextjs')
  console.log(cookie) // => { name: 'nextjs', value: 'fast', Path: '/' }
  const allCookies = request.cookies.getAll()
  console.log(allCookies) // => [{ name: 'nextjs', value: 'fast' }]

  request.cookies.has('nextjs') // => true
  request.cookies.delete('nextjs')
  request.cookies.has('nextjs') // => false
}
如果是 Response 則提供了 get、getAll、set 以及 delete 四種方法
取得 Response 的內容必須調用
NextResponse.next(),最後再回傳 response
export function middleware(request: NextRequest) {
const response = NextResponse.next()
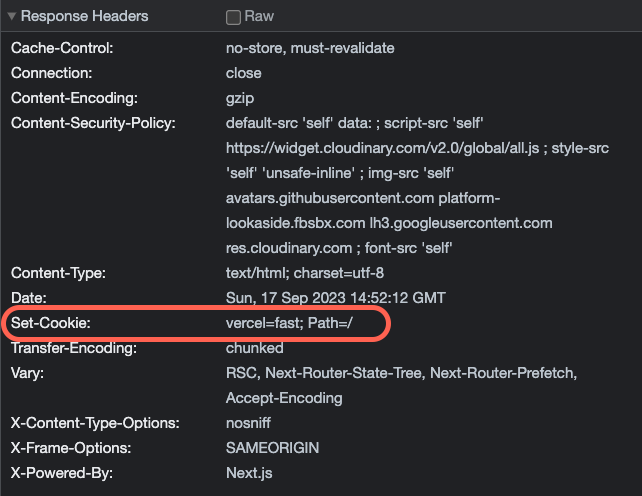
response.cookies.set('vercel', 'fast')
response.cookies.set({
name: 'vercel',
value: 'fast',
path: '/',
})
cookie = response.cookies.get('vercel')
console.log(cookie) // => { name: 'vercel', value: 'fast', Path: '/' }
return response
}
可以在 Response Headers 中看到設置的 Cookies
在我們專案中,由於有使用 NextAuth.js 作為身份驗證的設定,所以只要非常簡單的調用 NextAuth.js 提供的 default 就可以實現指定頁面的身份驗證設定:
export { default } from 'next-auth/middleware'

export const config = {
  matcher: '/portal/:path*'
}
如果在未登入的狀態進入 /portal 及他的子路徑,預設的行為會轉跳至 auth api 中設定的 signIn 頁面
// api/auth/[...nextauth]/route.ts

pages: {
  signIn: '/login'
},
回憶一下我們上一章節有特別介紹一些在 nextConfig.js 中設定的 Security Headers,Next.js 13 開始也提供在 middleware 中設定。
可以定義一個 Headers 實例,再透過 set 的方式設定,並覆寫 NextResponse:
export function middleware(request: NextRequest) {
  const requestHeaders = new Headers(request.headers);
  requestHeaders.set("x-hello-from-middleware1", "hello");
  const response = NextResponse.next({
    request: {
      headers: requestHeaders,
    },
  });
}
調用 NextResponse.next() ,以 set 設定 headers,最後再回傳 response
const response = NextResponse.next();
response.headers.set("x-hello-from-middleware2", "hello");
return response;

在上一章節中我們設定了 CSP 的安全設定,但在 script-src 部分發生了很兩難的錯誤訊息:
當 script-src 設定為 ‘self’ 時,所有專案中分割出的 javascript 檔皆為 inline script 全部都會被阻擋。
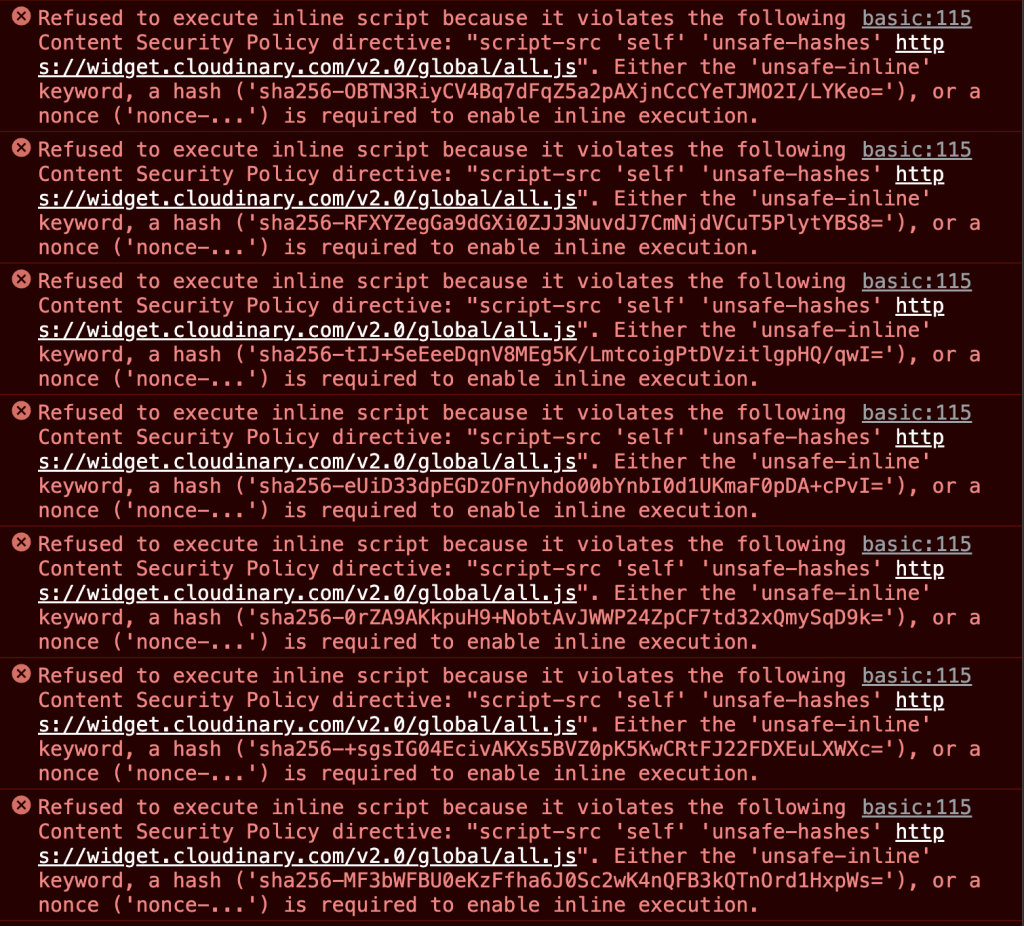
而 ‘unsafe-inline’ ,因為是個不安全的設定,所以不希望在專案中開放
這時候有幾個解決方法:
什麼是 Nonce?為什麼要用 Nonce?
Nonce 可以視為一種安全通行密碼,允許某些 script 在網站上運行。雖然 CSP 是設計來阻止 XSS 攻擊,但在某些情境下,inline script 是必要的。所以經過我們可以使用 Nonce 通行密碼來確保 script 可以正常運行。
而為了使 Nonce 具有一定的安全性,會設計為一組一次性使用的獨特、隨機的字串,例如:nonce-h38yeif,每次請求都要產生不一樣的字串。
先定義 cspHeader 並使用變數來建立隨機的 nonce 字串
在開發環境中,Next.js 使用
eval-source-maps來提供更詳細的錯誤信息和加快重新構建的速度。但因此,它需要'unsafe-eval'這一設置。但這是個 unsafe 不安全的設置,我們僅將它於開發環境中設置。
const nonce = Buffer.from(crypto.randomUUID()).toString("base64");
const cspHeader = `
    default-src 'self' data:;
    script-src 'self' https: http:${
      process.env.NODE_ENV === "development" ? " 'unsafe-eval'" : ""
    } 'nonce-${nonce}' https://upload-widget.cloudinary.com/global/all.js https://widget.cloudinary.com/v2.0/global/all.js;
    style-src 'self' 'unsafe-inline';
    img-src 'self' blob: data: avatars.githubusercontent.com platform-lookaside.fbsbx.com lh3.googleusercontent.com res.cloudinary.com;
    font-src 'self';
    frame-src 'self' https://upload-widget.cloudinary.com/;
`;
將 x-nonce 及 Content-Security-Policy 加入 request headers 中
const requestHeaders = new Headers();
requestHeaders.set("x-nonce", nonce);
requestHeaders.set(
  "Content-Security-Policy",
  cspHeader.replace(/\s{2,}/g, " ").trim()
);
在專案的 root layout 中建立一個以 nonce 定義的 Script
// app/layout.tsx

import { headers } from "next/headers";
import Script from "next/script";

export default async function RootLayout({ children, auth }: RootLayoutProps) {
  const nonce = headers().get("x-nonce");

  const currentUser = await getCurrentUser();
  return (
    <html lang="en" suppressHydrationWarning>
      <body className={inter.className}>{children}</body>
      <Script strategy="afterInteractive" nonce={nonce} />
    </html>
  );
}
由於專案有使用 nextAuth.js 在這串防禦之中,必須先等待身份驗證的 request,才可以將 session 建立於 response 中。使用的方法是調用 withAuth
withAuth:如果沒有經過身份驗證的用戶,middleware 邏輯不會執行,因此middleware 中 CSP 邏輯永遠不會執行。
const response = (await withAuth(request)) || NextResponse.next()
最後,等到身份驗證後,再將 CSP headers 塞回去給 response 並回傳
requestHeaders.forEach((value, key) => {
  response.headers.append(key, value);
});

return response;
middleware 的設定除了更進一步處理 CSP headers 的細節,也為應用程式多一層操作防護。假如只是做單純的身分驗證攔截,設定其實非常簡單,在寫這篇文章的同我個人也第一次嘗試在 middleware 中進行 headers 的修改,雖然一度因為 unsafe 的 inline 和 eval 兩個屬性弄得前途迷茫,所幸社群也非常多討論,也順利解決。
相關程式碼同步收錄於 github:
https://github.com/ysl0628/2023-ithelp/tree/main/day-22
https://github.com/ysl0628/next13-omni-links/blob/main/middleware.ts
https://csplite.com/csp251/#CSP_Next_specifics
https://github.com/nextauthjs/next-auth/issues/8023
https://blog.darkthread.net/blog/csp-script-src/
https://stackoverflow.com/questions/72376413/refused-to-evaluate-a-string-as-javascript-because-unsafe-eval-is-not-an-allow
https://csplite.com/csp251/#CSP_Next_specifics
https://github.com/vercel/next.js/issues/14221
https://scotthelme.co.uk/can-you-get-pwned-with-css/


 iThome鐵人賽