iT邦幫忙

2023 iThome 鐵人賽

DAY 23
0
Security

Zabbix 監控實做分享系列 第 23

23-Zabbix Proxy 啟動服務

  • 分享至 

  • xImage
  •  

安裝完Zabbix Proxy後接下來至Web頁面配置啟動服務。

ㄧ、啟動Proxy 服務

1.至Proxy主機啟動服務,並設定開機自起

#systemctl restart zabbix-proxy
#systemctl enable zabbix-proxy

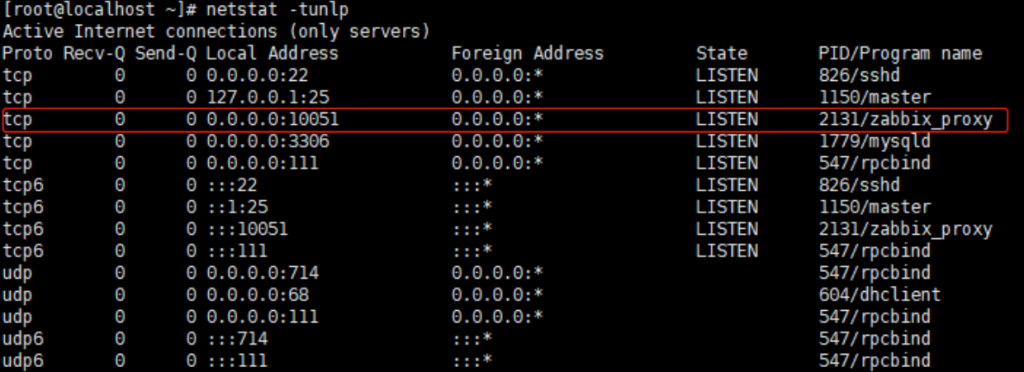
2.查看端口有沒有開啟,Zabbix Proxy端口為'10051'

#netatat -tunlp

https://ithelp.ithome.com.tw/upload/images/20231008/20161484DbXb0FLFRo.png

二、配置Proxy與Server端連線

1.至Web頁面點擊 管理 >> agent代理程序 >> 創建代理
https://ithelp.ithome.com.tw/upload/images/20231008/20161484kSAThtwa7w.png
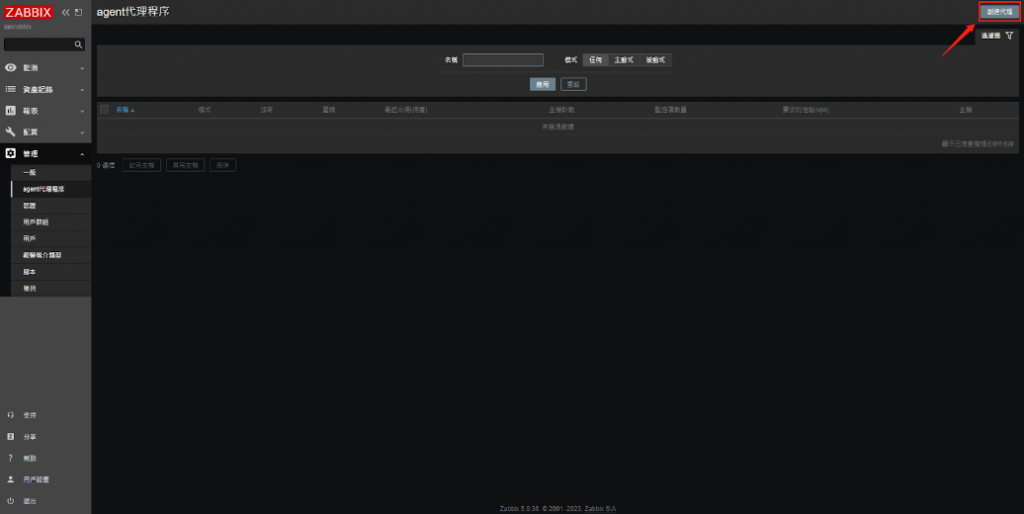
2.進入填寫Proxy 主機名稱與IP,需和zabbix_proxy.conf檔中寫入的資料一樣,填寫完成按添加。
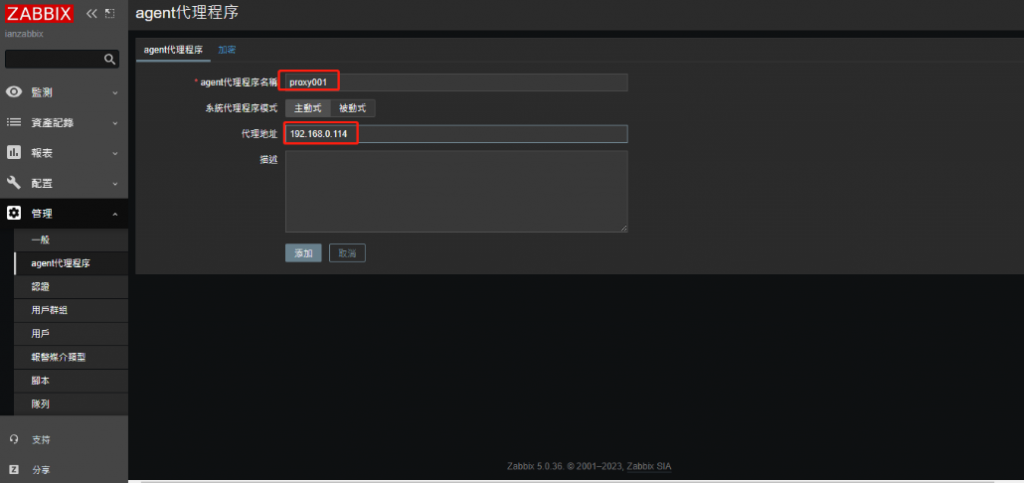
https://ithelp.ithome.com.tw/upload/images/20231008/20161484Bo0L2c7fbD.png
https://ithelp.ithome.com.tw/upload/images/20231008/20161484pqwXJGb6oJ.png
3.基本上添加完成1~2分鐘就會連上
如沒有連接上可以試試看
(1)重啟Zabbix proxy

#systemctl restart zabbix-proxy

查看Zabbix proxy信息

#systemctl status zabbix-proxy

(2)至Zabbix Server端查看日誌

#tail -f /var/log/zabbix/zabbix_server.log

以下是連接不上的範例,表示Server端有收到請求,但無法解析,這時應該查看Web與zabbix_proxy.conf的信息是否吻合。
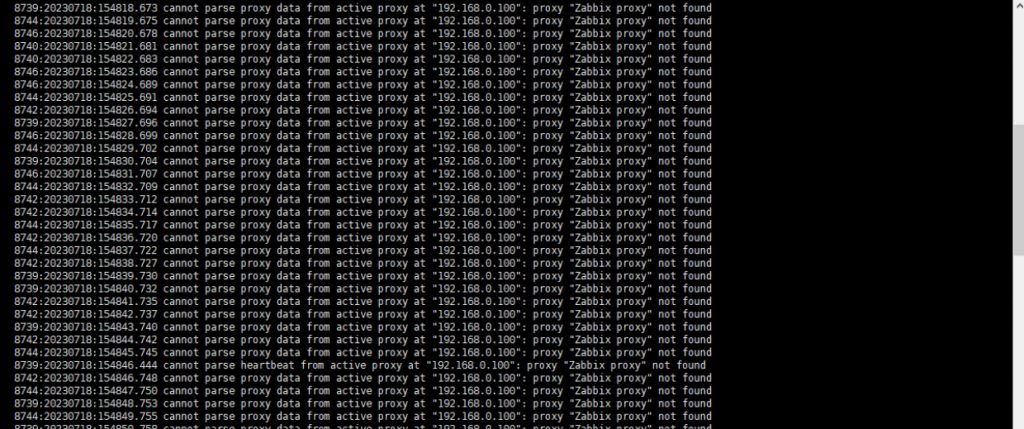
https://ithelp.ithome.com.tw/upload/images/20231008/20161484ZMhiMRUFng.png

三、配置Agent與Proxy端連線

1.首先至Agent端修改配置文件

#vim /etc/zabbix/zabbix_agent2.conf
ServerActive=Proxy IP
Server=Proxy IP

https://ithelp.ithome.com.tw/upload/images/20231008/20161484FssHiCtd3F.png
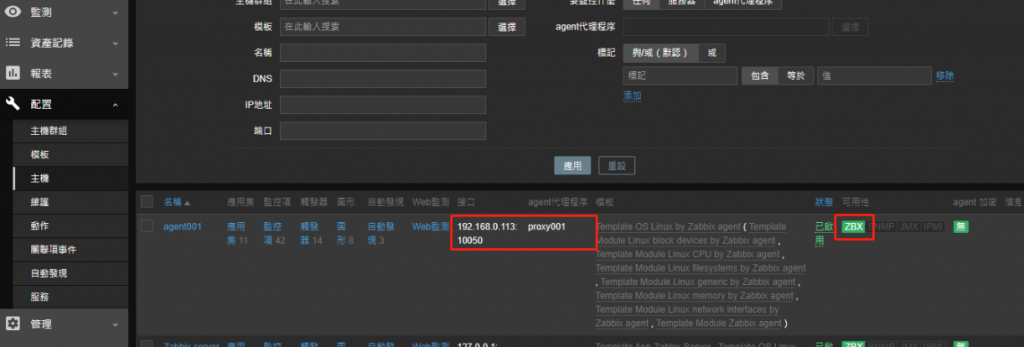
2.至Web端添加主機,客戶端IP填寫Proxy IP,Agent皆口為10050,下方選取代理的Proxy,並添加相對應模板,全部配置後完成點擊添加。
https://ithelp.ithome.com.tw/upload/images/20231008/20161484vSmgrRhZlf.png
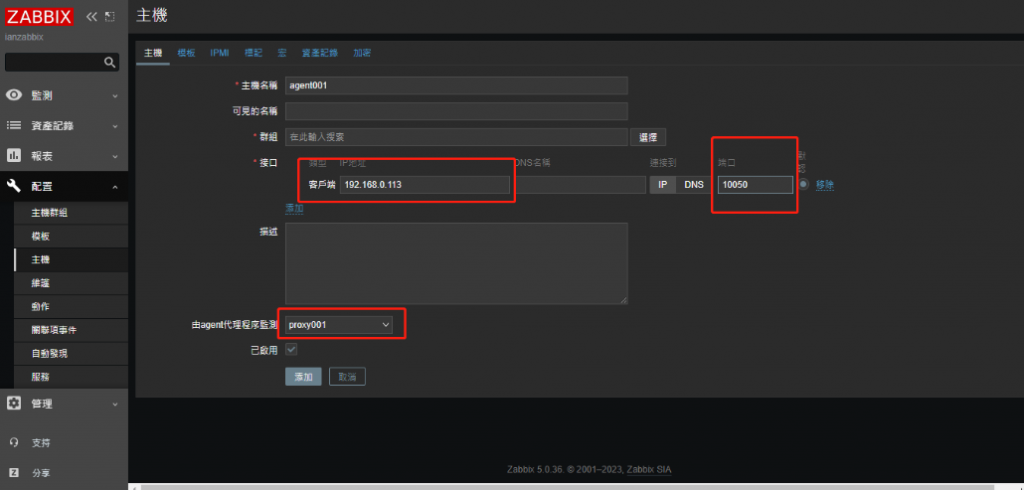
3.如過一段時間還是無法連線,可以試著重啟Zabbix-Proxy並查看日誌。

#systemctl restart zabbix-proxy
#tail -f /var/log/zabbix/zabbix_proxy.log

https://ithelp.ithome.com.tw/upload/images/20231008/20161484CVGMgNukwc.png
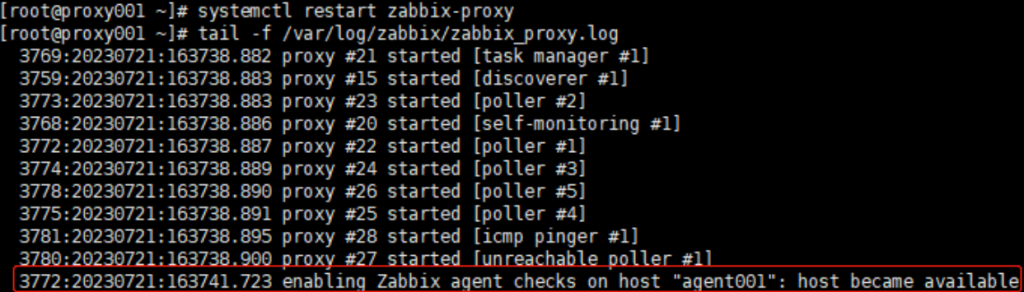
4.如查看日誌顯示Enabling後回到Web介面刷新,即可看到以連線,以上即完成,
https://ithelp.ithome.com.tw/upload/images/20231008/20161484teMxzscDdC.png


上一篇
22-Zabbix Proxy 安裝
下一篇
24-安裝Grafana
系列文
Zabbix 監控實做分享28
圖片
  直播研討會
圖片
{{ item.channelVendor }} {{ item.webinarstarted }} |
{{ formatDate(item.duration) }}
直播中

尚未有邦友留言

立即登入留言