Amazon Rekognition 提供預先訓練和可自訂的電腦視覺 (CV) 功能,可從影像和影片中擷取資料和分析。
AI影像辨識需要大量運算資源跟訓練資料,我們可以用AWS的AI Service使其在AWS Server做運算,省下不少麻煩。
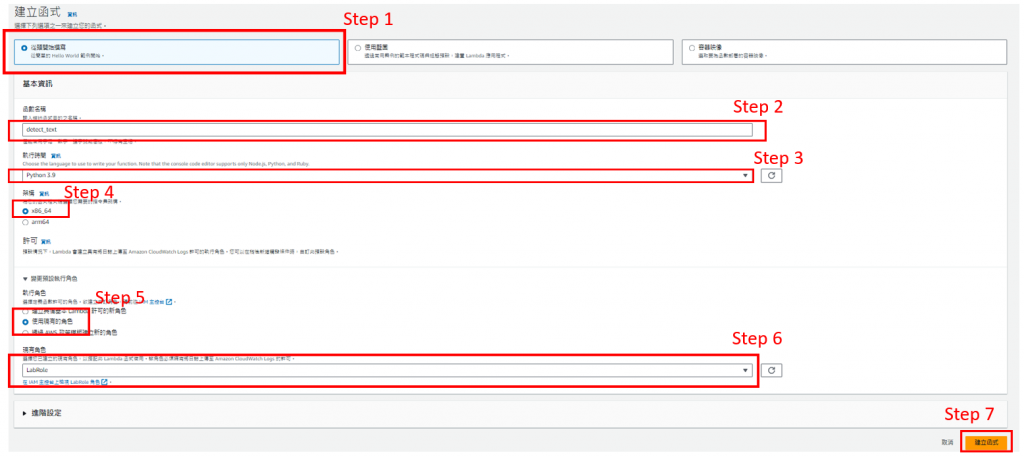
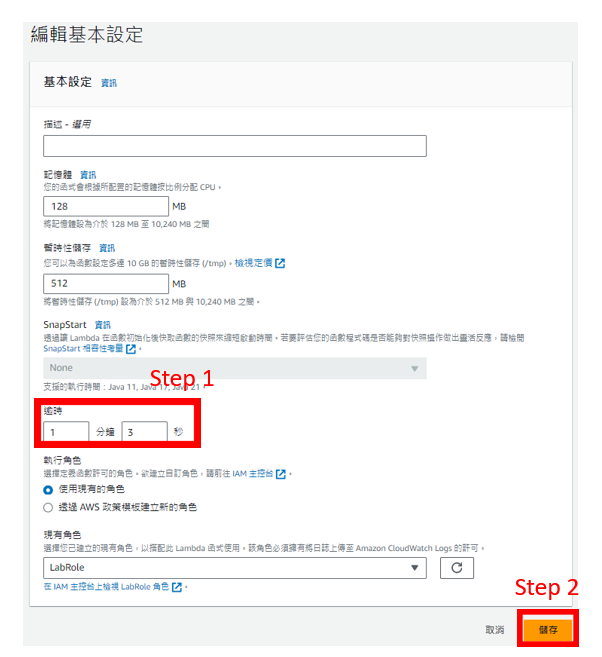
這次使用的AWS是教育方案的Learner Lab,差別在某些的功能限制以及IAM 角色只能使用"LabRole",接下來會展示Amazon Rekognition的文字辨識功能。
下面是接下來的範例架構圖。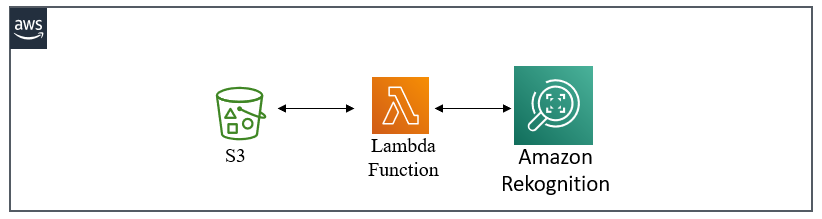
功能說明:使用lambda的測試事件將S3的指定圖片傳到Lambda去做Amazon Rekognition的文字辨識,並將結果用Python的 OpenCV 將結果框起來並標籤。
輸入圖片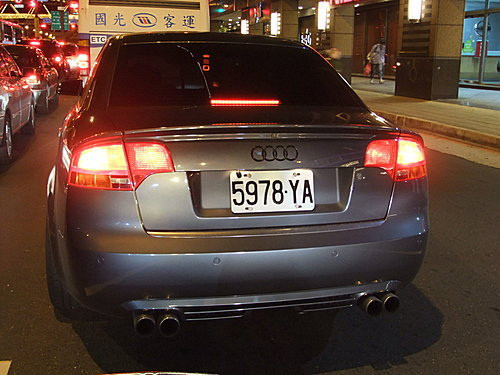
輸出圖片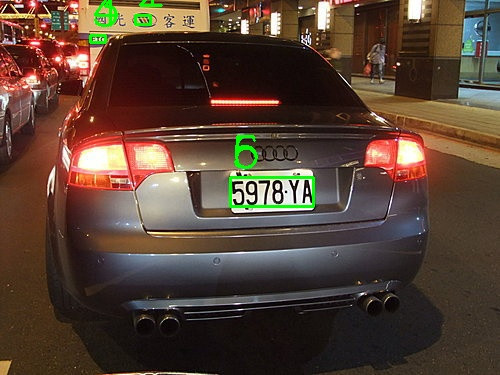
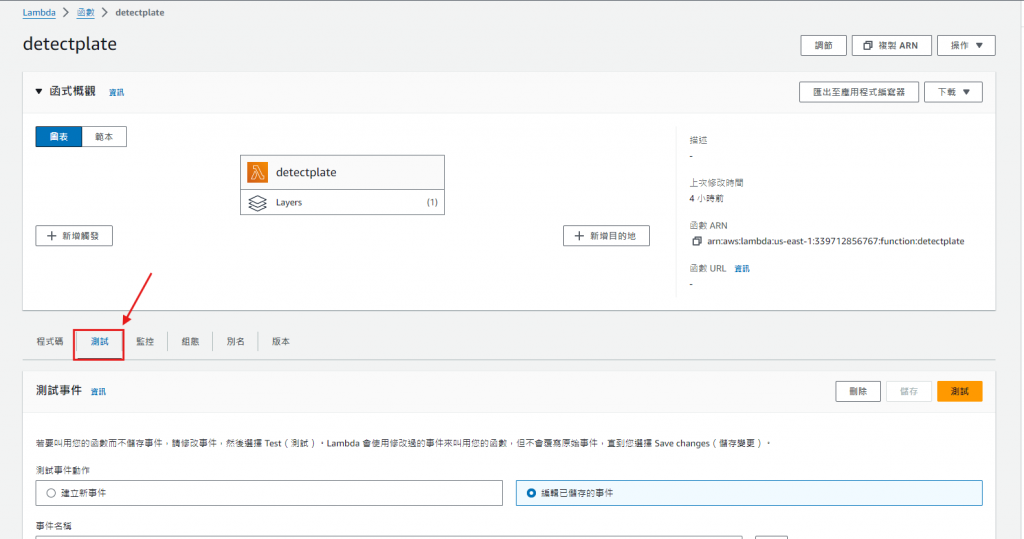
操作圖
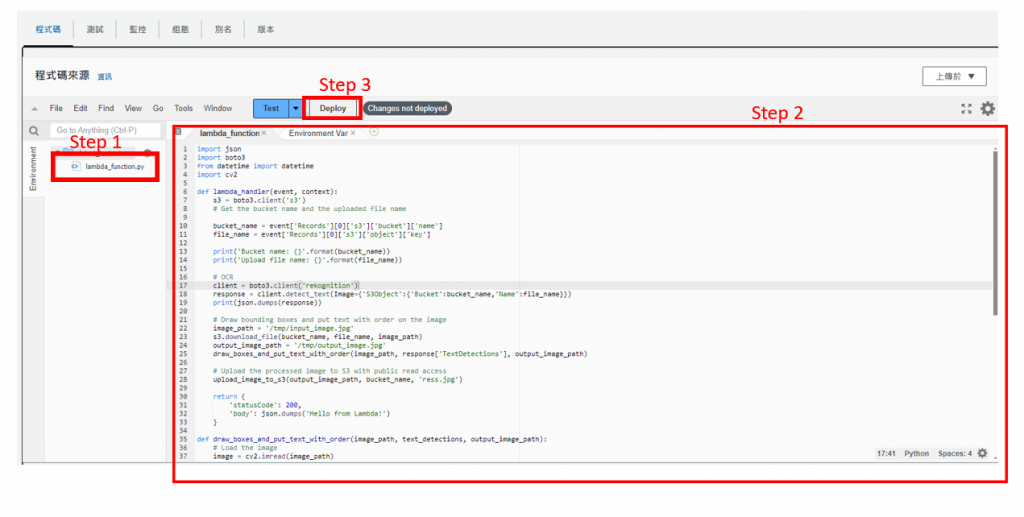
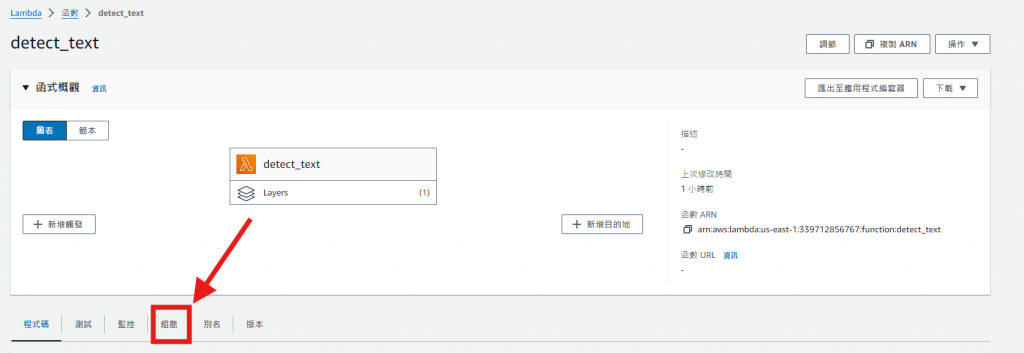
點擊 "程式碼"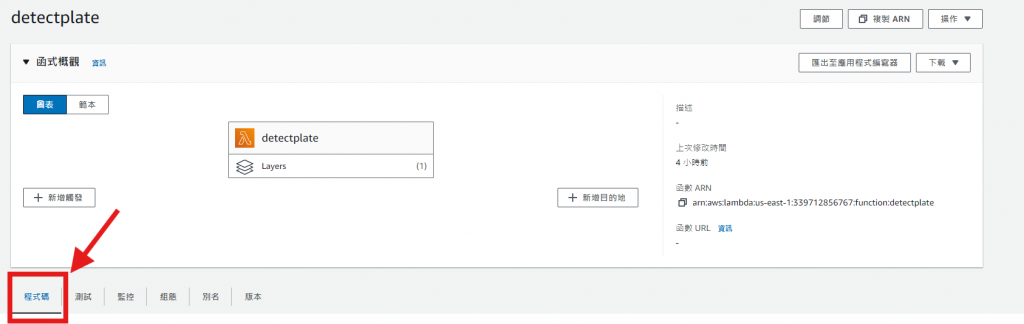
點擊 "Test"
3.查看結果
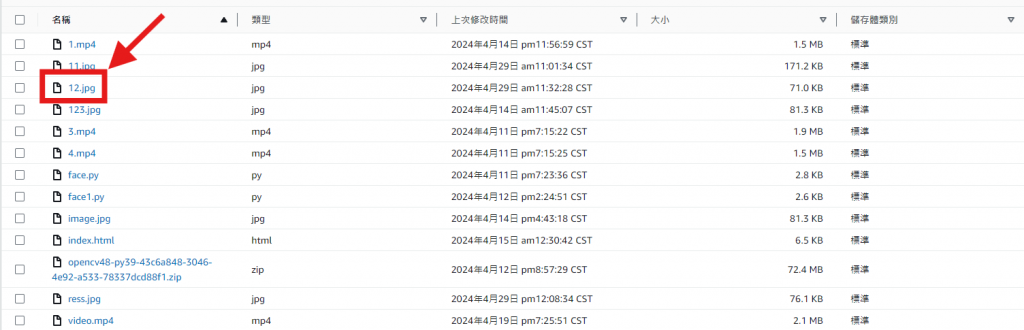
回到S3查看是否回傳結果圖 "ress.jpg"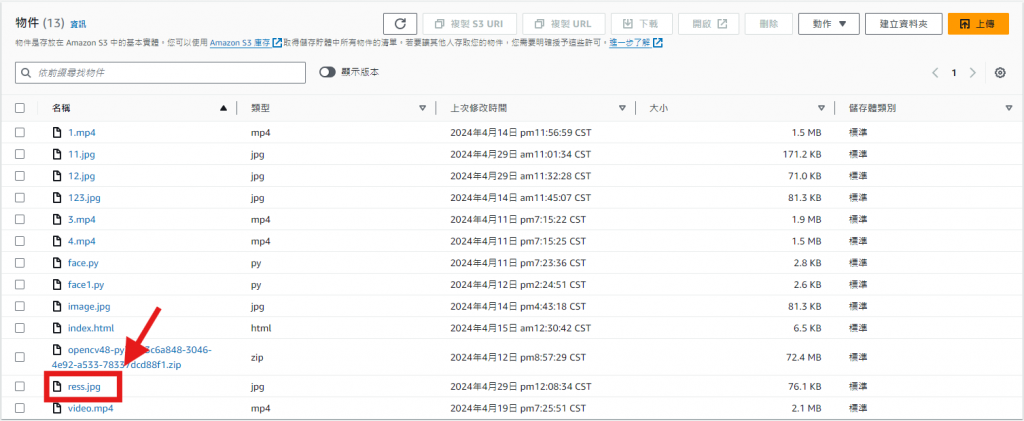
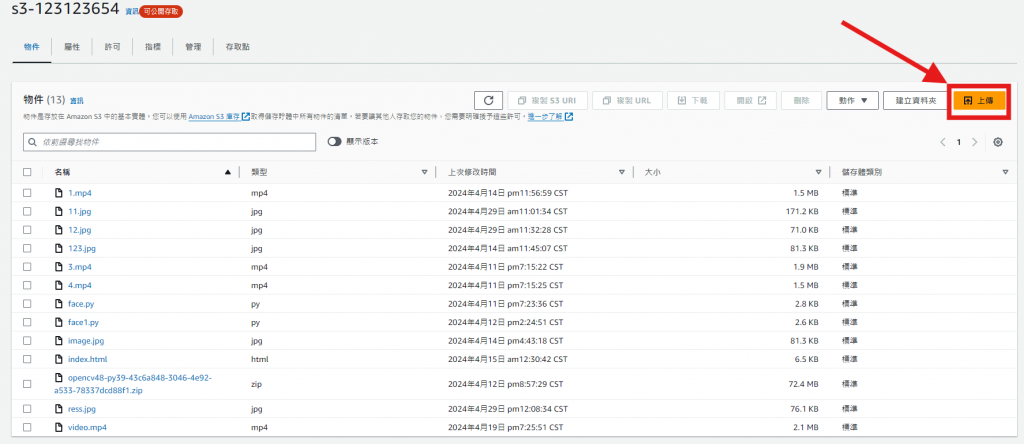
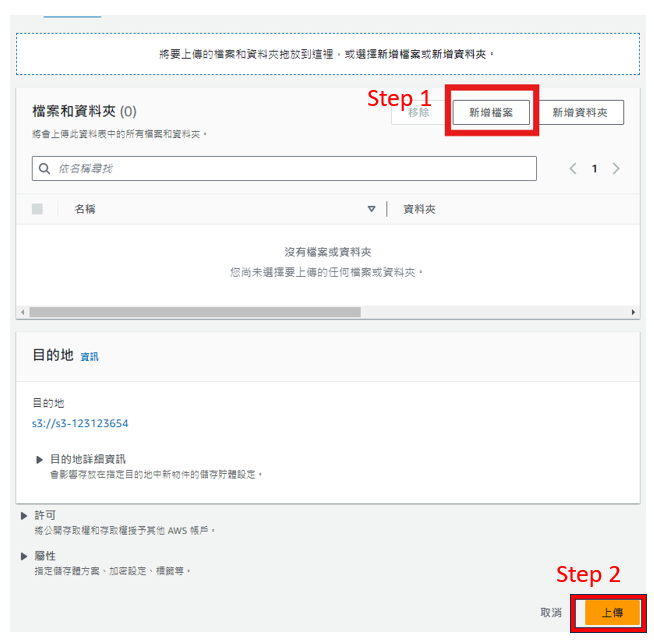
操作流程

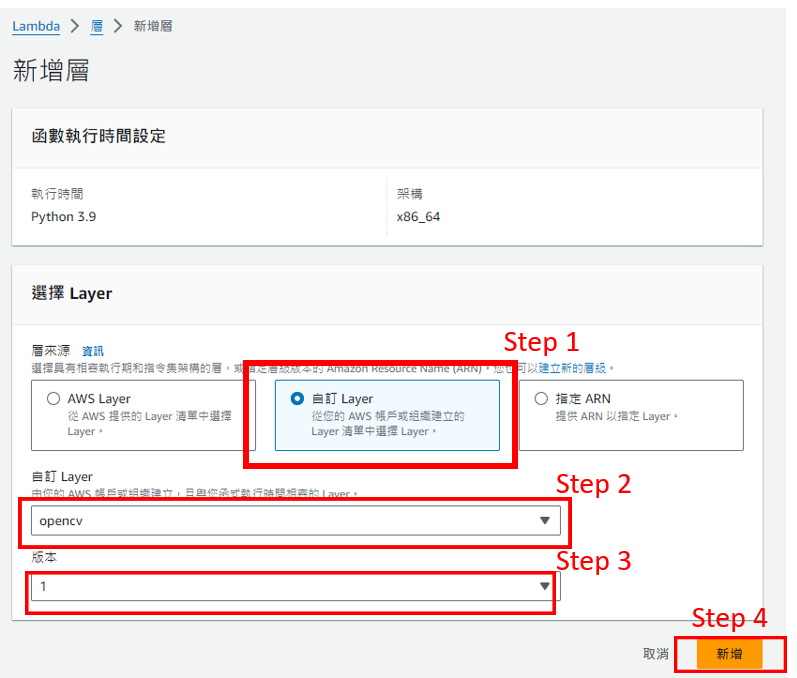
2. 新增層
關於step2 可以參考OpenCV Layer建立非常清楚 。
建立完畢後,到lambda 程式碼最下面,點擊 "新增層"。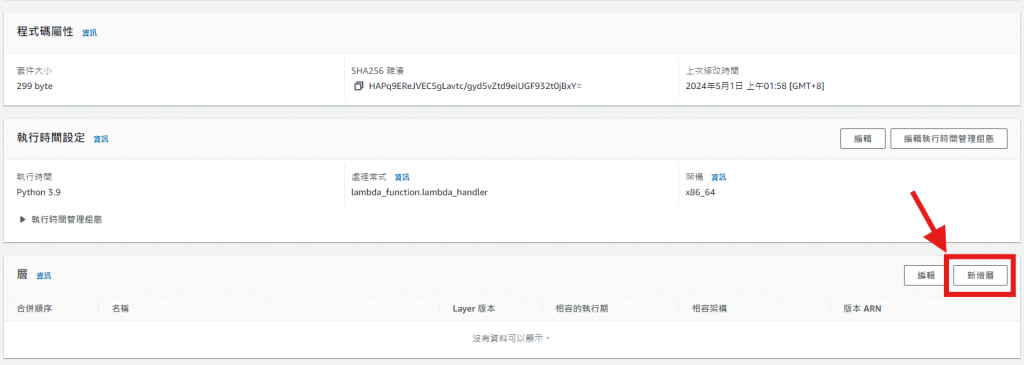
import json
import boto3
from datetime import datetime
import cv2

def lambda_handler(event, context):
    s3 = boto3.client('s3')
    # Get the bucket name and the uploaded file name

    bucket_name = event['Records'][0]['s3']['bucket']['name']
    file_name = event['Records'][0]['s3']['object']['key']

    print('Bucket name: {}'.format(bucket_name))
    print('Upload file name: {}'.format(file_name))

    #建立 Amazon Rekognition OCR
    client = boto3.client('rekognition')
    response = client.detect_text(Image={'S3Object':{'Bucket':bucket_name,'Name':file_name}})
    print(json.dumps(response))

    # 將辨識結果用OpenCV的函式框起來並標記號。
    image_path = '/tmp/input_image.jpg'
    s3.download_file(bucket_name, file_name, image_path)
    output_image_path = '/tmp/output_image.jpg'
    draw_boxes_and_put_text_with_order(image_path, response['TextDetections'], output_image_path)

    # #將結果圖放回該原圖的S3位置,並命名為 "ress.jpg" (可以依照你輸入的圖片的副檔名去更改)。
    upload_image_to_s3(output_image_path, bucket_name, 'ress.jpg')

    return {
        'statusCode': 200,
        'body': json.dumps('Hello from Lambda!')
    }

def draw_boxes_and_put_text_with_order(image_path, text_detections, output_image_path):
    # Load the image
    image = cv2.imread(image_path)

    # Sort text detections by their top coordinate
    sorted_detections = sorted(text_detections, key=lambda x: x['Geometry']['BoundingBox']['Top'])

    # Draw bounding boxes and put text with order on the image
    for i, detection in enumerate(sorted_detections):
        box = detection['Geometry']['BoundingBox']
        width, height = image.shape[1], image.shape[0]
        left = int(width * box['Left'])
        top = int(height * box['Top'])
        right = int(left + (width * box['Width']))
        bottom = int(top + (height * box['Height']))

        # Draw the bounding box
        cv2.rectangle(image, (left, top), (right, bottom), (0, 255, 0), 2)

        # Put text with order on the image
        text = '{}: {}'.format(i+1, detection['DetectedText'])
        cv2.putText(image, str(i+1), (left, top-10), cv2.FONT_HERSHEY_SIMPLEX, 1.5, (0, 255, 0), 2)

    # Save the image with bounding boxes and text
    cv2.imwrite(output_image_path, image)

def upload_image_to_s3(image_path, bucket_name, key_name):
    s3 = boto3.client('s3')
    with open(image_path, 'rb') as file:
        s3.upload_fileobj(
            file,
            bucket_name,
            key_name,
            ExtraArgs={'ACL': 'public-read'}
        )
會到lambda 點擊 "測試"

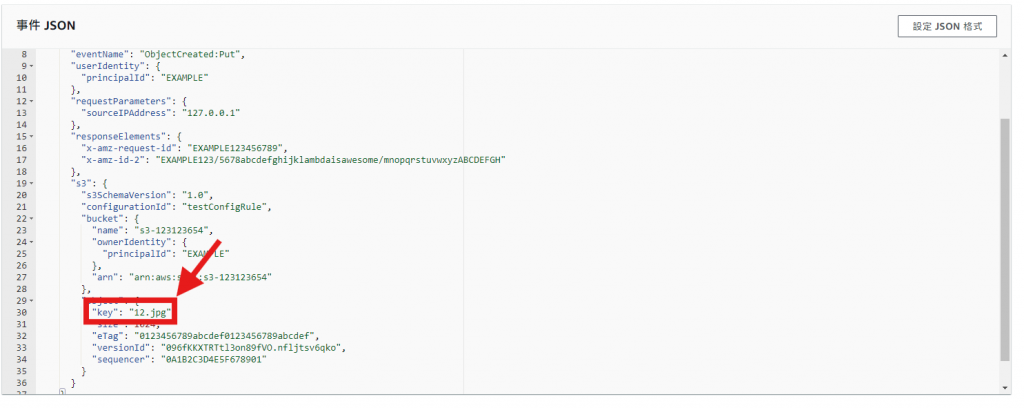
step2 的事件JSON請用以下程式碼(需要替換成你的S3貯存桶名稱跟圖片名稱)。
{
  "Records": [
    {
      "eventVersion": "2.1",
      "eventSource": "aws:s3",
      "awsRegion": "us-east-1",
      "eventTime": "2024-04-29T00:00:00.000Z",
      "eventName": "ObjectCreated:Put",
      "userIdentity": {
        "principalId": "EXAMPLE"
      },
      "requestParameters": {
        "sourceIPAddress": "127.0.0.1"
      },
      "responseElements": {
        "x-amz-request-id": "EXAMPLE123456789",
        "x-amz-id-2": "EXAMPLE123/5678abcdefghijklambdaisawesome/mnopqrstuvwxyzABCDEFGH"
      },
      "s3": {
        "s3SchemaVersion": "1.0",
        "configurationId": "testConfigRule",
        "bucket": {
          "name": "你的S3貯存桶名稱",
          "ownerIdentity": {
            "principalId": "EXAMPLE"
          },
          "arn": "arn:aws:s3:::你的S3貯存桶名稱"
        },
        "object": {
          "key": "你的圖片名稱(包含副檔名)",
          "size": 1024,
          "eTag": "0123456789abcdef0123456789abcdef",
          "versionId": "096fKKXTRTtl3on89fVO.nfljtsv6qko",
          "sequencer": "0A1B2C3D4E5F678901"
        }
      }
    }
  ]
}

7. 執行程式
回到程式碼並點擊 "Test"
查看step2的訊息是否跟下面的訊息一樣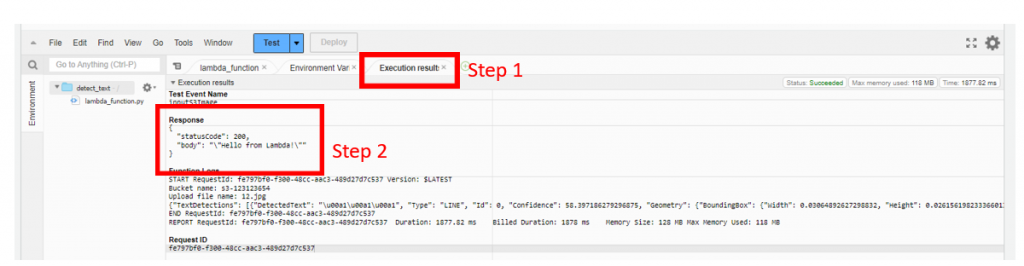
回到 S3 查看是否有 "ress.jpg" 的資料,有就代表成功了。
參考資料
簡明扼要,非常詳盡
謝謝,我會繼續進步,我會持續提升自身能力,發布更有用的文章,雖然這是我的最後一篇
 qaz8801143

謝謝 這是我的最後一個文章了