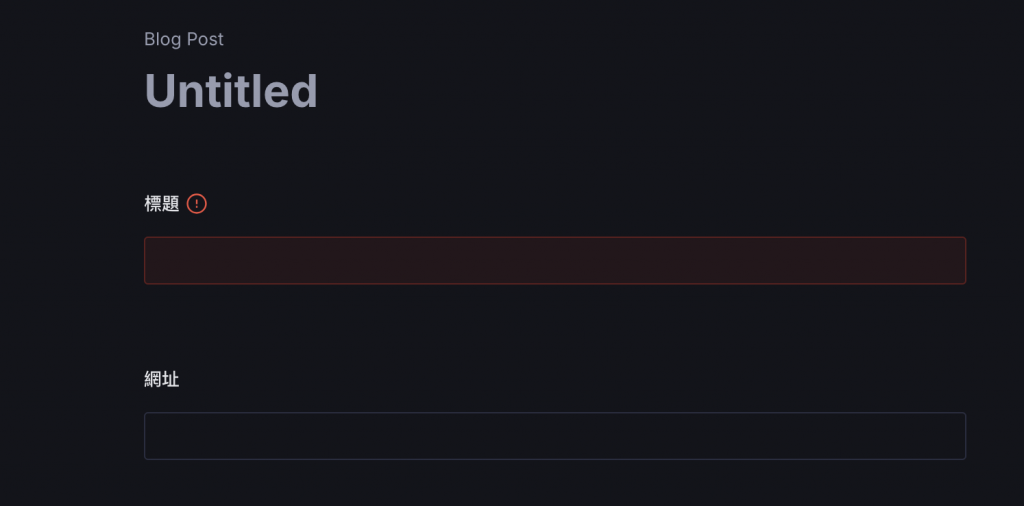
Sanity 是可以定義”必填”、”欄位限制條件”及”提示訊息”等諸如此類的。
export default defineType({
  // ...
  fields: [
    defineField({
      name: 'title', // 必填
      title: '標題',
      type: 'string',
    }),
    defineField({
      name: 'slug', // 必填
      title: '網址',
      type: 'string',
    }),
    defineField({
      name: 'subtitle',
      title: '副標題',
      type: 'string',
    }),
    defineField({
      name: 'heroImage',
      title: '封面圖片',
      type: 'image',
    }),
    defineField({
      name: 'content', // 必填
      title: '內容',
      type: 'text',
    }),
    defineField({
      name: 'publishedAt', // 預設今天
      title: '發布日期',
      type: 'date',
    }),
    defineField({
      name: 'tags',
      title: '標籤',
      type: 'array',
      of: [{type: 'string'}],
    }),
  ],
})
在我們的範例中, 標題, 網址 等等的欄位就會是必填欄位,而"封面圖片"則是可以加個限制檔案類型、圖片尺寸等等的屬性。
要設定欄位為必填只要設定欄位的 validation ,他是一個可呼叫的方法,並且提過設定方法回傳的參數就可以對欄位的屬性進行設定了。
不多說,直接先來把標題欄位設定為必填作為範例:
defineField({
  name: 'title',
  title: '標題',
  type: 'string',
  validation: (rule) => rule.required(), // 對 rule 進行設定欄位屬性
})

將 rule 設定為 required() 就可以將欄位設為必填。
不只可以設定為必填,甚至可以進一步設定長度規則、錯誤提示訊息等等的屬性。
defineField({
  name: 'title',
  title: '標題',
  type: 'string',
  validation: (rule) => rule
	  .required()
	  .min(5).max(25)
	  .error('標題長度需介於 5 到 25 字元間'),
})

規則不只可以只有一條,可以有多項規則、分別設定每一項規則的錯誤等級。
像是網址欄位可以做類似這樣的設定:
defineField({
  name: 'slug',
  title: '網址',
  type: 'string',
  validation: (rule) => [
    rule.required(),
    rule.lowercase().error('網址必須是小寫字母'),
    rule.regex(/^[\p{L}\p{N}_-]+$/u).error('網址包含了不允許的字元'),
  ],
}),
但是網址欄位其實可以不用這麼麻煩的設定規則,網址欄位可以用 Sanity 現有的資料型別 slug,
slug 可以指定要參照那欄位,並且用預設的格式產生合法的 url 欄位:
defineField({
  name: 'slug',
  title: '網址',
  type: 'slug',
  validation: (rule) => rule.required(),
  options: {
    source: 'title',
    maxLength: 80,
  },
}),
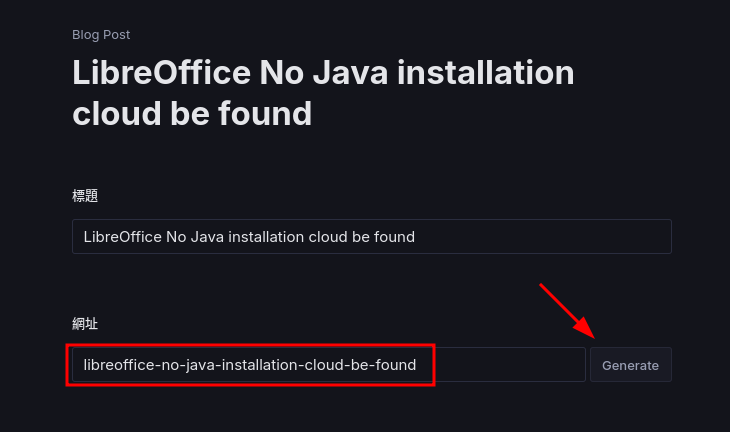
直接這樣定義參照 title 欄位,在 title 打完後直接點擊 slug 欄位旁邊的 Generate 就會自動產生 slug 的內容了。

要對 Sanity 的檔案或圖片等等的資源進行驗證是相對複雜的,因為不僅要用到 rule 的 custom() 方法,還需要取得圖片資源才可以進行細部驗證。
Sanity 預設在取得檔案或圖片時,不會直接取得資源的資料,而是取得資源的參照,像這樣:
{
  "_type": "image",
  "asset": {
    "_type": "reference",
    "_ref": "image-d1d57a17182e42c1bf0a46b61e0ed9893950fe24-770x480-jpg"
  }
}
要取得近一步的資料內容就必須使用 _ref 的資料再進行訪問,在這邊不要搞得那麼複雜,這邊直接使用社群開發的 @sanity/asset-utils 專案。
至於 @sanity/asset-utils 這個專案主要就是對於 Sanity 調用資源的流程做了封裝,讓我們可以簡單使用。細部就不在這邊講了,直接來使用吧。
先安裝起來:
npm install --save @sanity/asset-utils
再來引入專案內
import {getImageDimensions} from '@sanity/asset-utils'

// ...
	defineField({
	  name: 'heroImage',
	  title: '封面圖片',
	  type: 'image',
	  validation: (rule) =>
	    rule.custom((image) => {
	      const {aspectRatio} = getImageDimensions(image?.asset?._ref || '')
	      const isValid = Math.abs(aspectRatio - 1.604) <= 0.1
	      if (isValid) return true
	      return '建議尺寸為 16:10 (1920x1200)'
	    }),
	}),
// ...
用 getImageDimensions() 方法將圖片的 _ref 傳進去後,它就資動幫我們把寬、高、比例都回傳了。是不是很放便?
進行判斷後就可以回傳了,custom() 的回傳接受兩個,一個是 true,也就是驗證通過了,另一個接受的則是錯誤原因,可以像我寫的那樣傳入訊息。
( 記得不可以傳入 false 哦,它是不接受的 )
記得 custom() 驗證一樣可設定錯誤的等級,預設等級是 error,並且將 return 的錯誤訊息,
一樣可以在最後設定 warning() 或 error(),設定錯誤的等級。
import {getImageDimensions, getExtension} from '@sanity/asset-utils'
// ...
	defineField({
	  name: 'heroImage',
	  title: '封面圖片',
	  type: 'image',
	  validation: (rule) => [
	    rule.required().error('封面圖片是必填欄位'),
	    rule
	      .custom((image) => {
	        try {
	          const {aspectRatio} = getImageDimensions(image?.asset?._ref || '')
	          const isValid = Math.abs(aspectRatio - 1.604) <= 0.1
	          if (isValid) return true
	          return '建議尺寸為 16:10 (1920x1200)'
	        } catch (error) {
	          return true
	        }
	      })
	      .warning(),
	    rule
	      .custom((image) => {
	        try {
	          const fileType = getExtension(image?.asset?._ref || '')
	          if (fileType !== 'jpg' && fileType !== 'png') {
	            return '圖片必須是 .jpg 或 .png 格式'
	          }
	          return true
	        } catch (error) {
	          return true
	        }
	      })
	      .error(),
	  ],
	}),
// ...
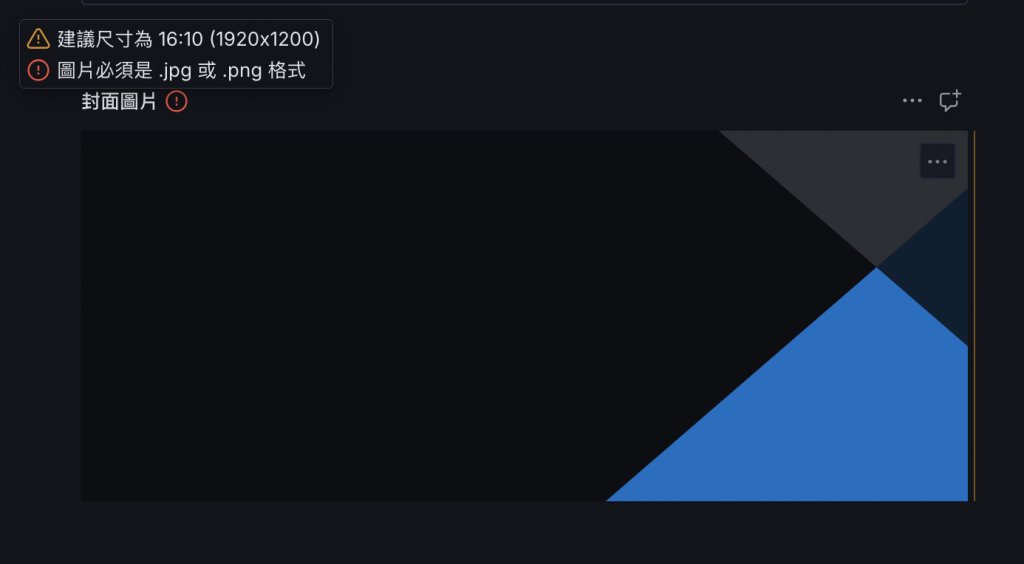
經過最後的設定後,刻意上傳一張比例不對的 .svg 圖檔後,就會看到這樣的錯誤訊息。
