content在第二篇中,我們會繼續擴展這個主題,並添加頁面的 content 部分。
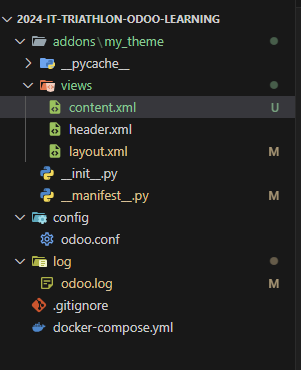
__manifest__.py我們需要在模組中新增 content.xml
{
    'name': 'My Custom Theme',
    'description': 'Custom theme for website with custom header.',
    'version': '1.0',
    'category': 'Theme/Website',
    'depends': ['website'],  # 依賴網站模組
    'data': [
        'views/layout.xml',  # 繼承 layout 視圖
        'views/header.xml',  # 自定義的 header 視圖
        'views/content.xml',  # 加載頁面主體內容
    ],
    'installable': True,
    'application': False,
}
2.定義 content.xml
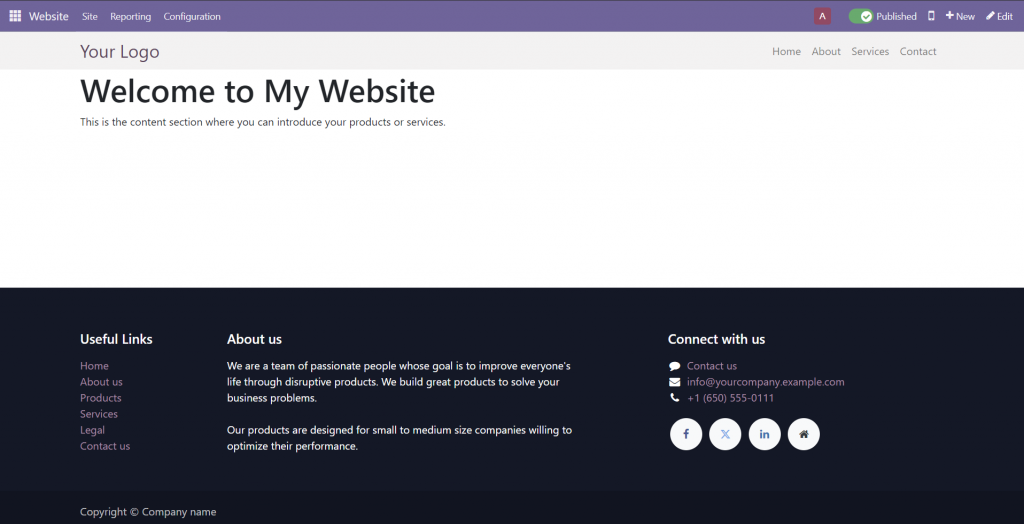
這是頁面的 content 部分,顯示主體內容。我們會將 header 和 content 一起渲染
<odoo>
    <template id="content">
        <section id="wrap" class="oe_structure">
            <div class="container">
                <h1>Welcome to My Website</h1>
                <p>This is the content section where you can introduce your products or services.</p>
            </div>
        </section>
    </template>
</odoo>
並依照上一篇的步驟,去安裝addons,切換到website頁面去編輯,更新自己的主題,如果發現主體報錯,建議可以先移除後重新於安裝主題的地方重新切換,這樣odoo會自動幫你安裝主題並安裝相對應的模組
成果應該會如下,你會發現header和content都被我們換掉了,剩下footer