如何使用Scaffolding建立CRUD表單
Scaffolding是什麼?
Scaffolding是一種Visual Studio用來產生各種MVC程式樣板的程式產生框架。
用它可以快速地產生CRUD相關的Controller/Actions/Views及EF Core與資料庫連線設定,省掉了一個個建立的時間,且樣板後續可以再修改或精緻化,這就是Scaffolding的好處。
建立第一個CRUD表單
這邊所使用的例子是員工聯絡資訊表單
第一步✨模型建立
路徑🧷Models/Employees.cs
在Models資料夾中建立Employees模型,程式碼參考如下:
namespace Employees_table.Models
{
    public class Employee
    {
        public int Id { get; set; }
        public string Name { get; set; }
        public string Mobile { get; set; }
        public string Email { get; set; }
        public string Department { get; set; }
        public string Title { get; set; }
    }
}
第二步✨Scaffolding建立Controller、View及資料庫設定
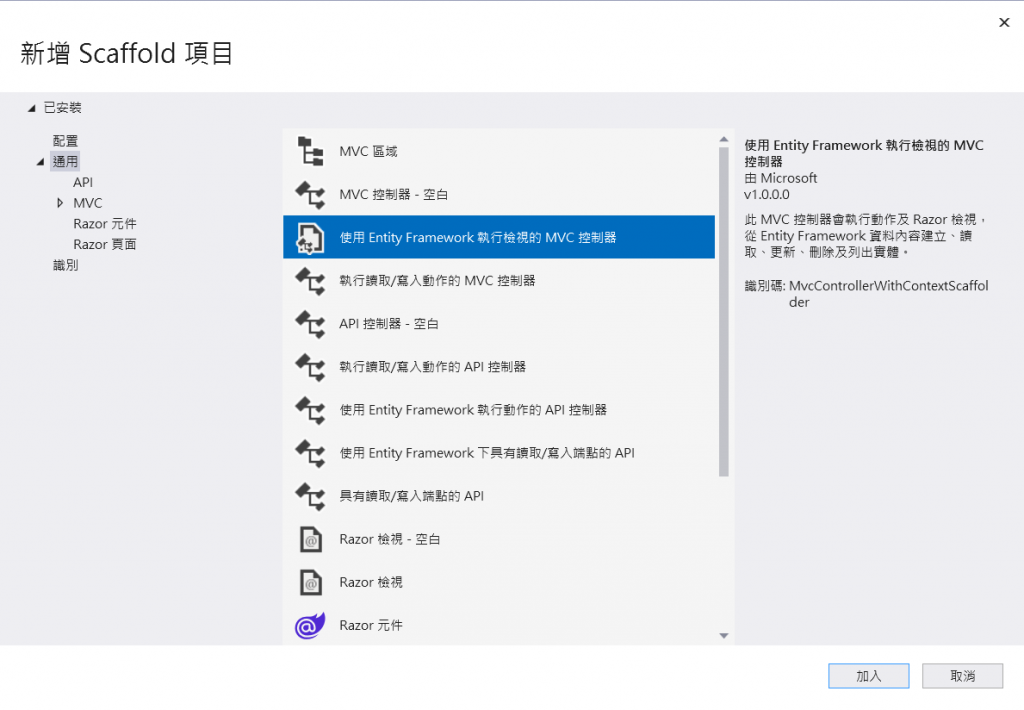
1.在Controller資料夾上點擊右鍵→【加入】→【新增Scaffold項目】→【控制器】→【使用Entity Framework執行檢視的MVC控制器】→【加入】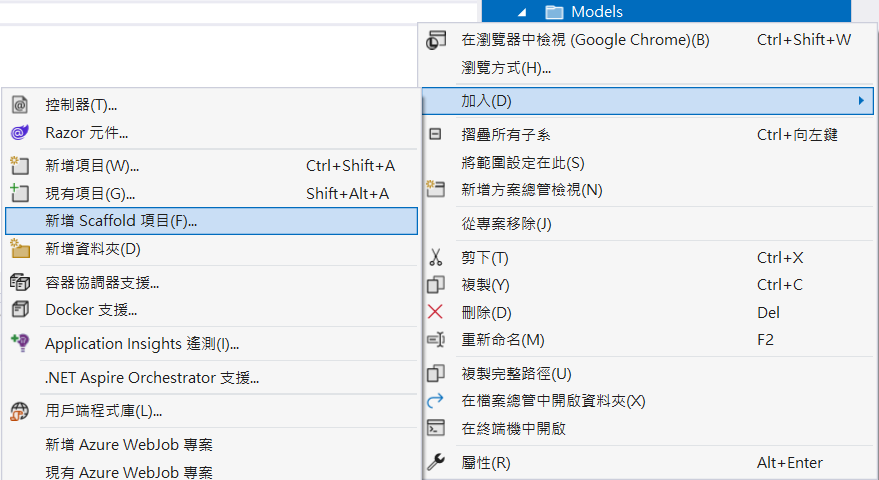
2.模型類別選擇「Employee」→點選資料內容選項右邊的加號→將名稱改為「EmployeeContext」→【新增】,這麼一來Scaffolding就會建立相關檔案及設定。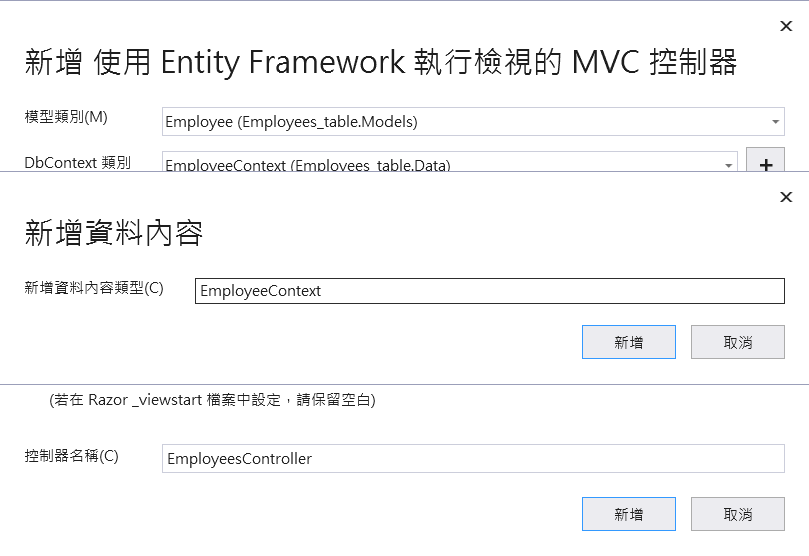
第三步✨更改appsettings.json中的資料庫連線字串
將Database後的資料庫名稱改為「EmployeeDB」
{
 ...
  "ConnectionStrings": {
    "EmployeeContext": "Server=(localdb)\\mssqllocaldb;Database=EmployeeDB;Trusted_Connection=True;MultipleActiveResultSets=true"
  }
}
第四步✨建立EF Core資料庫移轉檔(Migration)與SQL Server DB
點擊【工具】→【NuGet套件管理員】→【套件管理主控台】
開啟套件管理主控台後,在主控台中執行以下兩道命令。
Add-Migration InitialDB
Update-Database
第一條命令的功用為在Migrations資料夾中建立EF Core的資料移轉檔。
第二條命令是根據移轉檔建立SQL Server資料庫及Table資料表。
第五步✨查看資料庫與檢查CRUD功能
到上一步結束後基本上資料庫表單與CRUD功能都已經建置完成了。
首先我們可以到【檢視】→【SQL Server物件總管】查看資料庫是否建置成功。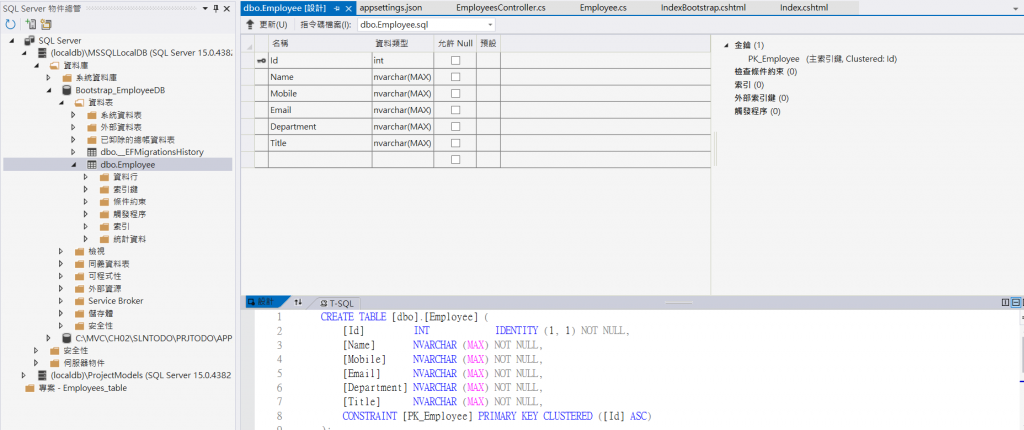
再來就是運行專案,並測試CRUD功能
CREATE✅
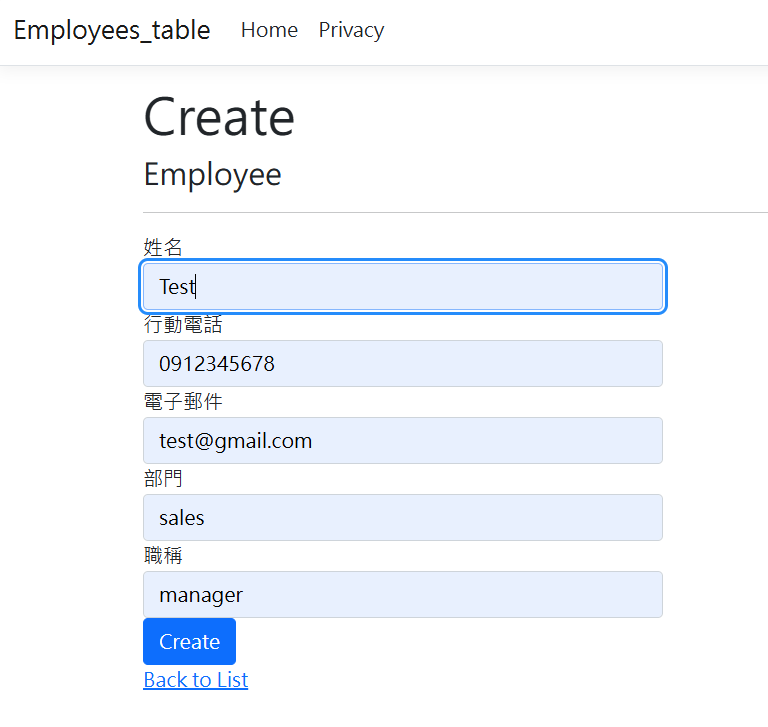
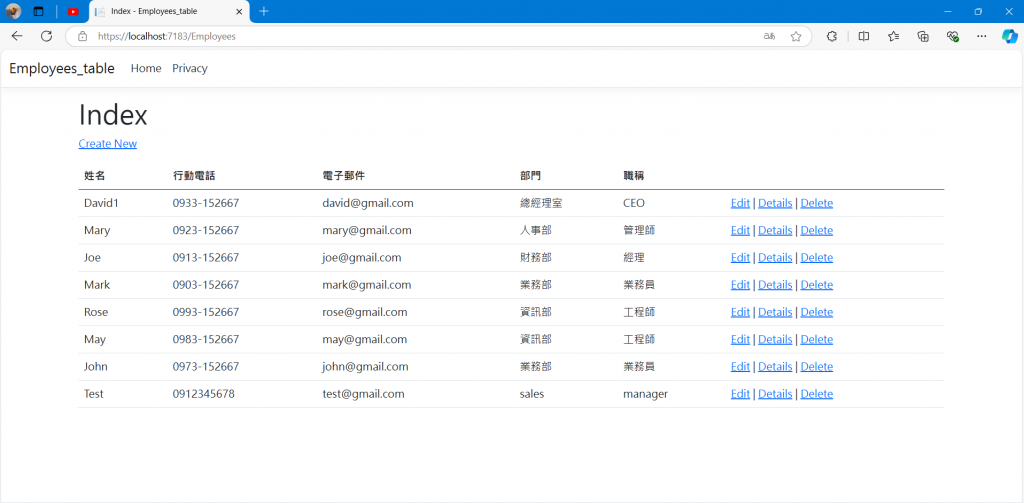
輸入剛才Scaffolding所自動建置的Index.cshtml之路徑「Employees/Index.cshtml」,並點擊網頁中的「Create new」新增一筆資料。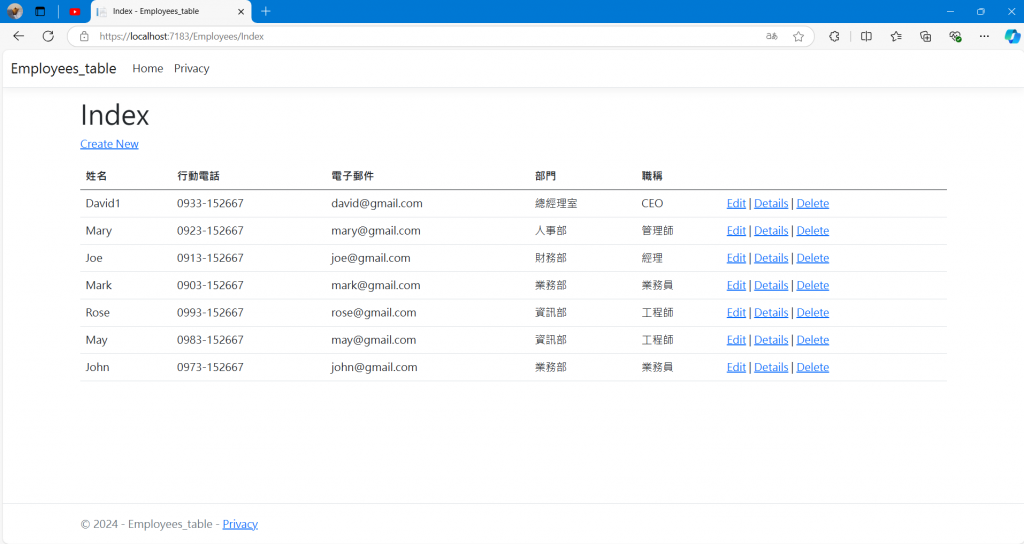
READ✅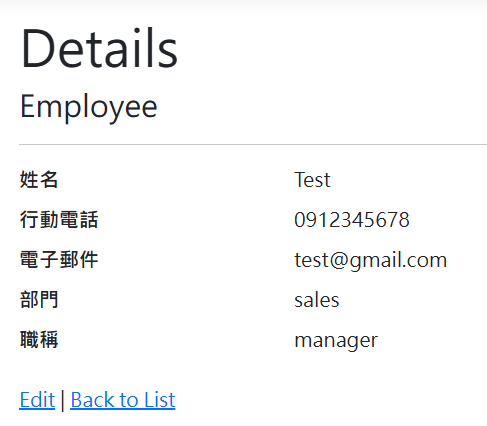
UPDATE✅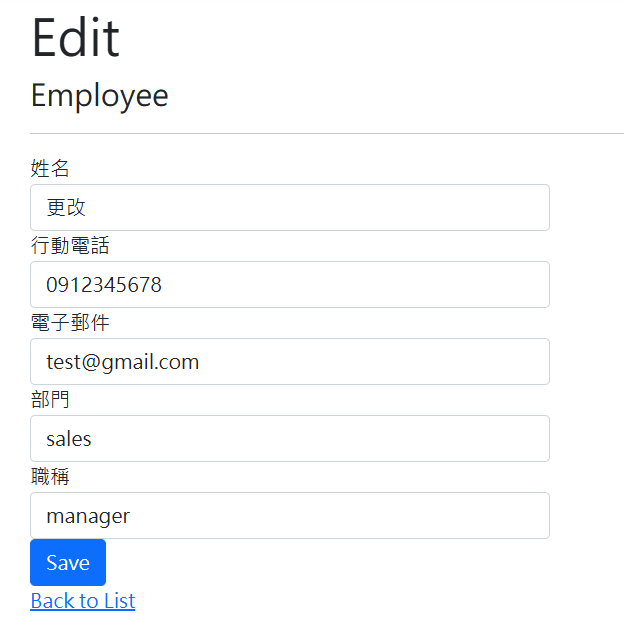
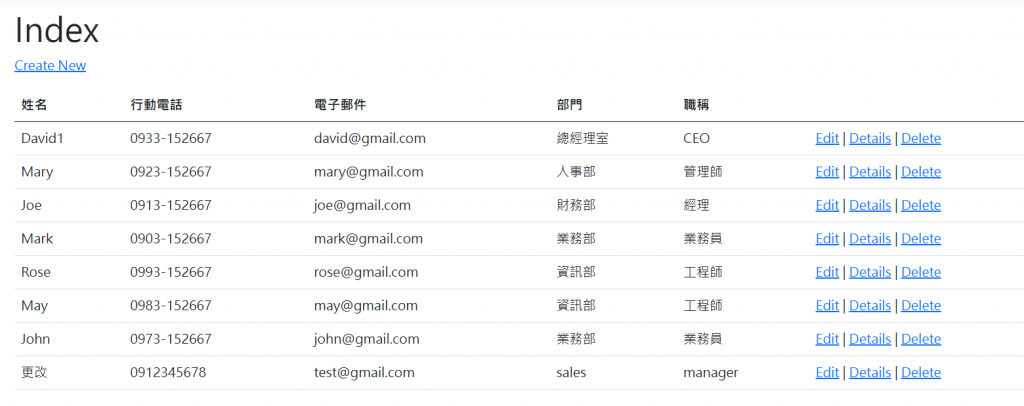
DELETE✅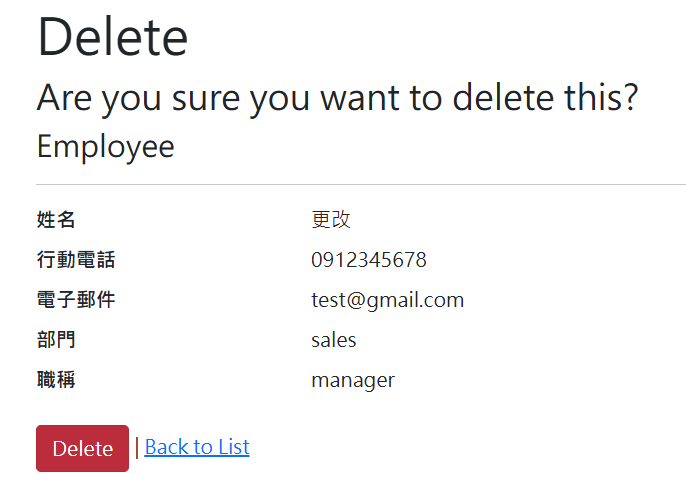
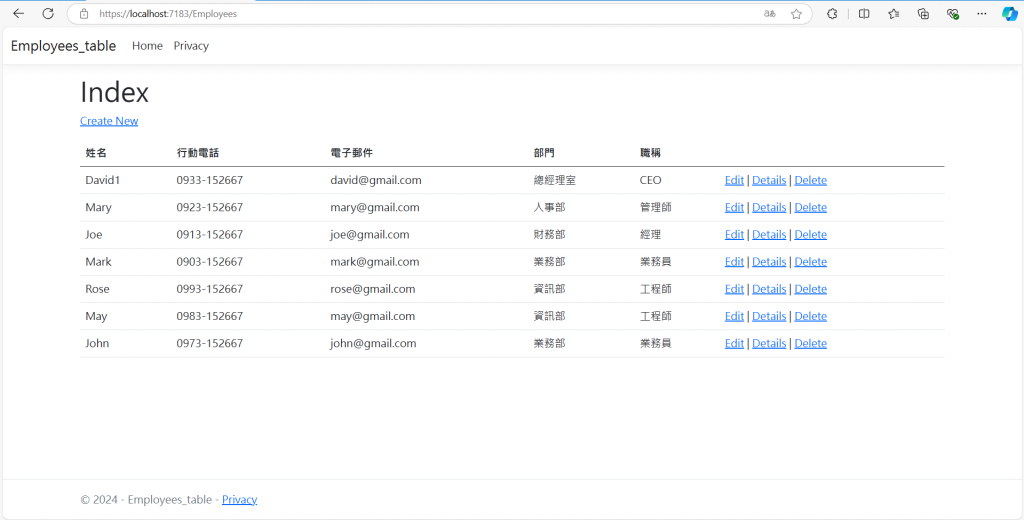
OK功能沒問題,非常成功,就是有點小醜,等第18天我們再來爆改( ᴖ ·̫ ᴖ )
那麼以上就是今天的分享啦~
明天見啦~See YA(。•̀ᴗ-)
