iT邦幫忙

2024 iThome 鐵人賽

DAY 22
0
Software Development

數位醫療與雲原生第一次的親密接觸系列 第 22

Day 22 [ 雲原生( Cloud Native) ] Keycloak與服務的適配(HAPI FHIR Server)

  • 分享至 

  • xImage
  •  

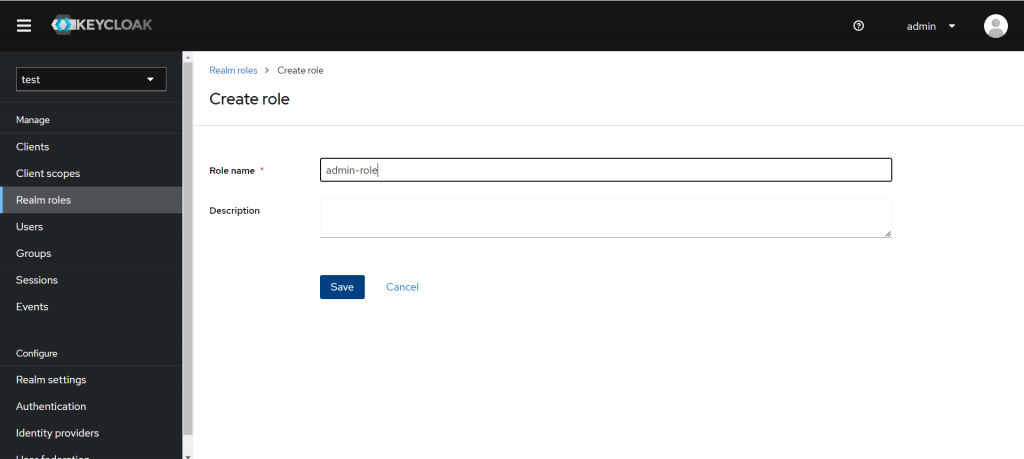
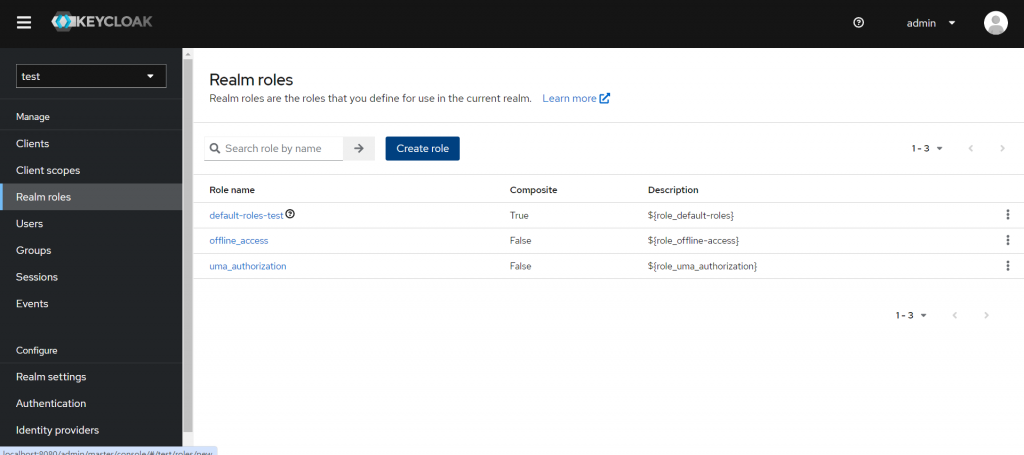
上篇文章註冊了新的服務,接下來需要新增Realm Role,即在這個服務中的角色。

先新增一個admin-role

Create Role
https://ithelp.ithome.com.tw/upload/images/20240930/20161987apdZmp1QgI.png

新增admin-role,之後再以相同步驟新增user-role
https://ithelp.ithome.com.tw/upload/images/20240930/20161987sqFyCdsBXS.png

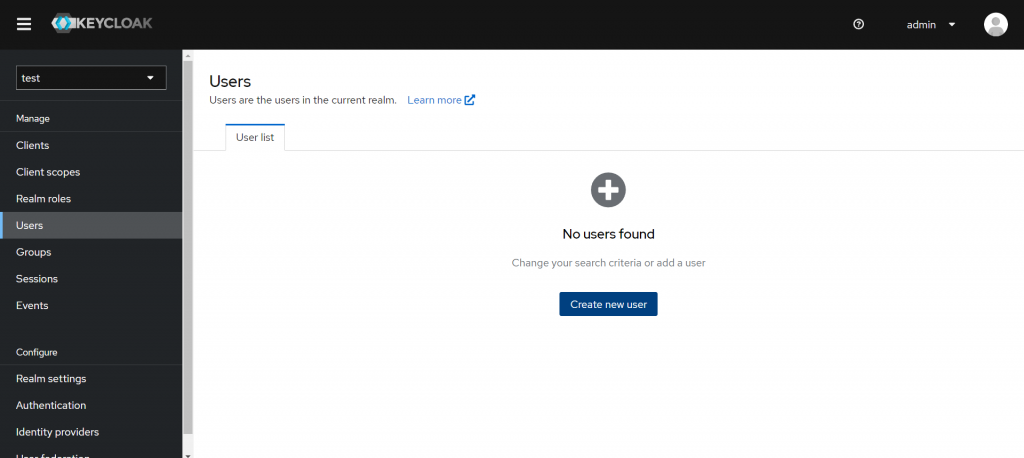
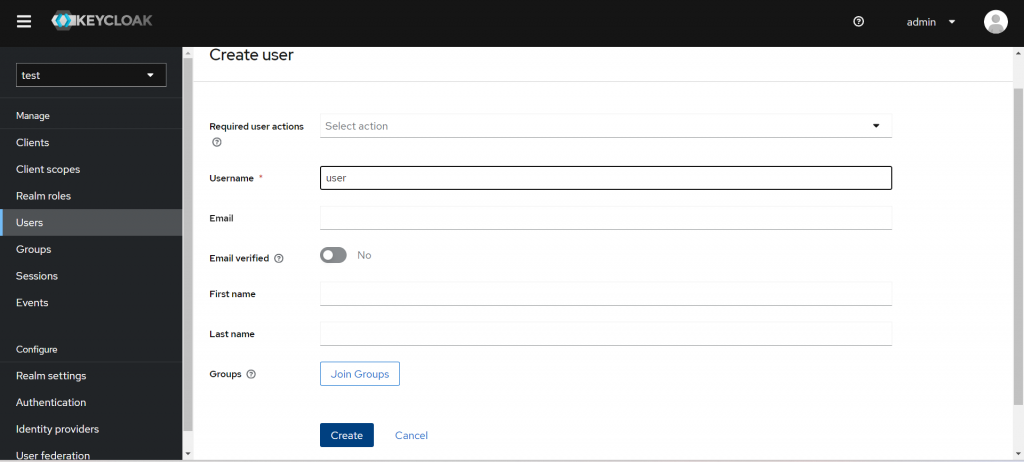
再來需要新增一個User(使用者)
https://ithelp.ithome.com.tw/upload/images/20240930/20161987swfupa1dc9.png

https://ithelp.ithome.com.tw/upload/images/20240930/20161987fxfFaBUSHN.png

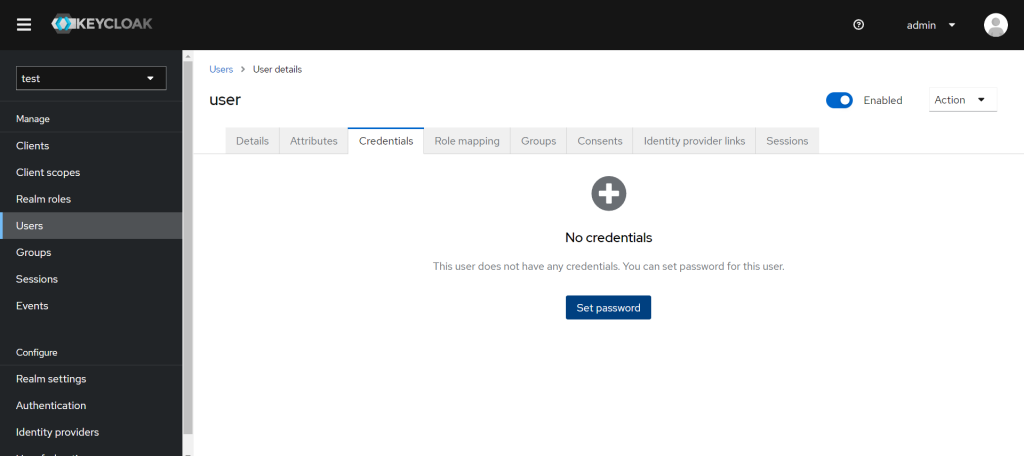
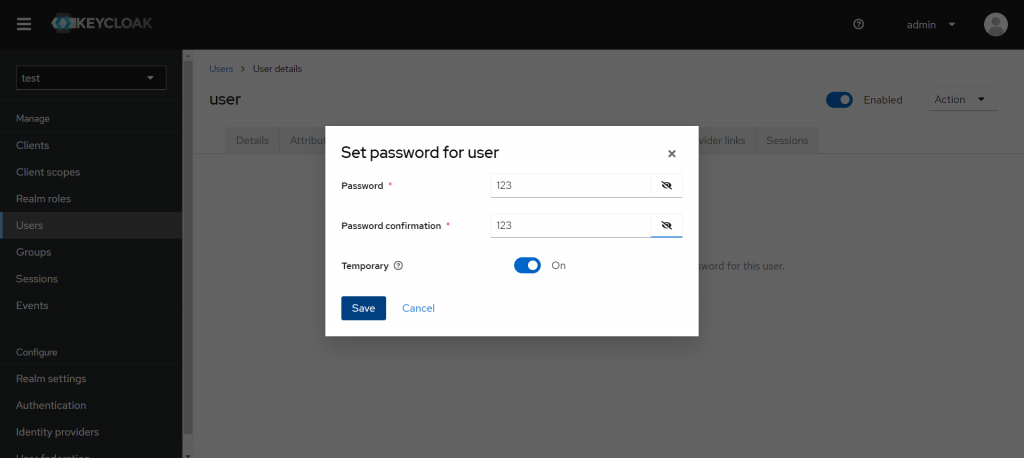
設定完後修改 'user' 密碼
https://ithelp.ithome.com.tw/upload/images/20240930/20161987e0RhWjbbEq.png

Temporary On 代表登入後需要重新修改密碼,Off則不用
https://ithelp.ithome.com.tw/upload/images/20240930/20161987A5PDGfrPMB.png

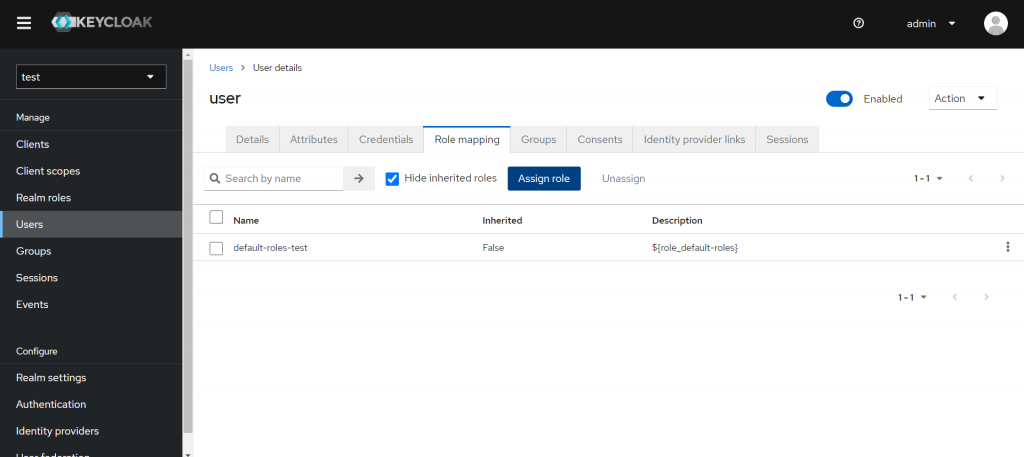
接下來需要assign role給使用者
https://ithelp.ithome.com.tw/upload/images/20240930/20161987f4Pja9cQaX.png

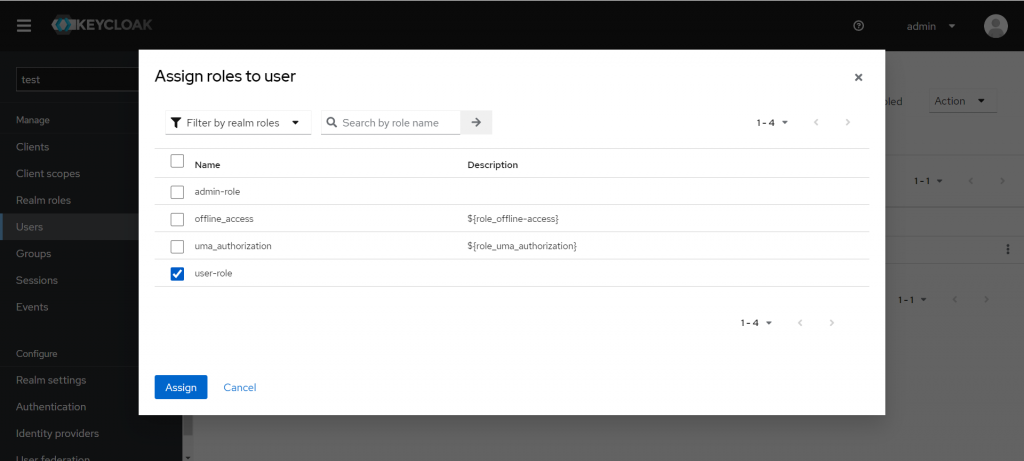
assign user-role給使用者
https://ithelp.ithome.com.tw/upload/images/20240930/20161987SdFzC7qa22.png

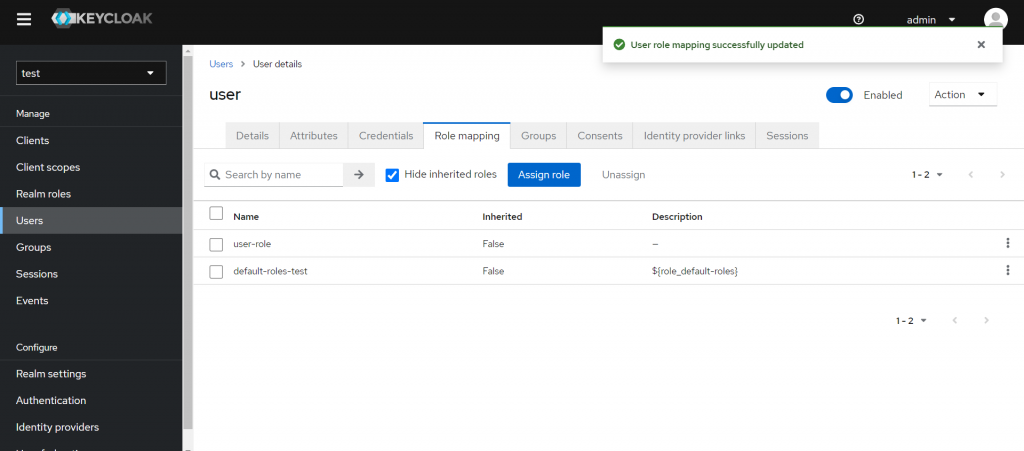
assign完後可以看到使用者的role裡有user-role了
https://ithelp.ithome.com.tw/upload/images/20240930/20161987rTBf84Rrdr.png

因此目前就有了admin-role、user-role兩種realm-role,還有一個角色為user-role的使用者。

接下來就可以到Springboot服務(HAPI FHIR Server)新增與Keycloak的適配了!

首先需要import dependency

  <dependency>
            <groupId>org.keycloak</groupId>
            <artifactId>keycloak-spring-boot-starter</artifactId>
            <version>21.1.1</version>
        </dependency>

import完成後修改application.yml

keycloak:
  # 使用realm
  realm: test
  # keycloak服務器的地址
  auth-server-url: http://localhost:8080
  # client ID
  resource: client01
  public-client: true
  cors: true

  security-constraints:
    # 角色和資源的關係
    - auth-roles:
        - user-role
      security-collections:
        - name: user
        # 限定user-role這個角色只能瀏覽以下兩種URL
          patterns:
            - /fhir/Observation
            - /fhir/Observation/*

    - auth-roles:
        - admin-role
      security-collections:
        - name: admin
          patterns:
            - /fhir/Observation
            - /fhir/Observation/*

            - /fhir/Patient
            - /fhir/Patient/*

            - /fhir/Organization
            - /fhir/Organization/*

            - /fhir/swagger-ui/*

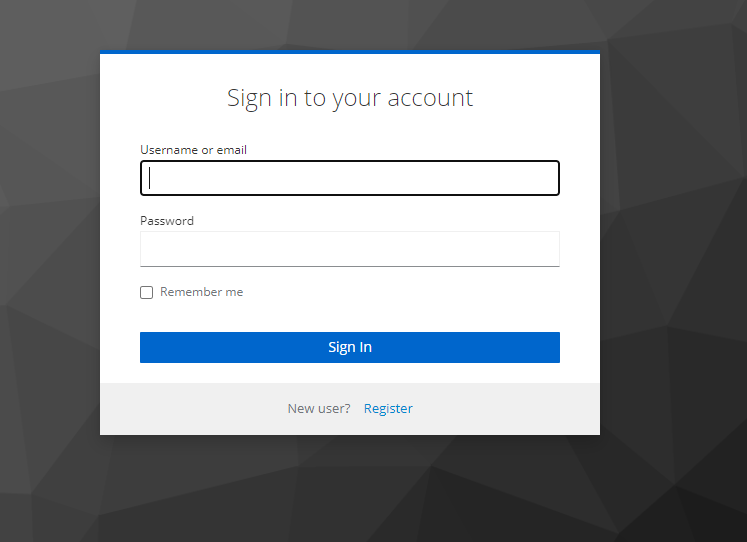
修改完application.yaml,重新啟動HAPI FHIR Server後就會發現輸入符合pattern的網址會被轉導至Keycloak登入頁面,需要輸入正確帳號密碼登入後才能獲得資源。
https://ithelp.ithome.com.tw/upload/images/20240930/20161987La5EaL6h0W.png

以上的方法除了能用在HAPI FHIR Server外也能應用於一般的Springboot服務。使用者也能設定成可以自行創建,且可以透過Google、Github帳號等進行第三方登入。


上一篇
Day 21 [ 雲原生 (Cloud Native )] 新增IAM控管服務
下一篇
Day 23 [雲原生( Cloud Native ) ] Keycloak使用操作手冊
系列文
數位醫療與雲原生第一次的親密接觸30
圖片
  直播研討會
圖片
{{ item.channelVendor }} {{ item.webinarstarted }} |
{{ formatDate(item.duration) }}
直播中

尚未有邦友留言

立即登入留言