.

iT邦幫忙

1

VMWare Esxi 7.0 安裝Windows 11,及WSL 在 Windows 上安裝 Linux

  • 分享至 

  • xImage
  •  

在VMWare Esxi上安授Windows11,首先會遇到TPM 2.0(信賴平台模組)的問題,爬文後推薦的方式都是繞過(?)這個檢查,做一個Bypass的機碼來處理。

一、首先虛擬機器先選Windows 10(64位元),硬碟設定120GB。
https://ithelp.ithome.com.tw/upload/images/20250108/20122335JIg9CknY9Y.png
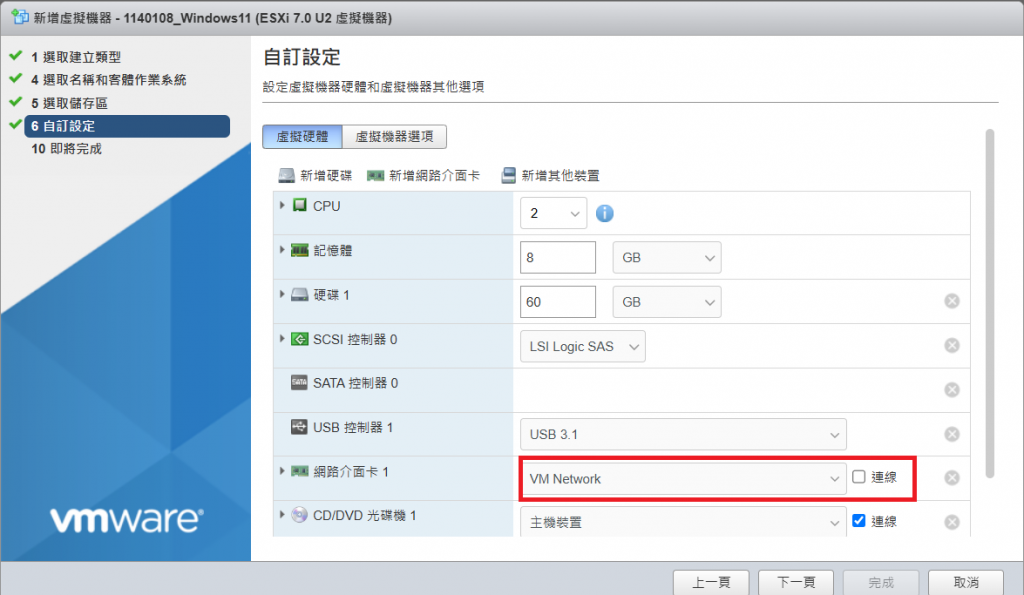
二、基本的選擇,這裏網卡的部份先選擇不連線(為了使用本機安裝模式)
https://ithelp.ithome.com.tw/upload/images/20250108/20122335ZzVj3T2C2C.png
三、虛擬機的CPU虛擬化的選項先勾起來(為了後續在Windows 安裝 Linux子系統做準備)
https://ithelp.ithome.com.tw/upload/images/20250108/20122335CcL2YS8HRy.png
四、接下來開始進入安裝Windows的程序
https://ithelp.ithome.com.tw/upload/images/20250108/20122335SFJqATAo3c.png
五、到選取映象這步驟時,先不要選「下一步」,直接按「shift」+「F10」,進入cmd的畫面,輸入regedit。
https://ithelp.ithome.com.tw/upload/images/20250108/201223350mri2nmcOL.png

https://ithelp.ithome.com.tw/upload/images/20250108/20122335OigsExkP1z.png
六、進入編輯登錄程式後,找到此路徑:電腦\HKEY_LOCAL_MACHINE\SYSTEM\Setup,新增機碼,名稱為「LabConfig」https://ithelp.ithome.com.tw/upload/images/20250108/20122335t9TvqCCqnY.png
七、新增一個「DWORD(32位元)值」,取名為「BypassTPMCheck」,然後將值修正為「1」。https://ithelp.ithome.com.tw/upload/images/20250108/20122335dgxs0NWa2S.png
https://ithelp.ithome.com.tw/upload/images/20250108/20122335stl85qawlU.png
八、做完六-七後,關掉編輯登錄程式,關掉cmd視窗,回到步驟五,按「下一步」。看到以下畫面就是繞過TPM了,開始安裝Windows 11。
https://ithelp.ithome.com.tw/upload/images/20250108/201223359RST2aLGcF.png
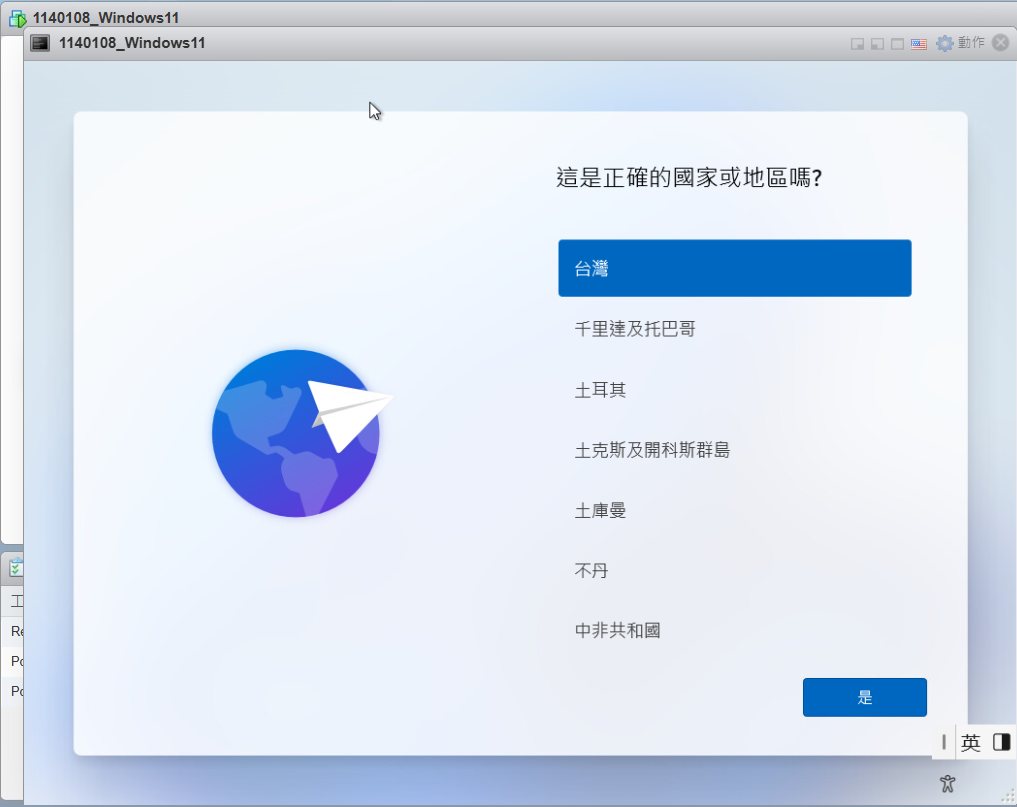
九、安裝到選取地區時,先按「shift」+「F10」,進入cmd視窗。這時候在裡面輸入「oobe\bypassnro」後按下 Enter,系統應該就會重開,重新開始初始化的流程。
https://ithelp.ithome.com.tw/upload/images/20250108/2012233550D4TpQxgu.png
https://ithelp.ithome.com.tw/upload/images/20250108/20122335EYvpYBnEMy.png
十、做完步驟九之後,會重新啟動安裝再回到選取地區。安裝會到「選取網際網路」時就選我沒有網路,就可以進入本機的安裝流程了。
https://ithelp.ithome.com.tw/upload/images/20250108/201223354UZ62bfhHC.png
十一、安裝完成後,先關機。回到虛擬機的設定畫面,將網路卡設定為「連線」,再重新開機。
https://ithelp.ithome.com.tw/upload/images/20250108/20122335YxYrNVQlws.png
十二、接下來就進入在Windows安裝Linux的步驟,先在程式列搜尋cmd,以系統管理員的身分執行。
https://ithelp.ithome.com.tw/upload/images/20250108/201223351qqutTNhUJ.png
輸入 wsl --install

wsl --install

安裝完的畫面
https://ithelp.ithome.com.tw/upload/images/20250108/20122335bNbaHlF4g1.png
裝完後重新開機,開啟「控制台」,點選「程式和功能」,點選「開啟或變更Windows功能」
https://ithelp.ithome.com.tw/upload/images/20250108/20122335ttJ0cHk3h8.png
勾選「Hyper V」後,按「確定」,按「重新啟動」。
https://ithelp.ithome.com.tw/upload/images/20250108/20122335FPyFXhBwJX.png
https://ithelp.ithome.com.tw/upload/images/20250108/20122335uxwFJfLpeV.png
開啟Ubuntu,開始安裝及設定帳號,帳號設定好了後,就完成所有程序了。
https://ithelp.ithome.com.tw/upload/images/20250108/20122335ZWbYsddBSy.png
https://ithelp.ithome.com.tw/upload/images/20250108/201223350omjQJyTOZ.png


.
圖片
  直播研討會

尚未有邦友留言

立即登入留言