今天和明天我們要使用前面學到的重點來寫一個「控制火箭是否發射」的迷你專案,複習前面的重點。
今日Day 12:完成「父子溝通 + 清單渲染 + 互動」的核心(props / emit / v-for / v-on / v-if / class 綁定)。
明日Day 13:升級為「高彈性元件 + 插槽 + v-model 子元件雙向綁定 +(可選)scoped slot」。
我們會完成:
讓我們先拆解分析,全部的程式碼依序複製就能完成囉!
<main class="mc">
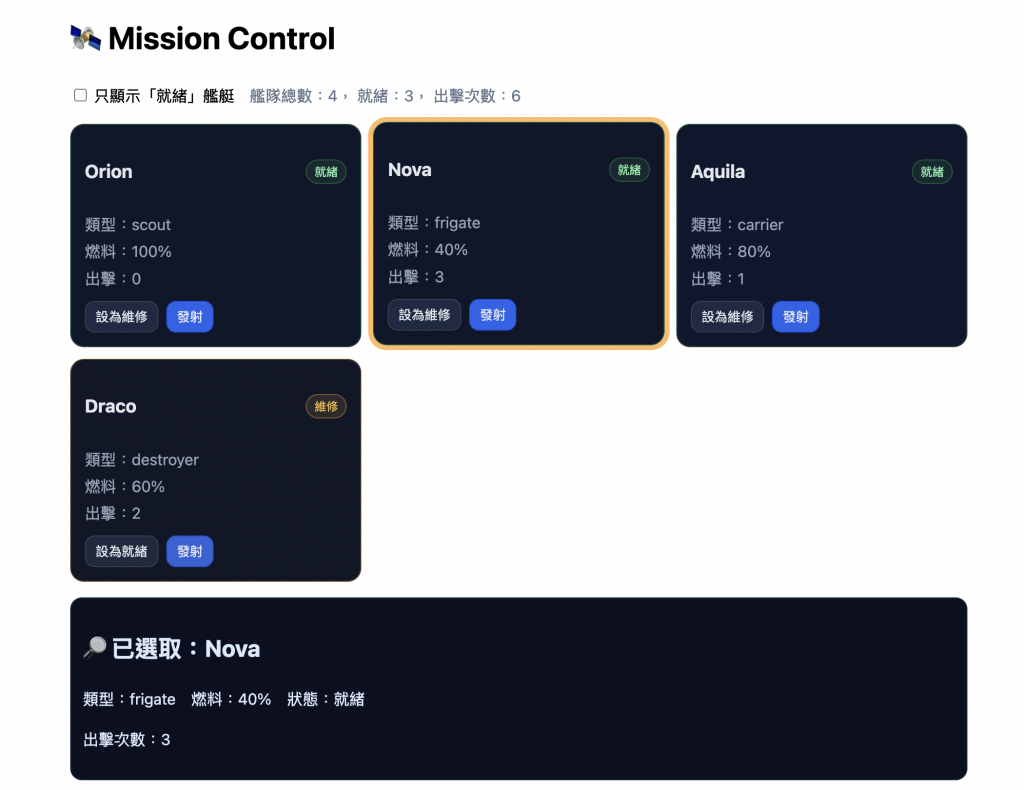
<h1>🛰️ Mission Control</h1>
<!-- 工具列:過濾 + 統計 -->
<div class="toolbar">
<label>
<input type="checkbox" v-model="onlyReady" />
只顯示「就緒」艦艇
</label>
<span class="stats">
艦隊總數:{{ ships.length }},
就緒:{{ readyCount }},
出擊次數:{{ launchedTotal }}
</span>
</div>
<!-- 艦隊列表:用 v-for 迭代每一艘船,丟給 <ShipCard> 顯示 -->
<ul class="fleet">
<li v-for="s in filteredShips" :key="s.id">
<ShipCard
:ship="s"
:isSelected="selectedId === s.id"
@select="onSelect(s.id)"
@toggle-ready="onToggleReady(s.id)"
@launch="onLaunch(s.id)"
/>
</li>
</ul>
<!-- 詳細資訊:只有在選到某艘船時 v-if 才顯示 -->
<section v-if="current" class="detail">
<h2>🔎 已選取:{{ current.name }}</h2>
<p>類型:{{ current.type }} 燃料:{{ current.fuel }}% 狀態:{{ current.ready ? '就緒' : '維修中' }}</p>
<p>出擊次數:{{ current.launches }}</p>
</section>
</main>
重點:
v-model="onlyReady":勾選後會影響 computed 的 filteredShips,只顯示就緒艦艇。v-for="s in filteredShips":把每艘船 s 渲染成一張 ShipCard。:ship、:isSelected 是父傳子 (props)。@select、@toggle-ready、@launch 是子傳父 (emit),父層用 onSelect / onToggleReady / onLaunch 這三個方法接住。v-if="current":只有選到某艘船時才顯示細節。建立一個shipCard在src/components/。
import { ref, computed } from 'vue'
import ShipCard from './components/shipCard.vue'
1) 狀態(ref)
const ships = ref([
  { id: 1, name: 'Orion',  type: 'scout',   fuel: 100, ready: true,  launches: 0 },
  { id: 2, name: 'Nova',   type: 'frigate', fuel: 100, ready: false, launches: 0 },
  { id: 3, name: 'Aquila', type: 'carrier', fuel: 80, ready: true,  launches: 1 },
  { id: 4, name: 'Draco',  type: 'destroyer', fuel: 60, ready: false, launches: 2 }
])

const selectedId = ref(null)
const onlyReady  = ref(false)
每艘船的欄位:
2) 衍生資料(computed)
// 清單過濾(配合 checkbox)
const filteredShips = computed(() =>
  onlyReady.value ? ships.value.filter(s => s.ready) : ships.value
)

// 目前選中的艦艇物件(用選到的 id 去找)
const current = computed(() =>
  ships.value.find(s => s.id === selectedId.value) || null
)

// 統計
const readyCount = computed(() => ships.value.filter(s => s.ready).length)
const launchedTotal = computed(() => ships.value.reduce((sum, s) => sum + s.launches, 0))
3) 事件處理(被子元件 emit 觸發)
// 點卡片:選取/取消選取
const onSelect = (id) => {
  selectedId.value = selectedId.value === id ? null : id
}

// 切換就緒狀態
const onToggleReady = (id) => {
  const t = ships.value.find(s => s.id === id)
  if (t) t.ready = !t.ready
}

// 🚀 發射(重點:每次燃料 -20)
const onLaunch = (id) => {
  const t = ships.value.find(s => s.id === id)
  if (!t) return

  // 發射前的條件檢查
  if (!t.ready) { alert('尚未就緒,無法出擊。'); return }
  if (t.fuel < 20) { alert('燃料過低,請補給。'); return }

  // ✔️ 真的出擊:次數 +1、燃料 -20
  t.launches++
  t.fuel = Math.max(0, t.fuel - 20) // 防止變負數
  alert(`🚀 ${t.name} 已出擊!`)
}
<template>
  <article
    class="card"
    :class="[
      ship.ready ? 'ready' : 'repair',
      isSelected && 'selected',
      ship.type
    ]"
    @click="emit('select')"
  >
    <header class="heading">
      <h3>{{ ship.name }}</h3>
      <span class="badge" :class="{ ok: ship.ready, warn: !ship.ready }">
        {{ ship.ready ? '就緒' : '維修' }}
      </span>
    </header>

    <ul class="meta">
      <li>類型:{{ ship.type }}</li>
      <li>燃料:{{ ship.fuel }}%</li>
      <li>出擊:{{ ship.launches }}</li>
    </ul>

    <footer class="actions" @click.stop>
      <button @click="emit('toggle-ready')">
        {{ ship.ready ? '設為維修' : '設為就緒' }}
      </button>
      <button class="primary" @click="emit('launch')">發射</button>
    </footer>
  </article>
</template>

<script setup>
const props = defineProps({
  ship: { type: Object, required: true },
  isSelected: { type: Boolean, default: false }
})
const emit = defineEmits(['select', 'toggle-ready', 'launch'])
</script>

<style scoped>
.card { background:#0f172a; color:#e2e8f0; border:1px solid #24324d; border-radius:14px; padding:14px; cursor:pointer; transition:.2s ease; }
.card.selected { outline:5px solid #ffbb66; transform: translateY(-2px); }
.card.ready { border-color:#22c55e55; }
.card.repair { border-color:#f59e0b55; filter:saturate(.85); }
.card.carrier { background: #10172e; }
.heading { display:flex; justify-content:space-between; align-items:center; }
.badge { font-size:12px; padding:2px 8px; border-radius:999px; border:1px solid #334155; }
.badge.ok { color:#86efac; border-color:#16a34a66; background:#16a34a22; }
.badge.warn { color:#fbbf24; border-color:#f59e0b66; background:#f59e0b22; }
.meta { list-style:none; padding:0; margin:8px 0 0; color:#94a3b8; }
.meta li { margin:2px 0; }
.actions { display:flex; gap:8px; margin-top:10px; }
button { background:#1f2a44; color:#e2e8f0; border:1px solid #334155; border-radius:10px; padding:6px 10px; }
button.primary { background:#2563eb; border-color:#1d4ed8; }
button:hover { filter:brightness(1.15); }
</style>


 iThome鐵人賽