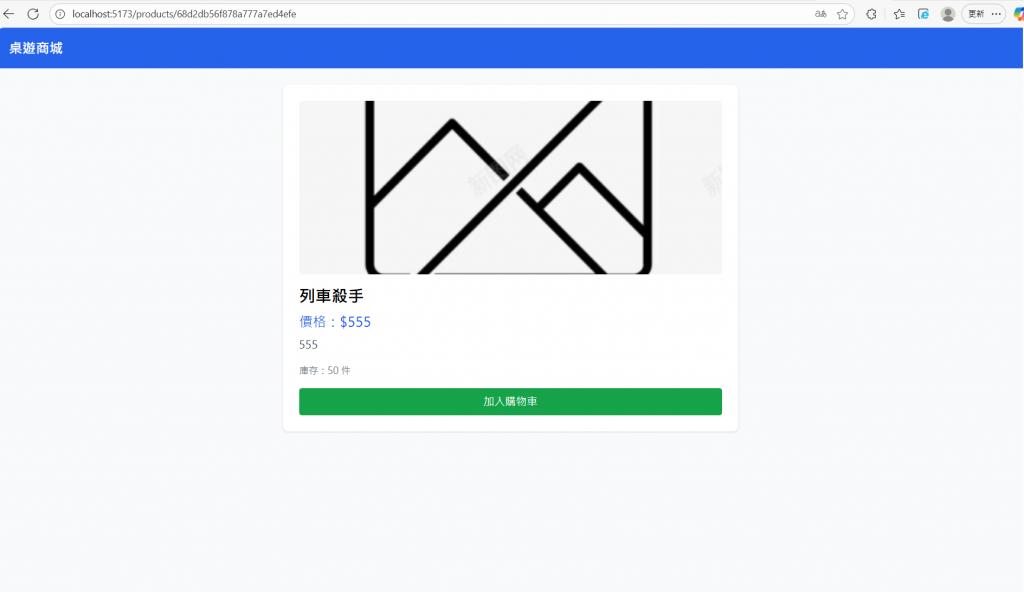
今天是鐵人賽 Day11,目標是完成商品詳細頁,能顯示商品圖片、價格、描述與庫存,並串接後端 API,讓使用者可以看到完整商品資訊;另外,也加上前端可以新增商品(含圖片)的功能。
1️⃣ 建立 ProductDetail 頁面與抓取單一商品 API
在 src/pages/ProductDetail.jsx 建立 ProductDetail component,利用 useEffect 根據 id 抓取後端 /api/products/:id 資料,並用 useState 管理商品、載入與錯誤狀態。
// ProductDetail.jsx
import { useEffect, useState } from "react";
import { useParams } from "react-router-dom";
import axios from "axios";

export default function ProductDetail() {
  const { id } = useParams();
  const [product, setProduct] = useState(null);
  const [loading, setLoading] = useState(true);
  const [error, setError] = useState(null);

  useEffect(() => {
    const fetchProduct = async () => {
      try {
        const res = await axios.get(`http://localhost:3000/api/products/${id}`);
        setProduct(res.data);
      } catch (err) {
        console.error("❌ API 錯誤:", err);
        setError("載入失敗,請稍後再試!");
      } finally {
        setLoading(false);
      }
    };

    fetchProduct();
  }, [id]);

  if (loading) return <p className="text-gray-500 text-center mt-10">載入中...</p>;
  if (error) return <p className="text-red-500 text-center mt-10">{error}</p>;
  if (!product) return <p className="text-gray-500 text-center mt-10">找不到商品</p>;

  return (
    <div className="p-6 min-h-screen bg-gray-50">
      <div className="max-w-2xl mx-auto bg-white shadow rounded-lg p-6">
        {product.image && (
          <img
            src={product.image ? `http://localhost:3000${product.image}` : '/default.jpg'}
            alt={product.name}
            className="w-full h-64 object-cover rounded mb-4"
          />
        )}
        <h1 className="text-2xl font-bold mb-2">{product.name}</h1>
        <p className="text-xl text-blue-600 mb-2">價格:${product.price}</p>
        <p className="text-gray-700 mb-4">{product.description}</p>
        <p className="text-sm text-gray-500 mb-4">
          {product.stock > 0 ? `庫存:${product.stock} 件` : "⚠️ 已售完"}
        </p>
        <button
          className="w-full bg-green-600 text-white py-2 rounded hover:bg-green-700 transition"
          disabled={product.stock === 0}
          onClick={() => alert(`已加入購物車:${product.name}`)}
        >
          {product.stock > 0 ? '加入購物車' : '已售完'}
        </button>
      </div>
    </div>
  );
}
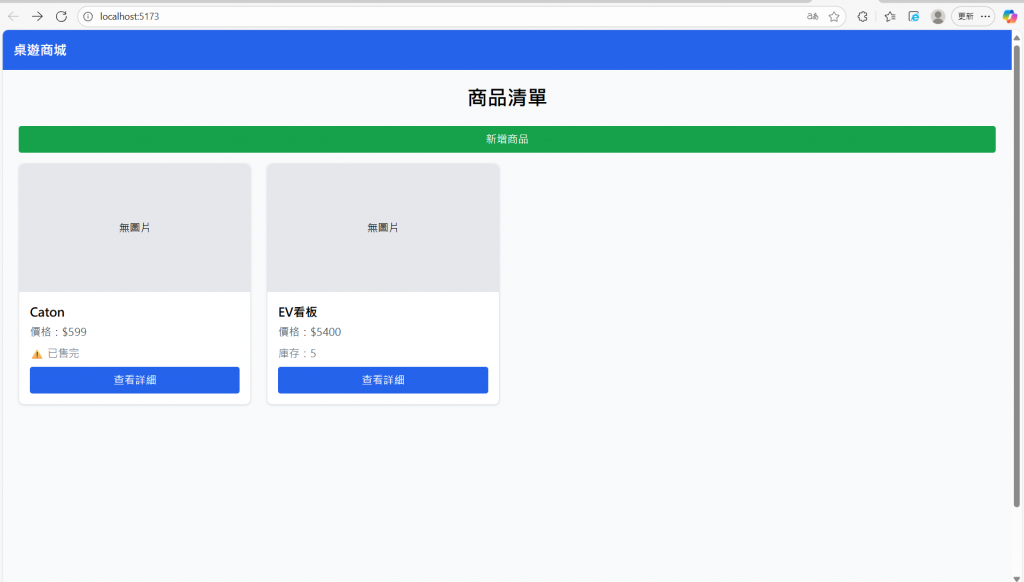
2️⃣ 新增商品表單 (含圖片上傳)
在 src/pages/Products.jsx 新增表單,利用 FormData 上傳文字與圖片到後端 /api/products。
// Products.jsx
import { useState } from "react";
import axios from "axios";

export default function Products() {
  const [formData, setFormData] = useState({
    name: "",
    price: "",
    description: "",
    stock: ""
  });
  const [image, setImage] = useState(null);
  const [message, setMessage] = useState("");

  const handleChange = e => setFormData({ ...formData, [e.target.name]: e.target.value });
  const handleFileChange = e => setImage(e.target.files[0]);

  const handleSubmit = async e => {
    e.preventDefault();
    try {
      const data = new FormData();
      Object.keys(formData).forEach(key => data.append(key, formData[key]));
      if (image) data.append("image", image);

      const res = await axios.post("http://localhost:3000/api/products", data, {
        headers: { "Content-Type": "multipart/form-data" }
      });

      setMessage(`✅ 新增成功:${res.data.name}`);
      setFormData({ name: "", price: "", description: "", stock: "" });
      setImage(null);
    } catch (err) {
      console.error(err);
      setMessage("❌ 新增失敗");
    }
  };

  return (
    <div className="p-6 max-w-md mx-auto bg-white shadow rounded-lg">
      <h1 className="text-2xl font-bold mb-4">新增商品</h1>
      {message && <p className="mb-2">{message}</p>}
      <form onSubmit={handleSubmit} className="space-y-3">
        <input type="text" name="name" placeholder="商品名稱" value={formData.name} onChange={handleChange} className="w-full p-2 border rounded"/>
        <input type="number" name="price" placeholder="價格" value={formData.price} onChange={handleChange} className="w-full p-2 border rounded"/>
        <textarea name="description" placeholder="描述" value={formData.description} onChange={handleChange} className="w-full p-2 border rounded"/>
        <input type="number" name="stock" placeholder="庫存" value={formData.stock} onChange={handleChange} className="w-full p-2 border rounded"/>
        <input type="file" onChange={handleFileChange} className="w-full"/>
        <button type="submit" className="w-full bg-blue-600 text-white py-2 rounded hover:bg-blue-700 transition">新增商品</button>
      </form>
    </div>
  );
}
3️⃣ 前後端串接測試
後端:npx nodemon index.js,確認 /api/products 可接收 multipart/form-data。
前端:npm run dev,打開新增商品頁,填寫名稱、價格、描述、庫存,選擇圖片,按下「新增商品」,確認商品成功新增並可在首頁看到。
🐛 遇到的問題
圖片上傳失敗:後端需使用 multer,並設定 express.static('uploads')。
前端看不到圖片:前端要把 src 改成完整路徑 http://localhost:3000${product.image}。
CORS:前後端不同埠號要加上 cors()。
💡 Day11 收穫

