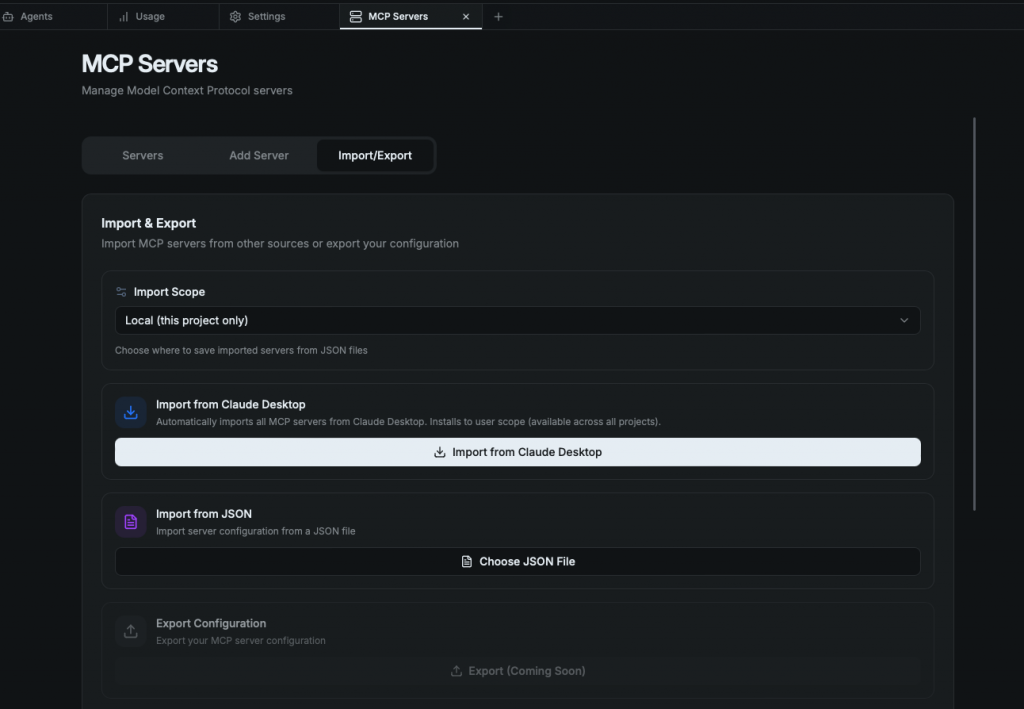
iT邦幫忙

2025 iThome 鐵人賽

DAY 10
2
自我挑戰組

攔截記憶碼:每日一小時記錄技術學習系列 第 10

Day 9 - opcode:Claude Code 的視覺化指揮中心

  • 分享至 

  • xImage
  •  

https://ithelp.ithome.com.tw/upload/images/20250924/201493017CMMiL9IzT.png

攔截源頭

  • 發現管道:每天都可以在 Thread 上發現新的酷東西
  • 攔截 Github:opcode
  • 攔截原因:我平常用 Claude Code 主要靠 CLI,久了發現 session 多到難以管理,MCP server 也要自己手動跑。看到有人做了 GUI,把所有 Claude Code 的 session、agent、MCP 管理、甚至 usage dashboard 整合在一起,立刻覺得這就是缺的拼圖

MCP Server 管理是真的很方便

技術初探

  • 官方定義:opcode 是一個基於 Tauri 2 開發的桌面應用,專門用來管理 Claude Code,提供 GUI + 工具集,讓使用 Claude Code 更直觀
  • 核心賣點:
    • Project & Session Management:可視化管理所有 Claude Code 專案與 session
    • CC Agents:建立、管理自訂 Claude Code agents
    • Usage Analytics Dashboard:追蹤使用量,方便控管 token 成本
    • MCP Server Management:一鍵管理 MCP server
    • Timeline & Checkpoints:回溯 session 的過程
    • CLAUDE.md Management:文件統一管理
  • 適用場景:
    • Claude Code 重度使用者
    • MCP server 管理需求高
    • 想要更直覺管理多個 AI agent、session 的人

實戰使用

快速安裝

目前要 Git Clone 專案後 Build:Release Executables Will Be Published Soon

預先安裝

Rust (1.70.0 or later)
# Install via rustup
curl --proto '=https' --tlsv1.2 -sSf https://sh.rustup.rs | sh

安裝後需要 source "$HOME/.cargo/env"

Bun (latest version)
# Install bun
curl -fsSL https://bun.sh/install | bash
Git
# Usually pre-installed, but if not:
# Ubuntu/Debian: sudo apt install git
# macOS: brew install git
# Windows: Download from https://git-scm.com
Claude Code CLI

https://github.com/anthropics/claude-code

Platform-Specific Dependencies(Mac)
# Install Xcode Command Line Tools
xcode-select --install

# Install additional dependencies via Homebrew (optional)
brew install pkg-config

Build Steps

Clone the Repository
git clone https://github.com/getAsterisk/opcode.git
cd opcode
Install Frontend Dependencies
bun install
Build the Application
# Build the application
bun run tauri build

# The built executable will be in:
# - Linux: src-tauri/target/release/
# - macOS: src-tauri/target/release/
# - Windows: src-tauri/target/release/

Hello World:打開專案

打開 opcode 後,會自動掃描 ~/.claude/projects/,顯示所有 Claude Code 專案,像是專案總管一樣。

建立新 Agent

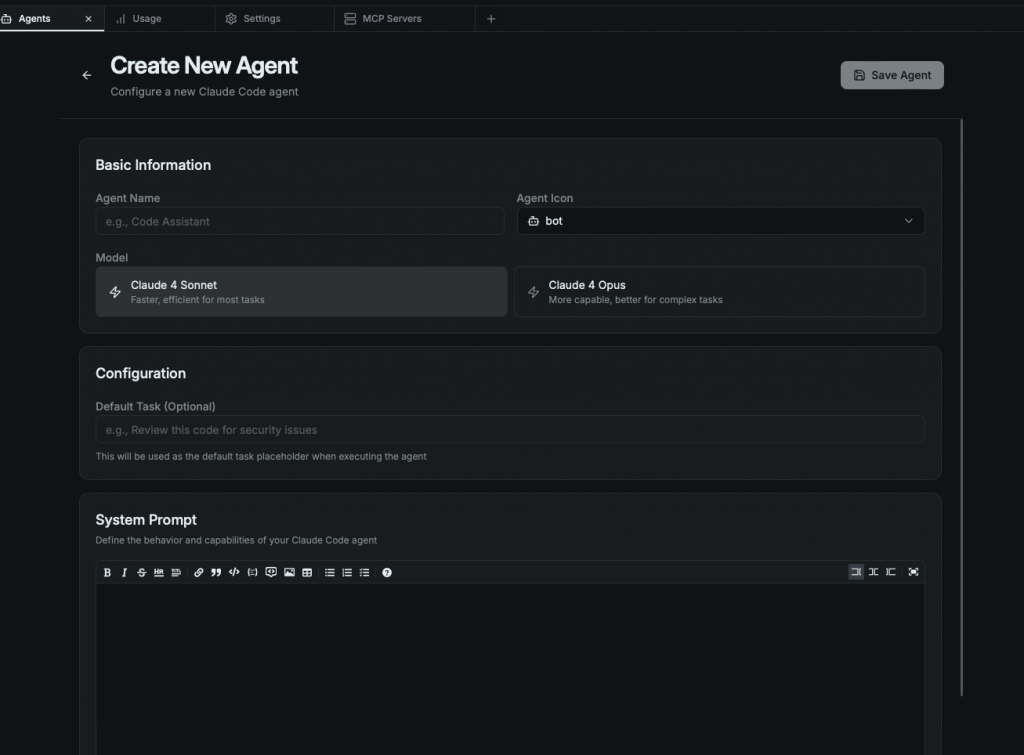
GUI 裡有 CC Agents 功能,可以直接建立自訂 agent(等於以前要寫配置檔,現在用 GUI 完成)。

https://ithelp.ithome.com.tw/upload/images/20250924/20149301bNj6gKQJ4M.png

使用 MCP Server 管理

以前要自己在 CLI 跑 npx @modelcontextprotocol/server-xxx,現在 GUI 裡就能直接啟停 MCP server

https://ithelp.ithome.com.tw/upload/images/20250924/20149301Cj07mAjmxO.png

Usage Analytics

opcode 內建 dashboard,能看到 Claude Code 用量趨勢,對於控管 API 成本特別方便。

踩坑筆記

Rust 安裝

安裝完之後要加入環境變數才能正確執行 Rust 指令

相依套件需要安裝

一開始忘記安裝 Mac 相依套件所以遇到錯誤:
https://ithelp.ithome.com.tw/upload/images/20250924/20149301tgTM3IcEWf.png

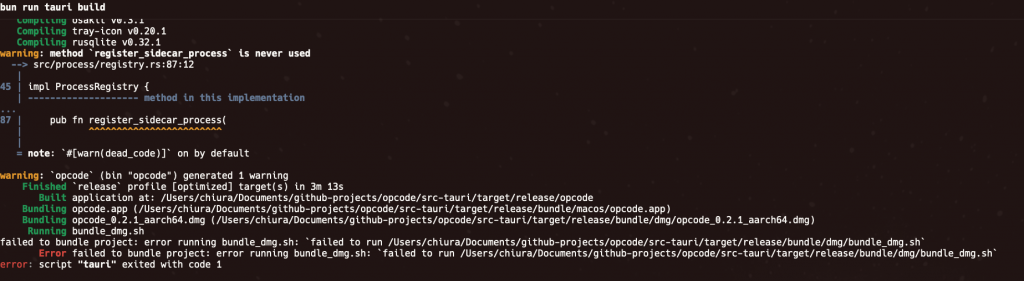
解法:安裝 pkg-config 後解決

記憶碼摘要

技術:opcode
分類:Claude Code 工具 / GUI 管理器
難度:⭐⭐⭐☆☆(1-5顆星)
實用度:⭐⭐⭐⭐☆(1-5顆星)
一句話:讓 Claude Code 從 CLI 跨進 GUI,成為視覺化的指揮中心
關鍵指令:brew install winfunc/tap/opcode
適用情境:Claude Code 重度使用、需要管理多個 session / MCP server 的人

結語

用了 opcode,我覺得最大的感受是:Claude Code 終於有「總控台」了。不再只是 CLI,而是像一個 IDE,能讓我快速切換 session、建立 agent、管理 MCP,甚至看到用量報表。

這對我來說的啟發是:AI 工具要普及,不一定要功能更多,而是要降低「使用成本」—— GUI 就是其中一個解法。


上一篇
Day 8 - Frogmouth:在終端機裡優雅瀏覽 Markdown 文件
下一篇
Day 10 - AI Elements:幫你快速組裝 AI 應用的 UI 積木庫
系列文
攔截記憶碼:每日一小時記錄技術學習14
圖片
  熱門推薦
圖片
{{ item.channelVendor }} | {{ item.webinarstarted }} |
{{ formatDate(item.duration) }}
直播中

尚未有邦友留言

立即登入留言