🎯 系列目標:用 30 天時間,從零開始打造一個專屬輔大學生的課表生成 Chrome 擴充功能
👨💻 作者:輔大智慧資安 412580084
📅 Day 17:Chrome Extension 實作篇 - 組件協作與基礎消息傳遞
昨天我們學會了在網頁中注入「我的課表」按鈕,今天我們要深入學習如何讓 Content Script 與 Background Script 協同工作,建立基本的自動化課表生成流程!
今天我們要完成:
在前面的學習中,我們分別建立了三個主要組件:
我們採用「中央控制」模式:
Content Script ──────┐
                     ▼
               Background Script
                     ▲
Popup Script ────────┘
| 模組 | 責任說明 |
|---|---|
| Content Script | 1. 注入按鈕到網頁2. 監聽用戶點擊3. 發送消息給 Background4. 顯示處理結果給用戶 |
| Background Script | 1. 接收來自 Content/Popup 的消息2. 執行核心業務邏輯3. 管理分頁和資料4. 協調各組件工作 |
| Popup Script | 1. 提供用戶操作介面2. 發送消息給 Background3. 顯示處理狀態和結果 |
在開始實作之前,我們先了解整個課表生成的基本流程:
flowchart TD
    A[用戶點擊「我的課表」按鈕] --> B[Content Script 發送消息]
    B --> C[Background Script 接收處理]
    C --> D[執行基本處理流程]
    D --> E[回應處理結果]
    E --> F[顯示結果給用戶]
這是整個系統的核心,負責接收和處理消息:
// Background Script 的基本消息監聽器
chrome.runtime.onMessage.addListener((request, sender, sendResponse) => {
  console.log('📨 Background 收到消息:', request);

  // 檢查消息類型
  if (request.action === 'generateSchedule') {
    console.log('🚀 開始課表生成流程');
    handleBasicScheduleGeneration(request, sendResponse);
    return true; // 保持消息通道開放
  }

  // 其他消息類型處理...
  console.log('❓ 未知的消息類型:', request.action);
  sendResponse({ success: false, error: '未知的操作類型' });
});
說明:
onMessage.addListener 監聽來自其他組件的消息request.action 用來區分不同的操作類型return true 保持消息通道開放,允許非同步回應將課表生成流程簡化為基本版本,透過chrome.tabs.create()可以開啟新分頁:
// 基本的課表生成處理函數
async function handleBasicScheduleGeneration(request, sendResponse) {
  try {
    console.log('🗺️ 開始基本課表生成流程');

    // 步驟 1:記錄請求資訊
    console.log('📝 步驟 1: 記錄用戶請求');
    console.log('來源頁面:', request.data.url);
    console.log('請求時間:', request.data.timestamp);

    // 步驟 2:模擬基本處理
    console.log('⚙️ 步驟 2: 執行基本處理');
    await simulateProcessing();

    // 步驟 3:開啟結果頁面
    console.log('🎉 步驟 3: 開啟課表結果頁面');
    chrome.tabs.create({ url: 'schedule.html' });

    // 成功回應
    sendResponse({
      success: true,
      message: '基本課表生成流程完成',
      data: {
        processedAt: new Date().toISOString(),
        fromUrl: request.data.url
      }
    });

  } catch (error) {
    console.error('❌ 課表生成流程失敗:', error);
    sendResponse({
      success: false,
      error: error.message,
      timestamp: new Date().toISOString()
    });
  }
}

// 模擬處理時間
function simulateProcessing() {
  return new Promise(resolve => {
    console.log('⏳ 模擬處理中...');
    setTimeout(() => {
      console.log('✅ 模擬處理完成');
      resolve();
    }, 2000); // 模擬 2 秒處理時間
  });
}
由於 Background Script 現在處理所有複雜邏輯,Content Script 可以專注於使用者介面:
// 優化的按鈕點擊處理
function handleScheduleButtonClick(event) {
  event.preventDefault();
  console.log('📊 「我的課表」按鈕被點擊');

  const button = event.target;
  const originalText = button.textContent;

  // 更新按鈕狀態
  setButtonProcessing(button);

  // 發送消息給 background script
  chrome.runtime.sendMessage({
    action: 'generateSchedule',
    source: 'webpage',
    data: {
      url: window.location.href,
      timestamp: new Date().toISOString()
    }
  }, (response) => {
    // 處理回應並恢復按鈕狀態
    handleScheduleResponse(button, originalText, response);
  });
}

// 設定按鈕處理中狀態
function setButtonProcessing(button) {
  button.textContent = '⏳ 處理中...';
  button.style.pointerEvents = 'none';
  button.style.opacity = '0.7';
}

// 處理背景腳本的回應
function handleScheduleResponse(button, originalText, response) {
  // 恢復按鈕狀態
  button.textContent = originalText;
  button.style.pointerEvents = 'auto';
  button.style.opacity = '1';

  if (response && response.success) {
    console.log('✅ 課表生成成功');
    showNotification('課表生成成功!正在開啟結果頁面...', 'success');
  } else {
    console.error('❌ 課表生成失敗:', response?.error);
    showNotification('課表生成失敗:' + (response?.error || '未知錯誤'), 'error');
  }
}
background.js:加入今天學習的基本流程控制邏輯content.js:優化按鈕互動處理在 Chrome 擴充功能管理頁面重新載入
https://portal.fju.edu.tw/student/

應該會開啟 schedule.html 頁面(目前尚未建立因此以下畫面為正常的)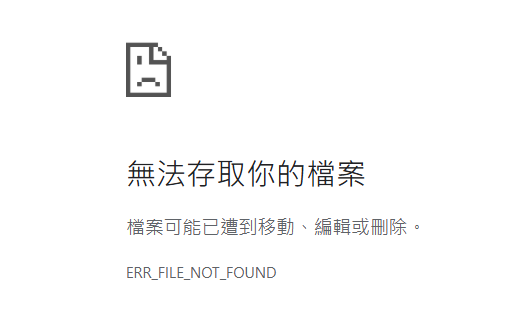
檢查日誌是否為以下情況即成功 (在schedule.html 中按下 F12 檢查)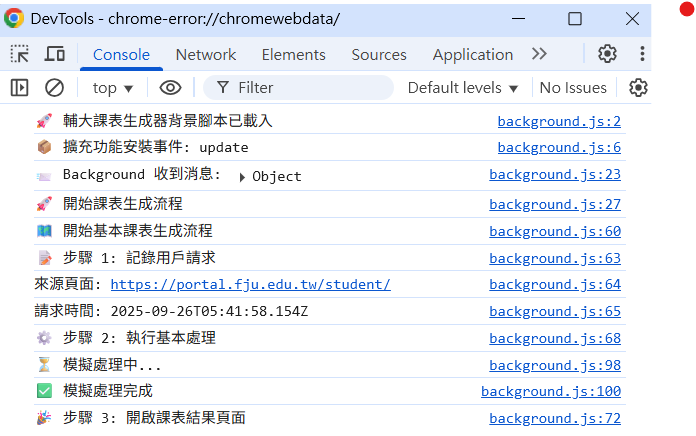
Day 18 我們將深入學習 Background Script 分頁控制機制
 alan_1024
