目前為止我們已經有了骨架版面(Day12)、頁籤切換(Day13),也寫過TodoApp作為練習。今天要正式開始做AI工具箱的第一個小工具:Chat介面
import { useState } from "react"

export default function ChatBox(){
  const [messages,setMessages] = useState([
    { id:1, role:"bot", text:"哈囉!我是AI助手,有什麼可以幫你?" }
  ])
  const [input,setInput] = useState("")

  const sendMessage=(e)=>{
    e.preventDefault()
    const text=input.trim()
    if(!text) return
    setMessages(prev=>[
      ...prev,
      { id:Date.now(), role:"user", text }
    ])
    setInput("")
  }

  return (
    <div className="flex flex-col h-full border rounded bg-white">
      {/* 對話區 */}
      <div className="flex-1 overflow-y-auto p-4 space-y-3">
        {messages.map(msg=>(
          <div
            key={msg.id}
            className={`p-3 rounded-lg max-w-xs ${
              msg.role==="user"
                ? "ml-auto bg-blue-600 text-white"
                : "bg-gray-200 text-gray-800"
            }`}
          >
            {msg.text}
          </div>
        ))}
      </div>

      {/* 輸入框 */}
      <form onSubmit={sendMessage} className="flex border-t">
        <input
          className="flex-1 px-3 py-2 outline-none"
          placeholder="輸入訊息..."
          value={input}
          onChange={e=>setInput(e.target.value)}
        />
        <button className="px-4 bg-blue-600 text-white">送出</button>
      </form>
    </div>
  )
}
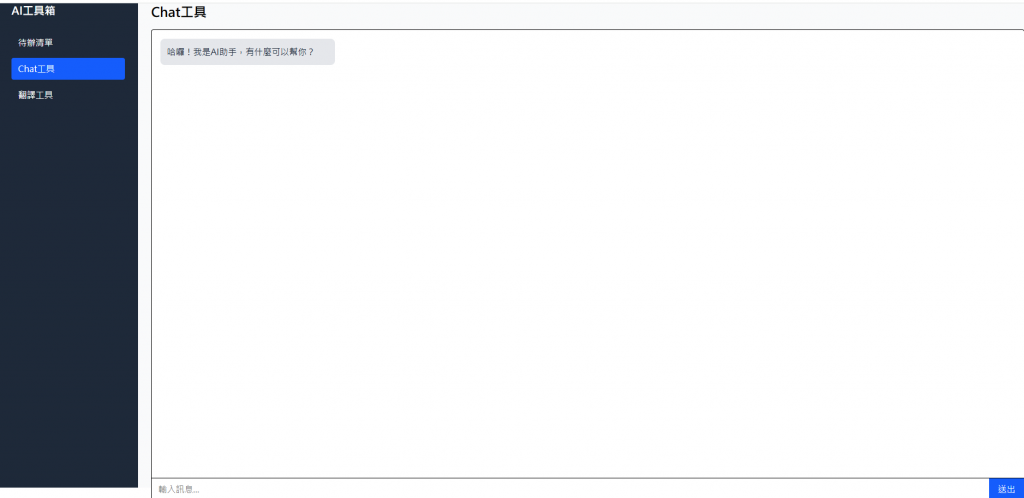
今天先做出這個畫面與chat的開場白,之後預計會在這邊接上AI Agent/LLM對話功能。