前面有介紹了 Spring Boot Security 設定與認證 (DB/AD/JWT/Oauth2)等,這裡說明測試方式與測試範例,因為不是每個專案都需要提供這麼所有的認證,後續應用於系統專案時可以參考與再調整,例如前後端分離的系統,也許後端只需要JWT認證就可以 (另如 Vue + Spring Boot),另外需要進一步了解系統流程,建議熟悉Debug方式執行系統,很多地方我也是使用Debug以及 Logger來除錯及找出問題處理與解決方法。
確認systemEnvReader.getProperty取得資料
example: systemEnvReader.getProperty("LOGIN_PAGE_URL", SecurityConstants.LOGIN_PAGE_URL);
** 確認系統Spring Boot的啟動**

測試時,建議清除瀏覽器的瀏覽紀錄,有些測試畫面不會呈現
**增加測試SysUserProfile資料(DataBase 認證用)
位置:src/test/java/tw/lewishome/webapp/database/primary/repository/SysUserProfileRepositoryTest
**省略部分是,若有參考Spring Boot資料庫設計與存取-單一 Key URL: https://ithelp.ithome.com.tw/articles/10398629 ,應該已經有此測試程式,只需增加testCreateSurityUser Method即可)
package tw.lewishome.webapp.database.primary.repository;
import static org.junit.jupiter.api.Assertions.*;
import java.util.List;
import java.util.Optional;
import org.junit.jupiter.api.BeforeEach;
import org.junit.jupiter.api.AfterEach;
import org.junit.jupiter.api.Test;
import org.springframework.beans.factory.annotation.Autowired;
import org.springframework.boot.test.context.SpringBootTest;
import org.springframework.test.context.TestPropertySource;
import tw.lewishome.webapp.base.utility.common.SM3Utils;
import tw.lewishome.webapp.database.primary.entity.SysUserProfileEntity;
/**
* SysUserProfileRepository Integration Tests
*
* Tests for SysUserProfileRepository using real repository with
*
* @BeforeEach to add test data and @AfterEach to clean up.
*
* @author lewis
*/
@SpringBootTest
@TestPropertySource(locations = "classpath:application.properties")
public class SysUserProfileRepositoryTest {
@Autowired
private SysUserProfileRepository sysUserProfileRepository;
private SysUserProfileEntity testEntity;
//**省略 */
@Test
void testCreateSurityUser(){
// Create CreateSurity test entity
testEntity = new SysUserProfileEntity();
SysUserProfileEntity.DataKey dataKey1 = new SysUserProfileEntity.DataKey();
dataKey1.setUserId("TEST_USER");
testEntity.setDataKey(dataKey1);
testEntity.setUserName("Test User One");
testEntity.setUserEmail("testuser1@example.com");
testEntity.setUserDept("IT Department");
testEntity.setUserExt("1234");
String password = SM3Utils.encrypt("Password1");
testEntity.setUserPassword(password);
testEntity.setUserLevel("5");
testEntity.setUserLastAuth("0");
testEntity.setUserMenuLayoutTop(true);
testEntity.setUserIsVaild(true);
testEntity.setExpired(false);
testEntity.setLocked(false);
sysUserProfileRepository.saveAndFlush(testEntity);
}
}
執行測試產生資料
 !
!
https://ithelp.ithome.com.tw/upload/images/20251210/201394772VnaCNkKhB.png

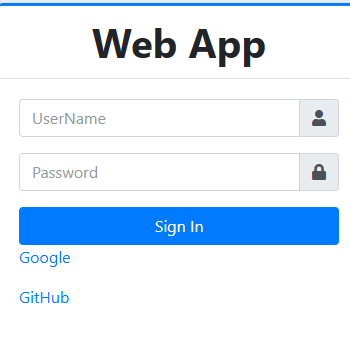
預設三組 BBB:BBB, CCC:CCC AAA:AAA
    // Memory User, password map
    private Map<String, String> MapUserAuth = Stream
            .of(new String[][] { { "AAA", "AAA" }, { "BBB", "BBB" }, { "CCC", "CCC" }
            }).collect(Collectors.toMap(data -> data[0], data -> data[1]));
登入成功訊息

登入成功後新增 DB (ast_auth)

系統導向 Google登入認證畫面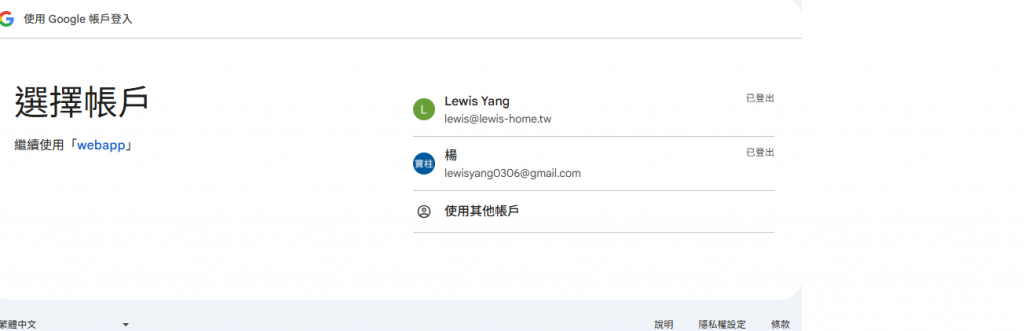
Google登入認證
Google登入授權畫面
Google登入成功後訊息
Google 登入成功後新增 DB (last_auth)
系統導向 Github 登入認證畫面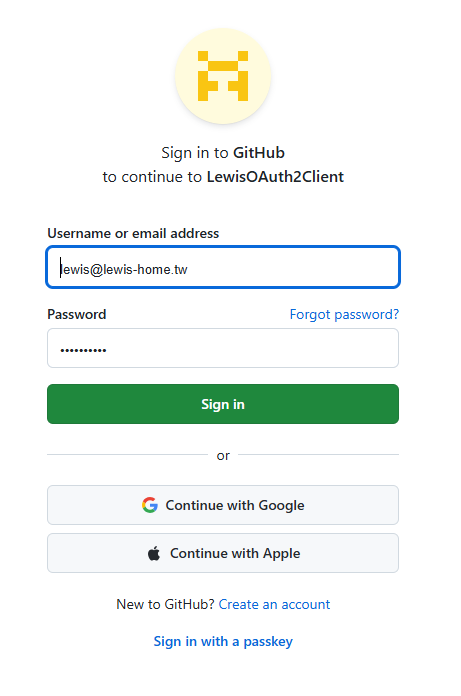
Github 登入成功後訊息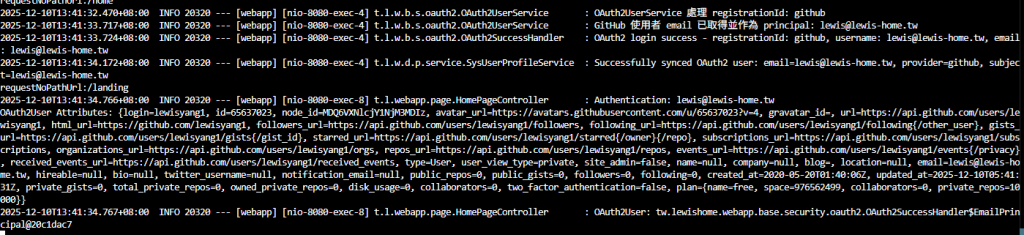
Github 登入成功後新增 DB (last_auth) 這裡因為 Google Email與 Github Email相同,所以會覆蓋。

確認有安裝REST Client 以及系統已啟動。
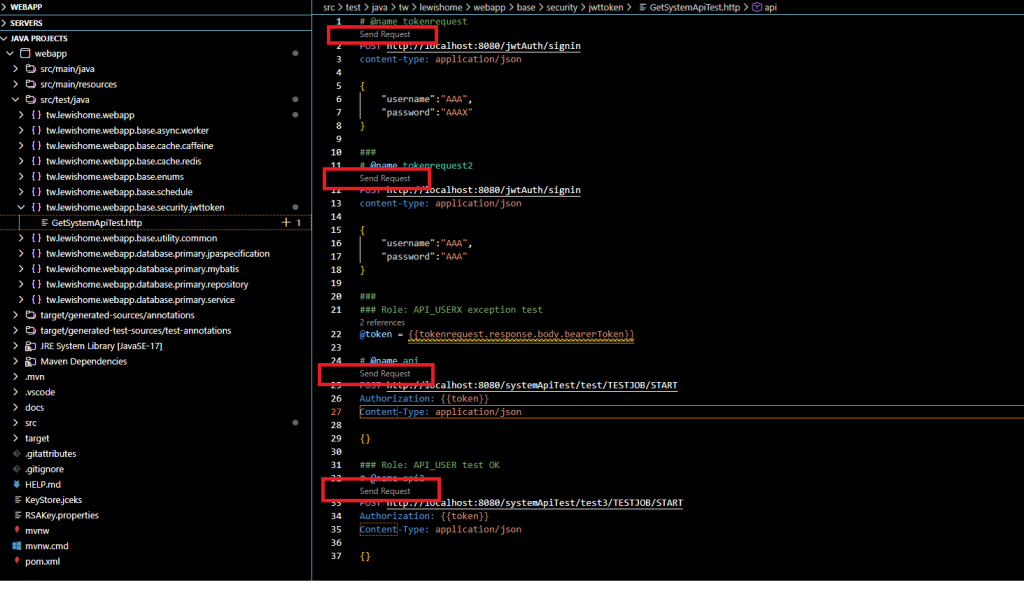
增加測試GetSystemApiTest.http(JWT 認證Rest Client script),注意:副檔名為 .http
位置:src/test/java/tw/lewishome/webapp/base/security/jwttoken/GetSystemApiTest.http
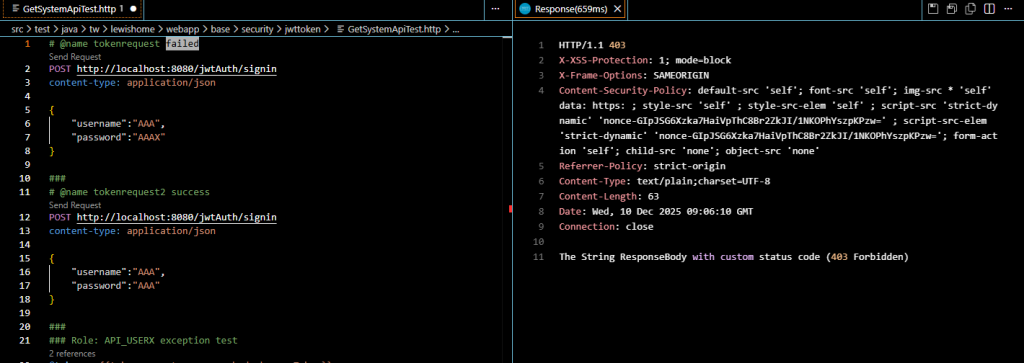
# @name tokenrequest failed
POST http://localhost:8080/jwtAuth/signin
content-type: application/json
{
"username":"AAA",
"password":"AAAX"
}
###
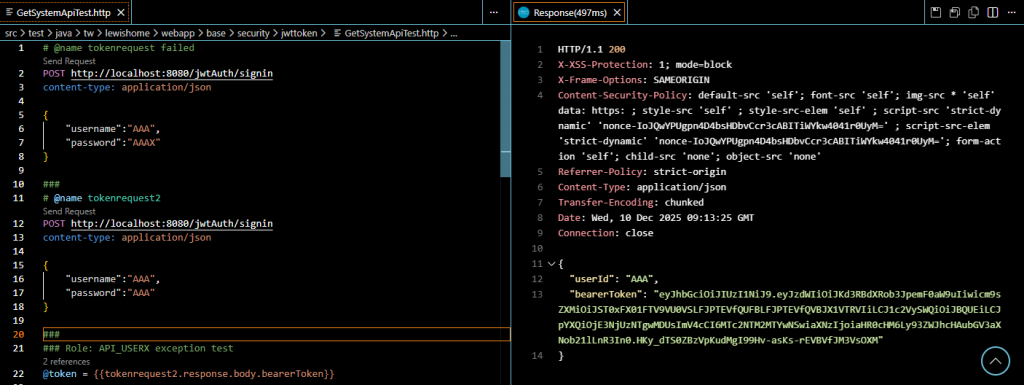
# @name tokenrequest2
POST http://localhost:8080/jwtAuth/signin
content-type: application/json
{
"username":"AAA",
"password":"AAA"
}
###
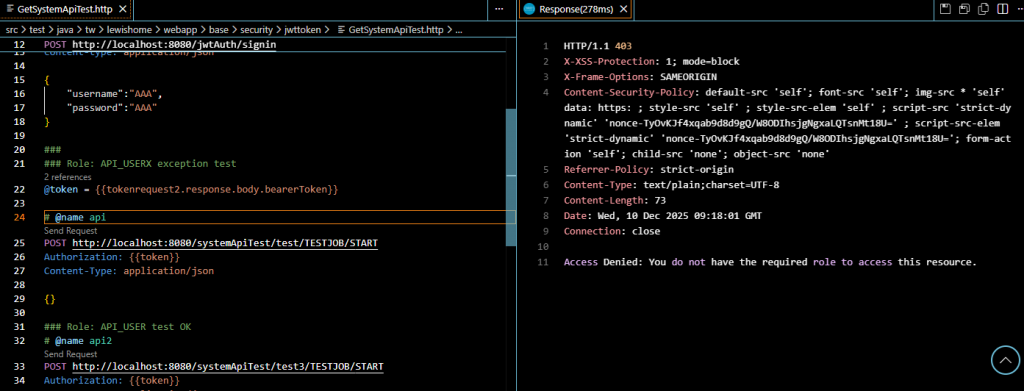
### Role: API_USERX exception test
@token = {{tokenrequest2.response.body.bearerToken}}
# @name api
POST http://localhost:8080/systemApiTest/test/TESTJOB/START
Authorization: {{token}}
Content-Type: application/json
{}
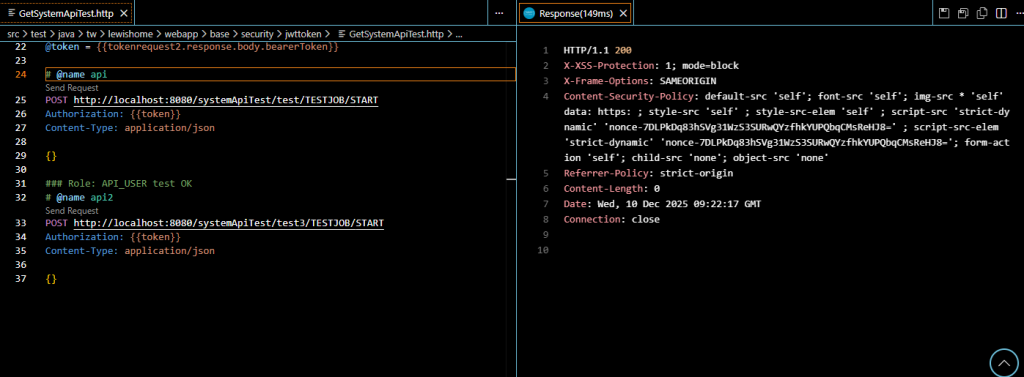
### Role: API_USER test OK
# @name api2
POST http://localhost:8080/systemApiTest/test3/TESTJOB/START
Authorization: {{token}}
Content-Type: application/json
{}
http: 403
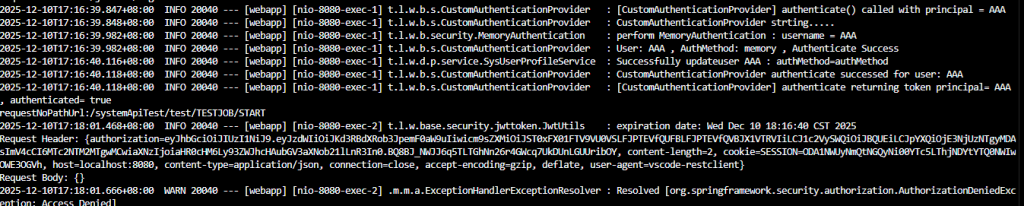
執行紀錄(CustomAuthenticationProvider)

http: 200 以及 取得 bearerToken
執行紀錄(CustomAuthenticationProvider)
[CustomAuthenticationProvider] authenticate returning token principal= AAA , authenticated= true

http: 302
執行紀錄(CustomAuthenticationProvider)
Resolved [org.springframework.security.authorization.AuthorizationDeniedException: Access Denied]
Method 執行結果(test JobId = TESTJOB & func Value ==> START)
 lewisyang

 iThome鐵人賽