之前在這篇介紹過 <ng-content> 可以達成嵌入式設計,但是透過這種方法只能做到模板的部分,也就是在 A 模板中嵌入 B 模板,要是想在 A 中順便嵌入 B 的組件內容呢?
不太理解文字的意思?繼續看下去。
app.ts
import {Component}       from 'angular2/core';
import {ParentComponent} from './parent';
import {ChildComponent}  from './child';

@Component({
    selector: 'my-app',
    template: `
        <h2>App Component</h2>
        <my-parent>
           <my-child></my-child>
        </my-parent>
    `,
    directives:[ParentComponent,ChildComponent]
})
export class AppComponent {
}
主程式的樣子,要求 <my-parent> 裡面包著一個 <my-child>
child.ts
import {Component} from 'angular2/core';

@Component({
    selector: 'my-child',
    template: `
        <div>Child Component</div>
    `
})
export class ChildComponent {
    name:string = 'childName';
}
name 是我們待會會用到的東西。
parent.ts
import {Component,ContentChild} from 'angular2/core';
import {ChildComponent}         from './child';

@Component({
    selector: 'my-parent',
    template: `
        <div>Parent Component</div>
        <ng-content></ng-content>
        <p>{{child.name}}</p>
    `
})
export class ParentComponent {
    @ContentChild(ChildComponent)
    child:ChildComponent;
}
<p>{{child.name}}</p> 這邊要求 child:ChildComponent 的物件,也就是 parent 直接調用 child 的內容,這邊是透過 @ContentChild 來處理, 其實就跟注入的概念很像。


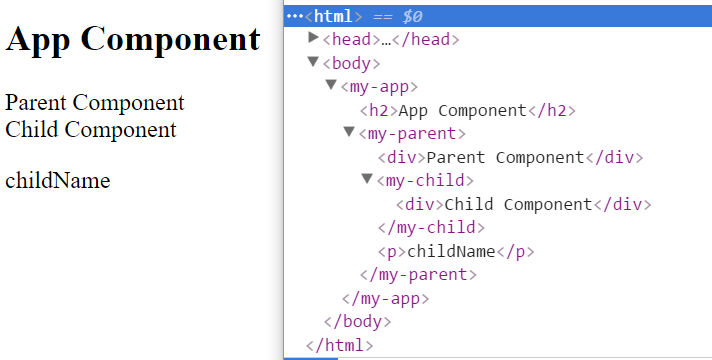
 iThome鐵人賽