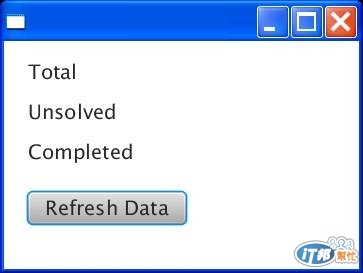
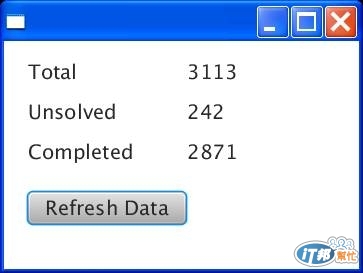
今天分享使用Java FX Scene Builder製作簡單UI介面,"拖、拉、放"來排版應該是大家都喜歡的吧,之前分享過純coding的方式似乎不太人性(應該是有人比較喜歡hard coding),使用SceneBuilder當然要對UI元件有些了解,特別是container,anyway,SceneBuilder是以FXML作為基礎的,存檔之後其實就是XML的code,Java FX啟動後載入fxml檔就會出現在scenebuilder所製作的視窗,如果要進一步處理Event的話,相關UI元件需要設定fx:id,然後在對應Controller的java檔引入,並進行coding,今天自己寫的這個例子用gridview與VBOX排版,按下button,就會顯示從資料庫來的數字,程式碼如下。
Main
/*
 * To change this template, choose Tools | Templates
 * and open the template in the editor.
 */
package myfxml;

import javafx.application.Application;
import javafx.fxml.FXMLLoader;
import javafx.scene.Parent;
import javafx.scene.Scene;
import javafx.stage.Stage;

/**
 *
 * @author joombuopre
 */
public class MyFXML extends Application {

    @Override
    public void start(Stage stage) throws Exception {
        Parent root = FXMLLoader.load(getClass().getResource("Sample.fxml")); //載入fxml檔,所有UI介面設定都在
                                                                                                                                   //fxml檔裡
        Scene scene = new Scene(root);

        stage.setScene(scene);
        stage.show();
    }

    /**
     * The main() method is ignored in correctly deployed JavaFX application.
     * main() serves only as fallback in case the application can not be
     * launched through deployment artifacts, e.g., in IDEs with limited FX
     * support. NetBeans ignores main().
     *
     * @param args the command line arguments
     */
    public static void main(String[] args) {
        launch(args);
    }
}
Sample.fxml
<?xml version="1.0" encoding="UTF-8"?>

<?import java.lang.*?>
<?import java.util.*?>
<?import javafx.scene.*?>
<?import javafx.scene.control.*?>
<?import javafx.scene.layout.*?>

<AnchorPane id="AnchorPane" prefHeight="228.0" prefWidth="355.0" xmlns:fx="http://javafx.com/fxml" fx:controller="myfxml.SampleController">//指定相關Event操作由SimpleController.java處理
  <children>
    <VBox layoutX="24.0" layoutY="11.0" prefHeight="200.0" prefWidth="317.0">
      <children>
        <GridPane alignment="CENTER" prefHeight="120.0" prefWidth="319.0">
          <children>
            <Label alignment="CENTER" contentDisplay="CENTER" text="Total" GridPane.columnIndex="0" GridPane.rowIndex="0" />
            <Label text="Unsolved" GridPane.columnIndex="0" GridPane.rowIndex="1" />
            <Label text="Completed" GridPane.columnIndex="0" GridPane.rowIndex="2" />
            <Label fx:id="total" GridPane.columnIndex="1" GridPane.rowIndex="0">
              <graphicTextGap>
                <Long fx:value="4" />
              </graphicTextGap>
            </Label>
            <Label fx:id="unsolved" GridPane.columnIndex="1" GridPane.rowIndex="1" /> //要設定fx:id
            <Label fx:id="completed" GridPane.columnIndex="1" GridPane.rowIndex="2" /> //要設定fx:id
          </children>
          <columnConstraints>
            <ColumnConstraints hgrow="SOMETIMES" minWidth="10.0" prefWidth="100.0" />
            <ColumnConstraints hgrow="SOMETIMES" minWidth="10.0" prefWidth="100.0" />
          </columnConstraints>
          <rowConstraints>
            <RowConstraints maxHeight="40.0" minHeight="10.0" prefHeight="40.0" vgrow="SOMETIMES" />
            <RowConstraints maxHeight="40.0" minHeight="10.0" prefHeight="40.0" vgrow="SOMETIMES" />
            <RowConstraints maxHeight="40.0" minHeight="10.0" prefHeight="40.0" vgrow="SOMETIMES" />
          </rowConstraints>
        </GridPane>
        <Button fx:id="button" contentDisplay="CENTER" onAction="#handleButtonAction" text="Refresh Data" /> //要設定fx:id
      </children>
      <spacing>
        <Long fx:value="20" />
      </spacing>
    </VBox>
  </children>
</AnchorPane>
當然是不可能再半小時之內就UI的xml code搞定,當然是用SceneBuilder來的快
Scenebuilder截圖:
layout跟元件配置好後,相關的event handler,就會定義再另外一個java檔(SimpleController.java)
SimpleController.java
package myfxml;

import DAO.getData;
import java.net.URL;
import java.util.ResourceBundle;
import javafx.event.ActionEvent;
import javafx.fxml.FXML;
import javafx.fxml.Initializable;
import javafx.scene.control.Label;

/**
 *
 * @author joombuopre
 */
public class SampleController implements Initializable {


    @FXML //讀取屬性要加@FXML
    public Label total;
    public Label unsolved;
    public Label completed;

    @FXML //讀取屬性要加@FXML
    private void handleButtonAction(ActionEvent event) {//按下button
        getData gd=new getData();
        total.setText(gd.getCount().get(0)); //顯示數字(String)
        unsolved.setText(gd.getCount().get(1));
        completed.setText(gd.getCount().get(2));

    }

    @Override
    public void initialize(URL url, ResourceBundle rb) {
        // TODO
    }
}
Ouput:


