IT Infrastructure監控軟體琳琅滿目,其中又以Nagios為大宗
本文將透過Nagios Core建置Nagios Monitoring system於RHEL平台
後期將與Splunk進行整合
[Nagios overview]
Nagios是一個 open source 的監控軟體。它可以監控主機、網路設備等狀態與其運作服務,當異常狀況發生時可以在短時間內通知相關人員進場處理,使服務影響層面大幅降低。
更多介紹可參閱Nagios Overview
[System requirements]
官方需求,只要求Linux平台即可,本文測試環境規格如下:
OS: Rat Hat Enterprise Linux 6.2 64 bit
Linux Kernel: 2.6.32
CPU Type: Intel Xeon CPU E5-2620 2.00GHz
CPU Core: 8
Memory: 16GB
[Download Package]
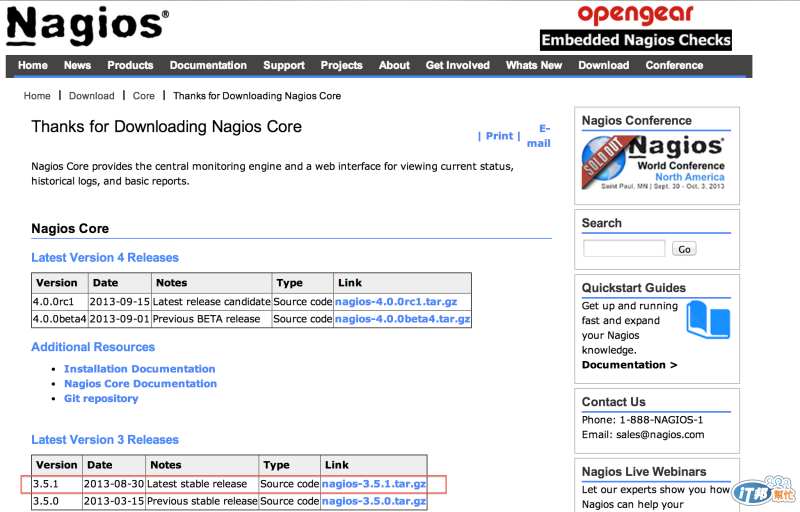
此次安裝版本為Nagios Core version 3,點此進入下載頁面,點選『Skip to download』後網頁將導引至版本下載頁面
下載nagios-3.5.1.tar.gz檔案,如下圖紅框所示:
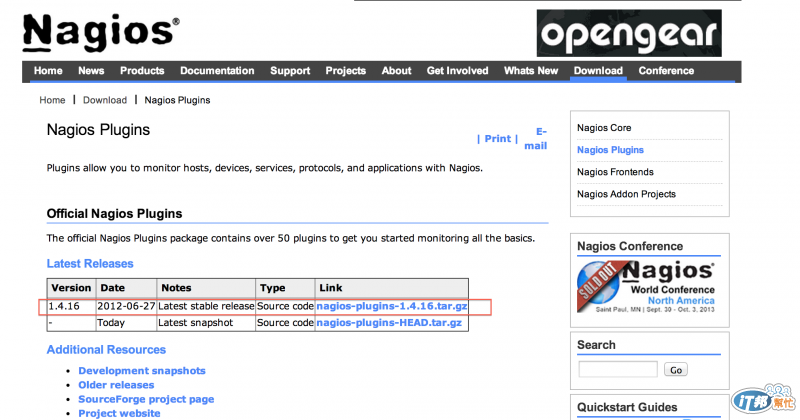
另外可下載基本的Nagios plugins,以便後續監控使用,點此進入下載頁面
下載nagios-plugins-1.4.16.tar.gz檔案,如下圖紅框所示:
[Install on Linux]
安裝Nagios前置作業,請先確認Linux Server是否已經存在下列套件:
・Apache
・PHP
・GCC compiler
・GD development libraries
・Openssl development libraries
若無安裝上述套件,請透過root帳號使用yum or rpm command進行安裝
下列指令皆以yum command進行實作,故請先將yum server組態檔設定完成
yum install httpd php gcc glibc glibc-common gd gd-devel openssl openssl-devel -y
上述套件安裝完畢後,則開始進行Nagios Core建置。以下指令皆使用root帳號進行操作
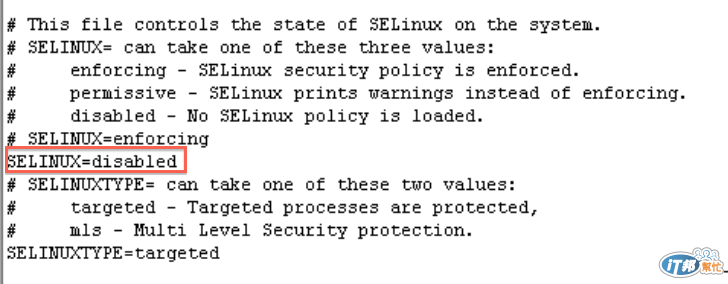
0. Modify SELinux Settings
此實作範例SELinux設定為disabled,可先透過getenforce command查詢SELinux Settings,如下圖示:

若需變更SELinux Settings,可參考下列步驟及紅框圖示進行異動,異動完畢需reboot才能套用新設定值
vi /etc/selinux/config
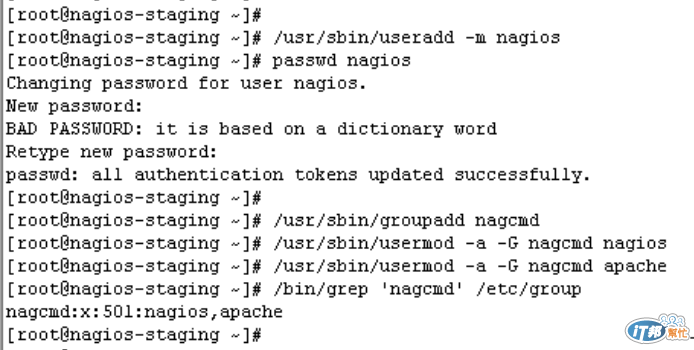
1. Create Account Information
此範例帳號:nagios and nagiosadmin密碼同一為12345678
#Create a new nagios user account and give it a password.
/usr/sbin/useradd -m nagios
passwd nagios
#Create a new nagcmd group for allowing external commands to be submitted through the web #interface. Add both the nagios user and the apache user to the group.
/usr/sbin/groupadd nagcmd
/usr/sbin/usermod -a -G nagcmd nagios
/usr/sbin/usermod -a -G nagcmd apache
/bin/grep 'nagcmd' /etc/group
執行結果如下圖示:
2. Compile and Install Nagios
此範例將下載的Nagios Core file放置於/root/plugin目錄下,請自行切換至該檔案放置目錄路徑
cd /root/plugin
tar -zxf nagios-3.5.1.tar.gz
cd nagios
bash configure --with-command-group=nagcmd
出現下列紅框處訊息,代表可執行後續步驟:

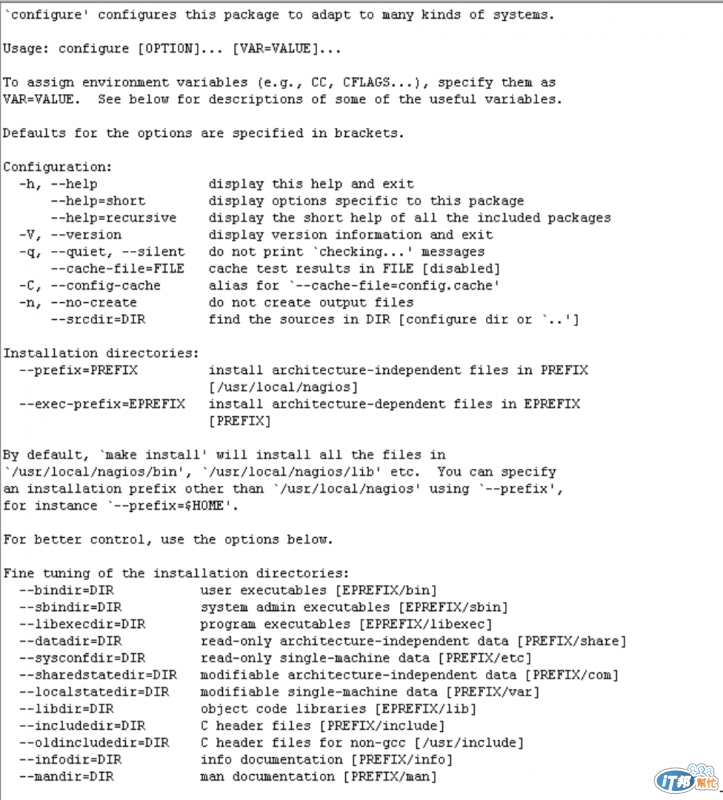
Nagios安裝完畢後預設目錄為:/usr/local/nagios,若需變更安裝目錄或其它參數,可執行下列指令,如下圖示:
bash configure -h
接下來開始進行Compile:
#Compile the Nagios source code.
make all
#Install binaries, init script, sample config files and set permissions on the external command directory.
make install
make install-init
make install-config
make install-commandmode
各個步驟用途如下圖示:

執行上述步驟完畢後請勿啓動Nagios daemon
3. Customize Configuration
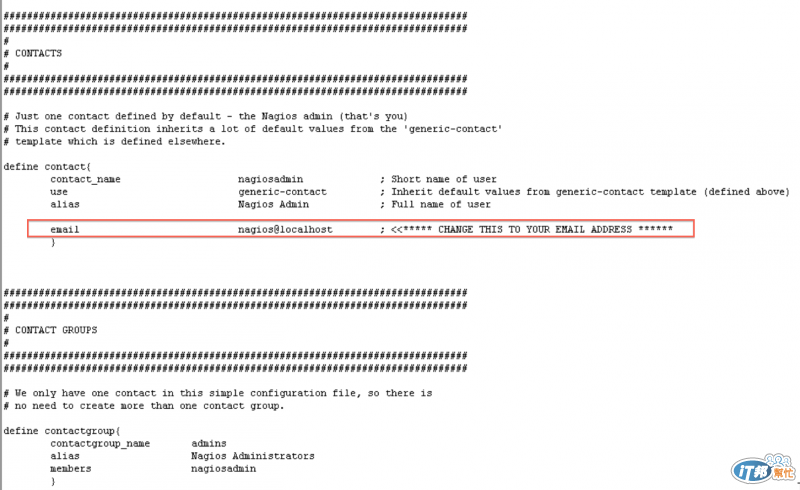
此步驟為變更Nagios管理者:nagiosadmin的聯絡email,如下圖紅框所示(此範例無任何異動):
vi /usr/local/nagios/etc/objects/contacts.cfg
4. Configure the Web Interface
此步驟為安裝Nagios web config,以及設定nagiosadmin登入密碼
隨後啓動apache daemon
#Install the Nagios web config file in the Apache conf.d directory.
make install-webconf
#Create a nagiosadmin account for logging into the Nagios web interface. Remember the password #you assign to this account - you'll need it later.
htpasswd -c /usr/local/nagios/etc/htpasswd.users nagiosadmin
#Restart Apache to make the new settings take effect.
service httpd restart
5. Compile and Install the Nagios Plugins
#Extract the Nagios plugins source code tarball.
cd /root/plugin
tar -zxf nagios-plugins-1.4.16.tar.gz
cd nagios-plugins-1.4.16
#Compile and install the plugins.
bash configure --with-nagios-user=nagios --with-nagios-group=nagios
make
make install
6. Start Nagios
此步驟將設定Nagios Server開機後自動啓動Nagios daemon
並透過/usr/local/nagios/bin/nagios binary file來檢查Nagios設定檔內容是否有誤
設定檔內容若為正確,則可正常啓動Nagios daemon
#Add Nagios to the list of system services and have it automatically start when the system boots.
chkconfig --add nagios
chkconfig nagios on
#Verify the sample Nagios configuration files.
/usr/local/nagios/bin/nagios -v /usr/local/nagios/etc/nagios.cfg
#If there are no errors, start Nagios.
service nagios start
[Use Nagios]
接下來打開瀏覽器,並於網址列中輸入:http://nagios-serverip/nagios
請將nagios-serverip自行更換為已完成安裝的Nagios Server IP
登入頁面如下圖所示:
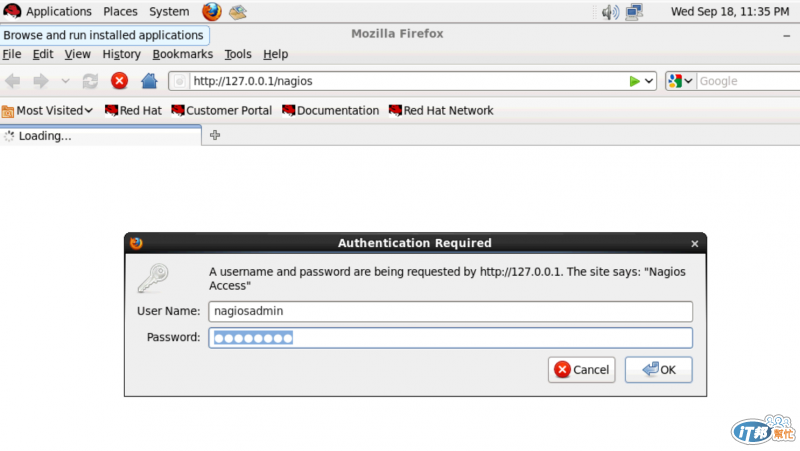
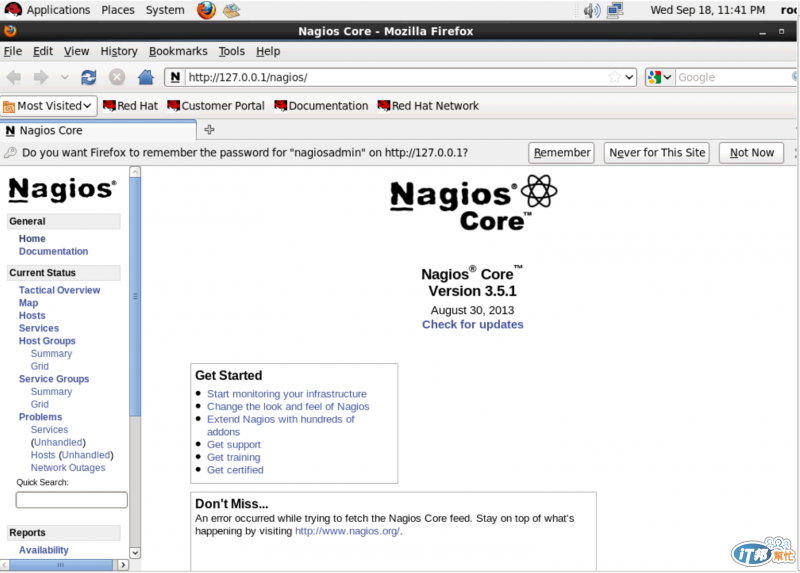
請於User Name欄位輸入nagiosadmin,Password欄位輸入12345678,並按下『OK』即可
之後即可開始使用Nagios,如下圖示:


 iThome鐵人賽