以PHP為開發語言的網站內容管理系統多如過江之鯽, 其中最有名的當屬Joomla, WordPress, 和Drupal, 擁護者各有所好, 我曾經用Drupal, 但是訝異於Drupal的效能表現比Joomla差, 就轉換到Joomla了.
上一篇: Linux Pi的奇幻旅程(22)-編譯Nginx
http://ithelp.ithome.com.tw/question/10137466
下一篇: Linux Pi的奇幻旅程(24)-Joomla!
http://ithelp.ithome.com.tw/question/10138331
所有: http://ithelp.ithome.com.tw/ironman6/player/bizpro/alll/1
在Raspberry Pi中建置了MySQL和Nginx, 這是許多網站系統的核心, 對於像Raspberry Pi這樣小型的電腦, 關聯式資料庫如MySQL等可能是沈重的負擔, 尤其是複雜且高度依賴資料庫來提供動態的網站內容的網站, 要在RaspberryPi上提供好的網站效能, 幾乎是不可能的任務, 當然還有許多很輕量級的網站內容管理系統是不需要關聯式資料庫的, 類似這種系統也是很好的選擇. 然而, 如果把Raspberry Pi專做網站伺服器, 而把關聯式資料庫安裝在擁有足夠運算與儲存資源的大型主機上, 再加上把許多的Raspberry Pi叢集起來, 小電腦也可以有超級運算的能力, 這也可以是很好的解決方案.
首先, 必需先更新系統:
pi@raspberrypi ~ $ sudo apt-get update
pi@raspberrypi ~ $ sudo apt-get upgrade
通常不更新系統不會有什麼問題, 但是今天我碰到了問題:
E: Unable to fetch some archives, maybe run apt-get update or try with --fix-missing?
原本想說昨天才更新的, 沒想到還真出了問題, 其實這問題我很少遇到的. 但在更新系統後, 問題就不見了.
安裝PHP比較Nginx複雜, 網路上有許多安裝PHP的方式, 最常見的是:
$ sudo apt-get install php5 php5-mysql
正在讀取套件清單... 完成
正在重建相依關係
正在讀取狀態資料... 完成
下列的額外套件將被安裝:
apache2-mpm-prefork apache2.2-bin apache2.2-common libapache2-mod-php5 libaprutil1-dbd-sqlite3 libaprutil1-ldap libmysqlclient18 php5-cli
php5-common
建議套件:
apache2-doc apache2-suexec apache2-suexec-custom php-pear
下列【新】套件將會被安裝:
apache2-mpm-prefork apache2.2-bin apache2.2-common libapache2-mod-php5 libaprutil1-dbd-sqlite3 libaprutil1-ldap libmysqlclient18 php5
php5-cli php5-common php5-mysql
升級 0 個,新安裝 11 個,移除 0 個,有 36 個未被升級。
需要下載 10.2 MB 的套件檔。
此操作完成之後,會多佔用 32.1 MB 的磁碟空間。
是否繼續進行 [Y/n]?
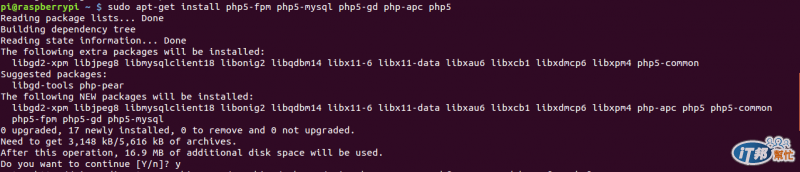
你會發現, 會有許多Apache相關的套件會被下載安裝的, 但是我用的是Nginx而不是Apache, 這並不是我想要的. 試了幾次之後, 終於找到安裝PHP-FPM的方式, 看似簡單, 其實有些玄機的. 因為安裝套件的順序不同, 可能導致不同的結果, 以下就是我安裝PHP-FPM方式:
pi@raspberrypi ~ $ sudo apt-get install php5-fpm php5-mysql php5-gd php-apc php5
PHP-FPM是PHP-FastCGI Process Manager, 是PHP新一代的FastCGI模組, 在PHP 5.4.0RC2之前都還是實驗性質, 因此, 安裝好PHP5之後, 檢查PHP版本的命令是php5-fpm:
pi@raspberrypi ~ $ php5-fpm -v
PHP 5.4.4-14+deb7u5 (fpm-fcgi) (built: Oct 13 2013 06:10:27)
Copyright (c) 1997-2009 The PHP Group
Zend Engine v2.4.0, Copyright (c) 1998-2012 Zend Technologies
這是一個舊的版本, 目前是5.4.20版. 就像Nginx的問題一樣, 使用APT的套件的可能風險就是用到舊版的. 我自己都是有新版出來就會重新編譯的. 但是這裡並不再像Nginx一樣用原始碼編譯, 而是仍然採用APT套件, 主要的原因是, 編譯PHP比Nginx複雜太多了, 遇到的問題也會很多. 就繼續打造網站吧.
到這裏, 已經有了Linux, Nginx, MySQL, 和PHP-FPM:

在開始安裝Joomla之前, 還必需設定網站環境.
首先, 先從Nginx開始, Nginx的設定目錄是在/etc/nignx之下.

在此目錄/etc/nginx之下, Nginx的主設定檔是檔案nginx.conf, 在這個設定檔中, 有兩行很重要的設定:
include /etc/nginx/conf.d/*.conf;
include /etc/nginx/sites-enabled/*;
第一個設定表示在目錄/etc/nginx/conf.d之下, 所有以conf為附檔名的檔案都是子設定檔. 但是在內定安裝的nginx架構下, 這個目錄/etc/nginx/conf.d是不存在的. 對於有需要設置子設定檔的情況, 則可以自行建立這個目錄, 並將子設定檔放入.
第二個設定表示Nginx會到目錄/etc/nginx/sites-enabled中去載入網站的設定檔. 在內定安裝中, 有一個網站設定檔default:
$ ls /etc/nginx/sites-enabled/
default
在這個設定檔中, 可設定網站的根目錄:
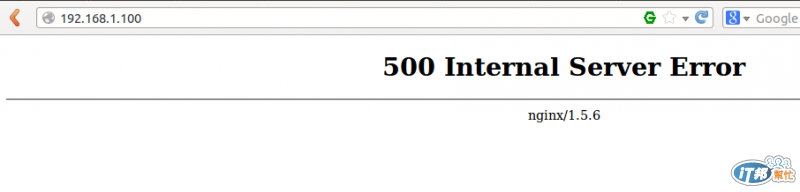
root /usr/share/nginx/www;
由於這個網站根目錄並不存在, 因此當連結到Raspberry Pi上的這個網站時, 會出現500 Internal Server Error的錯誤:
為了將網站放置到一般的使用者區, 例如/opt, 先在此目錄中設定網站根目錄, 也改此網站根目錄的權限給使用者www-data:
pi@raspberrypi ~ $ sudo mkdir -p /opt/www/bizpro
pi@raspberrypi ~ $ sudo chown -Rv www-data:www-data /opt/www/bizpro/
changed ownership of `/opt/www/bizpro/' from root:root to www-data:www-data
這時就可以修改設定檔/etc/nginx/sites-enabled/default, 將網站根目錄設為:
root /opt/www/bizpro;
重啟Nginx:
pi@raspberrypi ~ $ sudo /etc/init.d/nginx restart
Restarting nginx: nginx.
再連到http://192.168.1.100/試試:
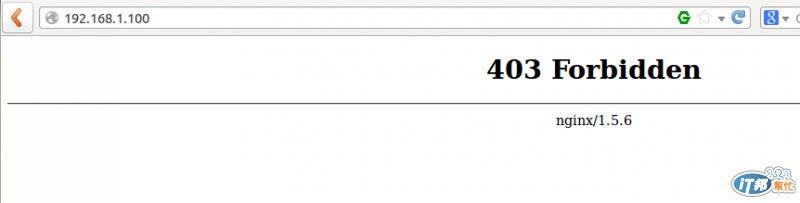
出現了403 Forbidden的錯誤, 這是因為網站根目錄是空的, 因此我建立了一個php檔:
pi@raspberrypi ~ $ sudo nano /opt/www/bizpro/test.php
內容只有短短的一行:
pi@raspberrypi ~ $ sudo cat /opt/www/bizpro/test.php
<?php echo "test";phpinfo();?>
再連看看 http://192.168.1.100/test.php
沒有出現錯誤, 但是還是錯的, 這是什麼意思? 請先看畫面:
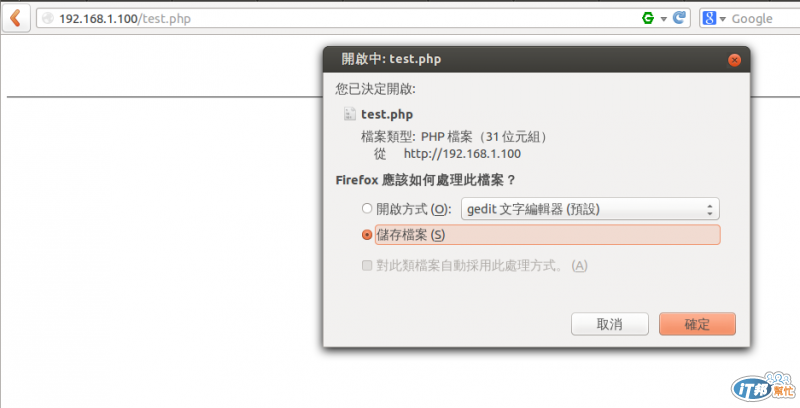
出現了一個下載檔案test.php的對話視窗, 因為我用的是Ubuntu, 內定的文件編輯器是gedit, 也就是畫面看到的.
連三錯, 這是為什麼? 最後一個錯就是用來說明什麼是FastCGI, 也就是php-fpm的作用. 我們都已經知道Nginx是網站伺服器, Nginx並不知道什麼是PHP檔, 因此就直接將檔案test.php提供使用者下載了. 但是這是不是我們所要的, 因此, 我們必需設定Nginx, 讓Nginx先將PHP檔案透過FastCGI送到等候要解析PHP檔案的PHP-FPM, 讓PHP-FPM處理PHP檔成為HTML格式的檔案再交還給Nginx, Nginx再呈現HTML的格式給使用者.
因此, 我們必需設定FastCGI了, 這時就要知道PHP-FPM等在哪裡了, 一般上, 內定安裝的PHP-FPM, 啟動時會產生一個socket, 這個socket就是檔案/var/run/php5-fpm.sock:
pi@raspberrypi ~ $ ls -ls /var/run/php5-fpm.sock
0 srw-rw-rw- 1 root root 0 Oct 15 12:51 /var/run/php5-fpm.sock
就在Nginx的網站設定檔/etc/nginx/sites-enabled/default中加入這個socket檔:
pi@raspberrypi ~ $ sudo nano /etc/nginx/sites-enabled/default
location ~ \.php$ {
try_files $uri =404;
fastcgi_split_path_info ^(.+\.php)(/.+)$;
fastcgi_pass unix:/var/run/php5-fpm.sock;
fastcgi_index index.php;
include fastcgi_params;
}
然後重啟Nginx:
pi@raspberrypi ~ $ sudo /etc/init.d/nginx restart
再連一次http://192.168.1.100/test.php, 就成功解譯了PHP檔案test.php:
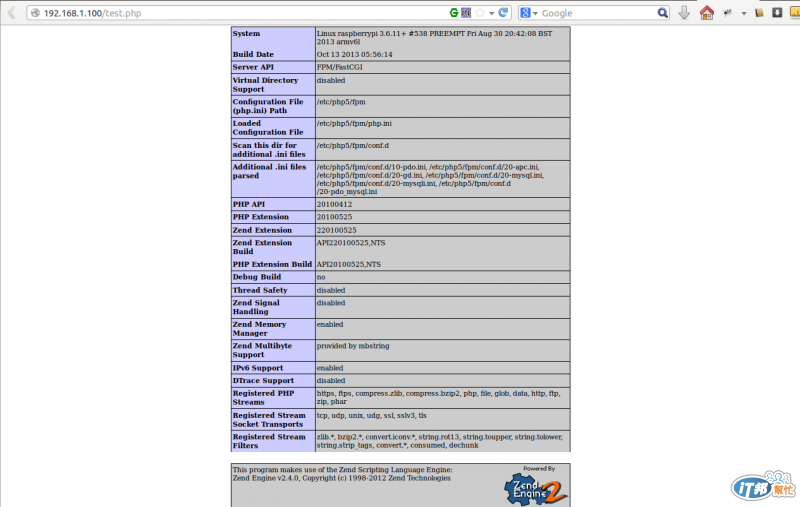
透過說明PHP的解譯過程, 對於Nginx的設置會更有幫助. 本文的Nginx設定都是片段, 之後在設置Joomla時, 會有詳盡的設定說明的. 在此之前, 先對剛架好的網站做個小測試:
$ ab -n 10000 -c 200 http://192.168.1.100/
This is ApacheBench, Version 2.3 <$Revision: 655654 $>
Copyright 1996 Adam Twiss, Zeus Technology Ltd, http://www.zeustech.net/
Licensed to The Apache Software Foundation, http://www.apache.org/
Benchmarking 192.168.1.100 (be patient)
Completed 1000 requests
Completed 2000 requests
Completed 3000 requests
Completed 4000 requests
Completed 5000 requests
Completed 6000 requests
Completed 7000 requests
Completed 8000 requests
Completed 9000 requests
Completed 10000 requests
Finished 10000 requests
Server Software: nginx/1.5.6
Server Hostname: 192.168.1.100
Server Port: 80
Document Path: /
Document Length: 168 bytes
Concurrency Level: 200
Time taken for tests: 30.088 seconds
Complete requests: 10000
Failed requests: 0
Write errors: 0
Non-2xx responses: 10000
Total transferred: 3170000 bytes
HTML transferred: 1680000 bytes
Requests per second: 332.36 [#/sec] (mean)
Time per request: 601.753 [ms] (mean)
Time per request: 3.009 [ms] (mean, across all concurrent requests)
Transfer rate: 102.89 [Kbytes/sec] received
Connection Times (ms)
min mean[+/-sd] median max
Connect: 0 71 480.5 1 15035
Processing: 50 385 1369.6 281 30045
Waiting: 50 385 1369.6 281 30045
Total: 57 456 1453.0 282 30081
Percentage of the requests served within a certain time (ms)
50% 282
66% 285
75% 288
80% 291
90% 305
95% 1062
98% 1519
99% 3294
100% 30081 (longest request)
這是併發200個, 共10000次, 強大的Nginx在小小的Raspberry Pi上表現尚不錯. 如果加上keep alive, 數字看起來更好:
Requests per second: 910.77 [#/sec] (mean)
Time per request: 219.594 [ms] (mean)
Time per request: 1.098 [ms] (mean, across all concurrent requests)
Transfer rate: 286.40 [Kbytes/sec] received