網誌好讀版:http://hungys.logdown.com/posts/236091-using-git-on-azure

Git 是一套分散式的版本控制系統,以近年來軟體開發的趨勢來說,版本控制已經是一個開發團隊中不可或缺的工具,且扮演相當重要的角色。本文將會以 Azure 的網站服務 (Websites) 為例,介紹如何使用 git 將網站部署至 Azure 上,以及網站服務本身所支援的與 GitHub、Bitbucket 等服務串接的連續部署。
關於 Git 的安裝網路上已經有相當多教學,相信大多數讀者也已經安裝過了,這邊簡單提供各個平台所對應的下載連結:
如果想要使用指令直接安裝,以 Mac OS X 為例,可以使用我們先前所介紹過的 Homebrew:
$ brew install git
針對 Linux 的使用者,各平台也都有相對應的套件管理程式可以幫助安裝,以筆者先前較常使用的 Ubuntu 及 Fedora 為例:
$ apt-get install git   # for Ubuntu
$ yum install git   # for Fedora
安裝完成之後首先我們先在命令列下設定 Git 的使用者資訊:
$ git config --global user.name "YOUR NAME"
$ git config --global user.email "YOUR EMAIL"
若要檢查設定是否正確,可以使用 git config --list 的指令來檢查:
$ git config --list
user.name=Yu-Hsin Hung
user.email=hungys@hotmail.com
到此就已經完成了 Git 的安裝囉!
首先我們先建立一個新的資料夾 ironman-repo,因為我想要在該資料夾下使用 Git 來做版本管理,所以切換到該資料夾下並執行 git init:
$ mkdir ironman-repo
$ cd ironman-repo/
$ git init
Initialized empty Git repository in /Users/hungys/Temp/ironman-repo/.git/
這時 Git 已經在該目錄底下建立了一個 Local Repository。
假如您在遠端已經有一個 Remote Repository,或使想要將別人的程式碼抓一份到本地,則可以使用 git clone 指令,以筆者放置這一系列部落格文章的 repo 為例:
$ git clone https://github.com/hungys/azure-blog.git
首先,我們在剛剛所建立的 ironman-repo 底下建立一個 HTML 檔 index.html 作為網站的首頁:
        <h1>Hello ironman!</h1>
        <h2>This website is deployed with git<h2/>
接下來我們使用 git status 的指令來觀察目前 Git 的狀態:
$ git status
On branch master

Initial commit

Untracked files:
  (use "git add <file>..." to include in what will be committed)

    index.html

nothing added to commit but untracked files present (use "git add" to track)
可以發現偵測到我們剛剛所建立的 HTML 檔,但目前還是處於 untracked 的狀態,如果要將該檔案加入讓 Git 能夠追蹤的話,可以使用 git add <path> 的指令:
$ git add index.html
$ git status
On branch master

Initial commit

Changes to be committed:
  (use "git rm --cached <file>..." to unstage)

    new file:   index.html
此時 index.html 已經加入了 Git 的追蹤,並處於等待被 commit 的階段,在 Git 的世界裡稱為「stage」,而剛剛還沒下git add 指令前則為「unstage」狀態。如果您有多個檔案要加入 Git 控管的話,也可以很懶惰的使用 git add . 一次性加入所有檔案,但要注意的是所有檔案都會被加入 Git 追蹤,所以建議還是使用 git add 來加入單一檔案或使用 git add -i 互動模式來操作會比較保險。
最後,我們要正式提交這些進入 stage 狀態的檔案,這個動作在 Git 中稱為「commit」,在 Git 底層的實作上會建立一個節點,這會是未來追蹤或回溯很重要的參考依據。若要提交 (commit) 程式碼,可以使用 git commit 指令,但它會開啟一個新的檔案要您輸入這次 commit 的註解,一般來說筆者比較習慣使用單行的指令來完成:
$ git commit -m "Add index.html into repo"
[master (root-commit) bcfac0a] Add index.html into repo
 1 file changed, 6 insertions(+)
 create mode 100644 index.html
後面的 "Add index.html into repo" 就是對於這次 commit 的註解,強烈建議讀者要簡單明瞭但清楚的表達這次 commit 所修改的內容,會有利於日後的版本控管。
到此,我們已經完成了 Git 的基本操作介紹,但 Git 還有一些更進階的使用例如 gitignore、branch 等等,並不是我們這篇的重點,建議讀者可以自行上網 Google 或是閱讀 Pro Git 這本有繁體中文翻譯的權威教材。
Azure 網站服務本身提供了版本控制的整合,而且可以直接在 Azure 資料中心建立一個 Repository 讓我們將網站上傳上去作為一個 Remote Repository,若要啟用的話我們需要進入 Management Portal,筆者發現 CLI 並沒有相關的指令可以操作。
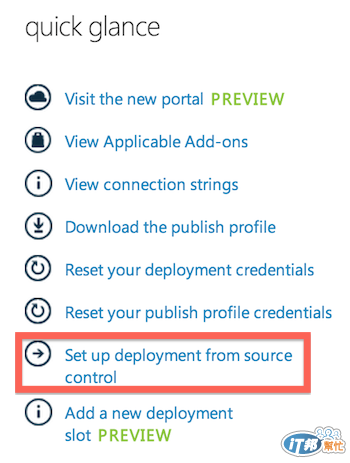
首先必須進入欲上傳的網站,在 quick glance 的地方點選**「Set up deployment from source control」**。
接著可以看到很多種部署的選項,在此我們選擇「Local Git」在 Azure 資料中心建立一個 Repository,當然對我們而言它就是一個 Remote Repo。

若是第一次設定部署設定的話會要求設定一組帳號密碼,設定完成後可以看到以下畫面:
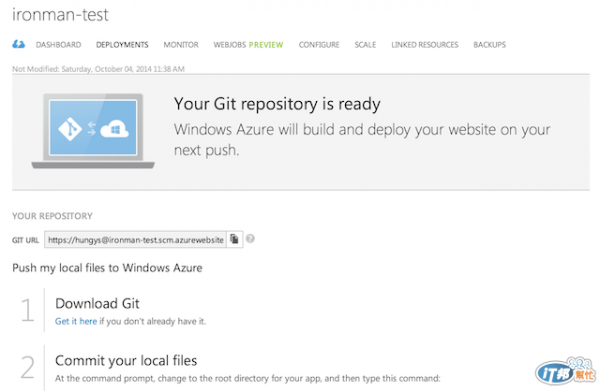
接著我們要將剛剛建立的網頁上傳至 Azure 的 Local Git,首先將剛剛畫面上看到的 Git Url 複製下來,在終端機中使用git remote add 指令加入這個 repo 作為參考,以「azure」作為名稱為例:
$ git remote add azure https://hungys@ironman-test.scm.azurewebsites.net:443/ironman-test.git
最後,只需要使用 git push 便可以將本地的檔案 push 至遠端的 repo,過程中會要求您輸入 Azure Local Git 的密碼:
$ git push azure master
Password for 'https://hungys@ironman-test.scm.azurewebsites.net:443':
Counting objects: 3, done.
Delta compression using up to 4 threads.
Compressing objects: 100% (2/2), done.
Writing objects: 100% (3/3), 313 bytes | 0 bytes/s, done.
Total 3 (delta 0), reused 0 (delta 0)
remote: Updating branch 'master'.
remote: Updating submodules.
remote: Preparing deployment for commit id 'bcfac0a888'.
remote: Generating deployment script.
remote: Generating deployment script for Web Site
remote: Generated deployment script files
remote: Running deployment command...
remote: Handling Basic Web Site deployment.
remote: KuduSync.NET from: 'D:\home\site\repository' to: 'D:\home\site\wwwroot'
remote: Deleting file: 'hostingstart.html'
remote: Copying file: 'index.html'
remote: Finished successfully.
remote: Deployment successful.
To https://hungys@ironman-test.scm.azurewebsites.net:443/ironman-test.git
 * [new branch]      master -> master
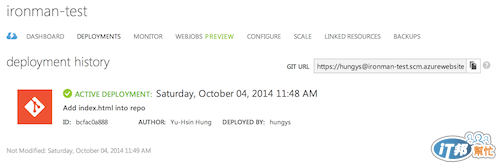
在 Management Portal 的部署歷史 (deployment history) 中已經可以看到剛剛的 commit:
在瀏覽器中輸入網站的網址,也可以發現我們所建立的 index.html 已經成功使用 Git 部署至遠端了!

我們試著修改 index.html 的內容,建立一個 commit 並將程式碼 push 至 Azure Local Git:
$ git add index.html
$ git commit -m "Add modified text"
[master 718501c] Add modified text
 1 file changed, 1 insertion(+), 1 deletion(-)
$ git push azure master
Counting objects: 5, done.
Delta compression using up to 4 threads.
Compressing objects: 100% (2/2), done.
Writing objects: 100% (3/3), 350 bytes | 0 bytes/s, done.
Total 3 (delta 0), reused 0 (delta 0)
remote: Updating branch 'master'.
remote: Updating submodules.
remote: Preparing deployment for commit id '718501cbc4'.
remote: Generating deployment script.
remote: Running deployment command...
remote: Handling Basic Web Site deployment.
remote: KuduSync.NET from: 'D:\home\site\repository' to: 'D:\home\site\wwwroot'
remote: Copying file: 'index.html'
remote: Finished successfully.
remote: Deployment successful.
To https://hungys@ironman-test.scm.azurewebsites.net:443/ironman-test.git
   bcfac0a..718501c  master -> master
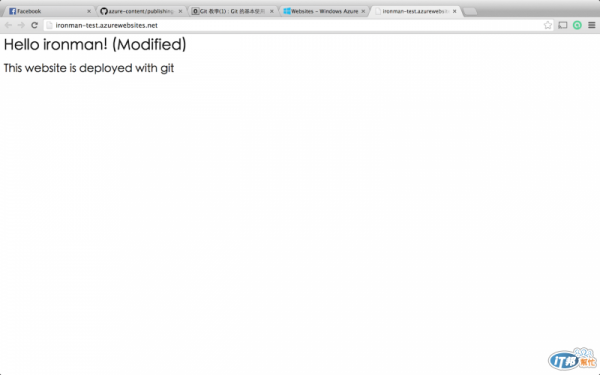
重新打開瀏覽器進入我們的網站,可以看到網頁內容也成功被更新了:

Azure 網站服務除了提供了 Local Git 可以使用,剛剛讀者設定時應該也有看到對於 GitHub、Bitbucket 等其他服務的支援,而且支援「連續部署 (continuous deployment)」,若是偵測到 Repo 發生了改變,網站服務便會進行同步的動作,可以說相當方便。
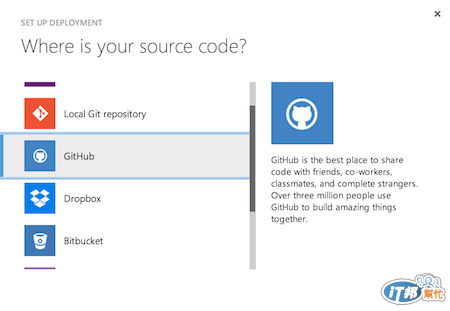
設定方式相當簡單,在稍早我們選擇 Local Git 的地方選擇欲整合的服務即可,在此我們以 GitHub 為例:
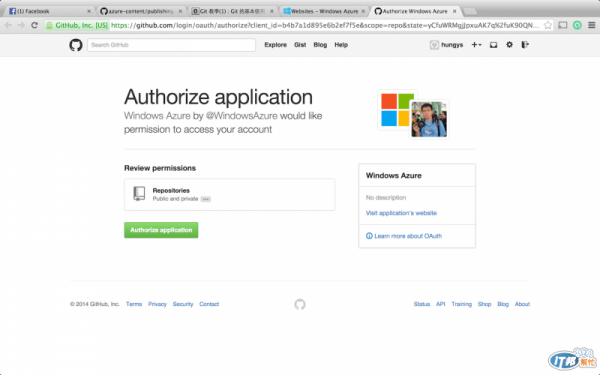
接著會跳出 GitHub 的授權視窗要求提供授權,這樣才能在 Management Portal 選擇我們所要同步的 repository:
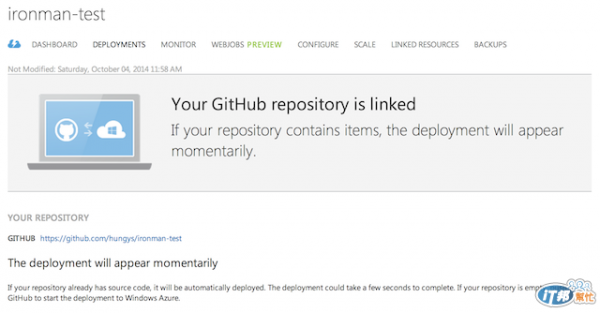
驗證完成後便可以選擇我們要同步的 repo,筆者已經事先建立好一個「ironman-test」的 repository 了,但還沒有上傳任何 commit 上去。

短短幾步已經完成了設定,並提示已經完成了與 GitHub 的連結,若有新的原始碼被 push 到 GitHub,Azure 網站服務也會自動做同步。
接著我們將前一小節所建立的網也檔案也 push 到 GitHub 上:
$ git remote add github https://github.com/hungys/ironman-test.git
$ git push github master
Counting objects: 6, done.
Delta compression using up to 4 threads.
Compressing objects: 100% (4/4), done.
Writing objects: 100% (6/6), 554 bytes | 0 bytes/s, done.
Total 6 (delta 1), reused 0 (delta 0)
To https://github.com/hungys/ironman-test.git
 * [new branch]      master -> master
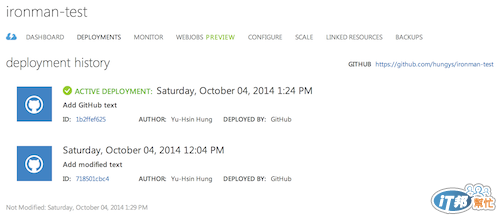
很快的在 Management Portal 已經看到了剛剛所建立的 commit,打開瀏覽器應該也可以看到對應的內容。

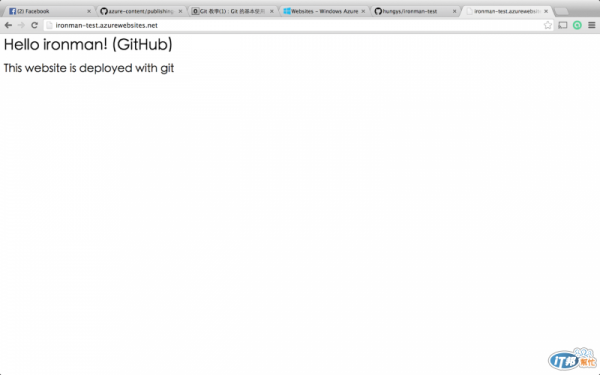
最後,我們在 index.html 中加入「GitHub」字樣並再次建立一個 commit 並 push 到 GitHub 上,也可以很快地看到 Portal 上偵測到了 GitHub 上狀態的改變並同時將程式碼同步至網站服務,此時打開瀏覽器應該可以看到剛剛所修改的內容已經生效,這就是所謂「連續部署」的功能。
在上一小節我們所介紹的連續部署中,CLI 也有提供針對 GitHub 的指令支援,細節設定可以使用 azure site deployment github -h 來查詢,但其實指令本身已經提供互動式的操作:
$ azure site deployment github ironman-test
info:    Executing command site deployment github
help:    Enter your github credentials
Username: hungys
Password:
+ Retrieving repositories
help:    Choose a repository (or hit ctrl-c to exit)
  1) hungys/azure-blog
  2) hungys/azure-notificationhubs-wns-for-silverlight81
  3) hungys/ironman-test
  4) hungys/Remote_Access_System
  5) hungys/Remote_Batch_System
  6) hungys/Remote_Working_Ground
  7) hungys/RoutingFlow
  8) hungys/SOCKS_Server
  9) hungys/wp-translation-converter
  10) Gogolook-Inc/GogoMonkeyRun
  11) Gogolook-Inc/TSMessages
  : 3
info:    Initializing remote Azure repository
+ Updating site information
info:    Remote azure repository initialized
+ Getting site information
+ Retrieving website hooks
+ Updating hook
+ Testing hook
info:    site deployment github command OK
透過簡單的指令就成功建立起網站服務與 GitHub 之間的連結,是不是很簡單呢?


 iThome鐵人賽