網誌好讀版:http://hungys.logdown.com/posts/236492-install-nginx-mongodb-on-azure
在上一篇文章中我們介紹了適合使用在中小型服務的 LAMP 組合,而本文將要介紹的是在效能以及穩定度上都更高的 nginx 網頁伺服器。在 Linux 系統之下,nginx 善用了非同步的 I/O 模式如 Linux 的 epoll 或是 BSD 的 kqueue,反之 Apache 則單純使用 select 的處理機制,如果要建構能應付超大流量的大型服務,一般認為 nginx 會是比較好的選擇。而在本文的後半段,將要介紹的是近幾年來廣受流行的 NoSQL solution,也就是 MongoDB ,並介紹一些基本的操作。
在前篇中我們已經介紹過如何使用 CLI 來部署一台 Linux VM,若忘記的話可以參考以下指令,本文將以 Ubuntu 14.04 為例:
$ azure vm create ironman-nginx b39f27a8b8c64d52b05eac6a62ebad85__Ubuntu-14_04_1-LTS-amd64-server-20140927-en-us-30GB hungys --location "East Asia" --ssh
在 SSH 進入 VM 之前,我們先用 CLI 設定所要開放的 endpoint,除了 nginx 所需要的 port 80 之外,我們也順便設定好 MongoDB 的預設 port 27017:
$ azure vm endpoint create ironman-nginx 80 --endpoint-name HTTP
$ azure vm endpoint create ironman-nginx 27017 --endpoint-name MongoDB
設定完成之後就可以透過 SSH 連進我們所建立好的 VM。

要在 Ubuntu 底下安裝 nginx 相當簡單,我們可以直接使用 apt-get 來達成:
$ sudo apt-get update
$ sudo apt-get install nginx
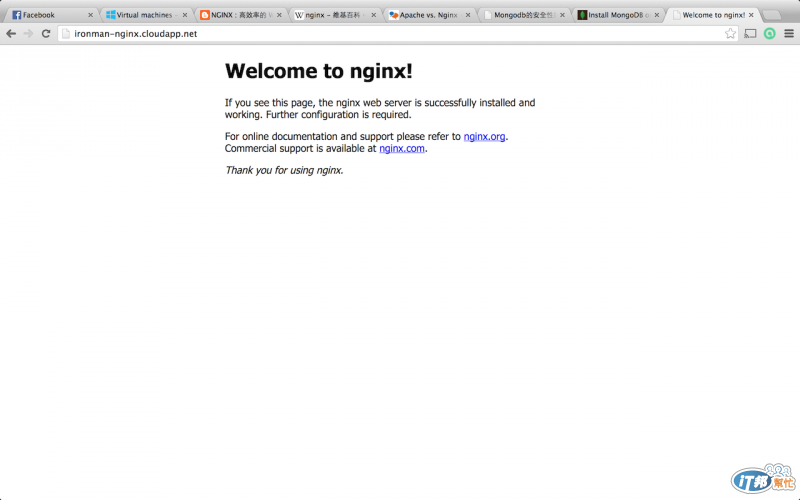
安裝完成之後 nginx 會預設直接啟動,這時可以使用 curl 指令或直接開啟瀏覽器進入「http://ironman-nginx.cloudapp.net」,應該就會看到預設的頁面。
接著講解一下如何管理 nginx 的 process,若要停止 nginx 的話,可以使用下列指令:
$ sudo service nginx stop
若要啟動 nginx 的服務的話,可以輸入:
$ sudo service nginx start
最後則是重啟啟動 nginx,則是使用以下指令:
$ sudo service nginx restart
其他更細節的設定以及操作,可以前往 nginx 的官方網站做查詢。在接下來的文章中並不會使用到 nginx,將會留到下一篇與 gunicorn 及 Python 搭配使用時才會用到。

根據官方網站的說法,MongoDB 主要由四個 package 所組成,分別是 mongodb-org-server、 mongodb-org-mongos、mongodb-org-shell 及 mongodb-org-tools。不過,在安裝的時候可以直接安裝 mongodb-org 這個 metapackage。
在 Ubuntu 底下,我們一樣可以透過 apt-get 來安裝,不過必須先將必要的資訊寫入 source list 裡。關於其他平台的安裝方式,可以參考官方網站更詳細的說明。
首先需要匯入套件管理系統所需的 public key:
$ sudo apt-key adv --keyserver hkp://keyserver.ubuntu.com:80 --recv 7F0CEB10
接著將 MongoDB 加入 apt 的來源清單:
$ echo 'deb http://downloads-distro.mongodb.org/repo/ubuntu-upstart dist 10gen' | sudo tee /etc/apt/sources.list.d/mongodb.list
記得更新套件資料庫:
$ sudo apt-get update
最後則是透過 apt-get 來安裝 MongoDB:
$ sudo apt-get install -y mongodb-org
若有指定安裝版本的需求,以 2.6.1 版為例,可以使用以下指令:
$ sudo apt-get install -y mongodb-org=2.6.1 mongodb-org-server=2.6.1 mongodb-org-shell=2.6.1 mongodb-org-mongos=2.6.1 mongodb-org-tools=2.6.1
在剛安裝完的時候,若我們嘗試用 mongo 指令來進入 MongoDB 的 shell,會得到連線失敗的錯誤訊息:
$ mongo
MongoDB shell version: 2.6.4
connecting to: test
2014-10-07T05:32:19.566+0000 warning: Failed to connect to 127.0.0.1:27017, reason: errno:111 Connection refused
2014-10-07T05:32:19.570+0000 Error: couldn't connect to server 127.0.0.1:27017 (127.0.0.1), connection attempt failed at src/mongo/shell/mongo.js:146
exception: connect failed
此時我們必須先修改 bind IP 的設定,大約在 /etc/mongod.conf 的第 18 行左右,請將 IP 位置改為:
# Listen to local interface only. Comment out to listen on all interfaces.
bind_ip = 0.0.0.0
若有需要設定 MongoDB 的 port 也可以順便做修改,儲存好設定檔後請將 mongo 重啟:
$ sudo service mongod restart
mongod stop/waiting
mongod start/running, process 2843
若有正確設定的話,這次我們應該可以成功連線進入 mongo 的 shell:
$ mongo
MongoDB shell version: 2.6.4
connecting to: test
Welcome to the MongoDB shell.
For interactive help, type "help".
For more comprehensive documentation, see
    http://docs.mongodb.org/
Questions? Try the support group
    http://groups.google.com/group/mongodb-user
>
MongoDB 在剛安裝完成時預設是沒有受到帳戶控管的,在 mongo shell 底下我們可以先使用 use 指令切換到「admin」資料庫新增一個 System Administrator,也就是最高權限管理者:
> use admin
switched to db admin
> db.createUser(
...   {
...     user: "ironman",
...     pwd: "ironman",
...     roles:
...     [
...       {
...         role: "userAdminAnyDatabase",
...         db: "admin"
...       }
...     ]
...   }
... )
Successfully added user: {
    "user" : "ironman",
    "roles" : [
        {
            "role" : "userAdminAnyDatabase",
            "db" : "admin"
        }
    ]
}
最後,我們必須為我們等會要使用的資料庫也設定一個管理者,假設資料庫名稱為「azure」,同樣的使用 use azure 來切換資料庫:
> use azure
switched to db azure
> db.createUser(
...   {
...     user: "azure",
...     pwd: "azure",
...     roles:
...     [
...       {
...         role: "userAdmin",
...         db: "records"
...       }
...     ]
...   }
... )
Successfully added user: {
    "user" : "azure",
    "roles" : [
        {
            "role" : "userAdmin",
            "db" : "records"
        }
    ]
}
在學習操作 MongoDB 之前,首些我們必須先對 MongoDB 的基本儲存結構有大致的認識,MongoDB 本身是 10gen 這家公司開發的一個 NoSQL Database,是屬於 Document-Oriented Database 的類型,而有一些基本術語可以與傳統的 Relational Database 做對應比較:
而在 MongoDB 中,每一筆資料稱作一個**「Document」**,它俱有 NoSQL 的 Schemaless 特色,並沒有特別的欄位定義,下面就是一個 Document 的例子:
{
    "_id": "<ObjectId>",
    "name": "Virtual Machines",
    "type": "IaaS"
    "url": "http://azure.microsoft.com/zh-tw/services/virtual-machines/",
    "pricing": "http://azure.microsoft.com/zh-tw/pricing/details/virtual-machines/",
    "rating" : 8
}
可以看到在 Document 中是用 BSON (Binary JSON) 的方式來儲存資料,其實與我們所熟悉的 JSON 相當類似,關於支援的型別以其他細節請操考官方的說明文件。而**「_id」這個欄位的值在 Collection 中必須是唯一的,以作為 Primary Key,如果在新增時沒有給定一個值,預設會自動填入一個個帶有時間戳記的 ObjectId 物件。而多個 Document 集合起來則稱為一個「Collection」**,對應到傳統 RDBMS 的「Table」。
還記得在先前介紹 MongoDB 的安裝指令時,我們是使用 apt-get install mongodb-org 安裝這個 metapackage,其中便包含了 mongodb-org-shell 這個 shell 管理工具。
mongo shell 基本上是一個互動式的 JavaScript 直譯器,所以除了 mongo 本身的指令之外,您也可以善用熟悉的 JavaScript 語法,例如陣列的宣告在進行 bulk insert 時便相當方便。然而,有些較複雜的操作,可能還是透過圖形化的管理界面輔助會比較容易上手。
若要使用內建的 Shell,只需要在終端機輸入 mongo 即可:
$ mongo
MongoDB shell version: 2.6.4
connecting to: test
> help
    db.help()                    help on db methods
    db.mycoll.help()             help on collection methods
    sh.help()                    sharding helpers
    rs.help()                    replica set helpers
    help admin                   administrative help
    help connect                 connecting to a db help
    help keys                    key shortcuts
    help misc                    misc things to know
    help mr                      mapreduce

    show dbs                     show database names
    show collections             show collections in current database
    show users                   show users in current database
    show profile                 show most recent system.profile entries with time >= 1ms
    show logs                    show the accessible logger names
    show log [name]              prints out the last segment of log in memory, 'global' is default
    use <db_name>                set current database
    db.foo.find()                list objects in collection foo
    db.foo.find( { a : 1 } )     list objects in foo where a == 1
    it                           result of the last line evaluated; use to further iterate
    DBQuery.shellBatchSize = x   set default number of items to display on shell
    exit                         quit the mongo shell
>
關於 mongo shell 的細節可以參考官方文件的說明,而接下來會介紹幾個比較多人使用的圖形化管理工具。
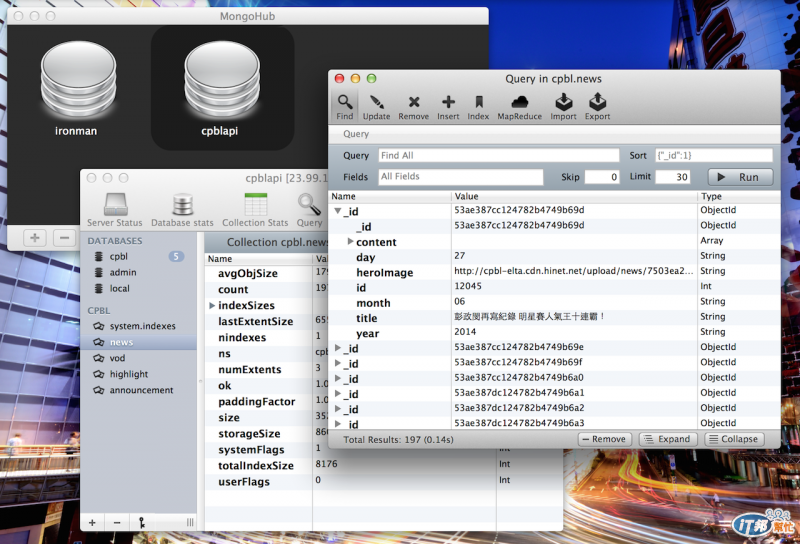
MongoHub 是筆者換了 MacBook 之後所使用的第一款 MongoDB 圖形化管理工具,基本上可以滿足大部份的需求,而且也支援 replica set 的設定。不過使用起來覺得界面上並不這麼討喜、人性化,例如內建的 JSON Editor 有時候使用起來會有點怪怪的,尤其是遇到 Document 中有中文字的情況。不過整體來說依舊是個堪用而且免費(重點!)的工具。

這套工具是前陣子在 Facebook 上看到朋友轉貼的消息才看到的,它是一套由 Angular.JS 所撰寫的跨平台應用程式,而且整體界面跟 MongoHub 相比清爽了許多,免費版的功能也能涵蓋到大多數的基本需求,也支援 replica set 的設定。若真要說缺點的話大概是 Loading 的動畫做得太顯眼看起來實在有點煩(?)
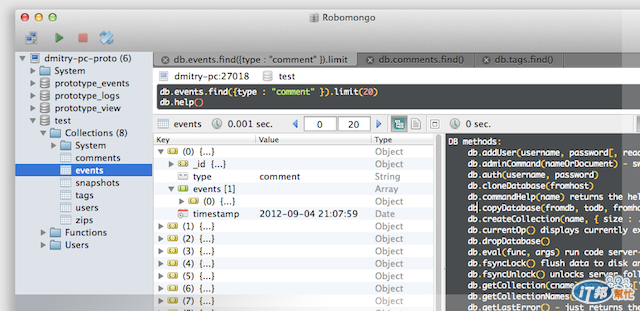
Robomongo 同樣是一套跨平台的管理工具,基本上是以 mongo shell 為中心來設計的,所以任何可以在 shell 中所輸入的指令、做的事情同樣能夠在 Robomongo 中達成,最方便的是支援指令自動完成。
接下來筆者將以 mongo shell 的指令來介紹如何在 MongoDB 中執行 CRUD 的操作,讀者可以直接使用 Shell 來操作或是利用前一節所介紹的圖形化管理工具。
指令:db.collectionName.insert(document, options)
若 collectionName 不存在會自動新增該 collection
新增 document 時可以自行帶入 _id 的值,但在該 collection 中必須是一個唯一的值以作為 Primary Key
若沒有給定 _id 則會自動填入一個型別為 ObjectID 的索引,並帶有時間戳記
db.product.insert({
... "name": "Virtual Machines",
... "url": "http://azure.microsoft.com/zh-tw/services/virtual-machines/",
... "pricing": "http://azure.microsoft.com/zh-tw/pricing/details/virtual-machines/",
... "rating": 8
... });
WriteResult({ "nInserted" : 1 })
若不帶任何參數以 find() 直接做查詢,將會回傳該 collection 底下所有的 document:
> db.product.find()
{ "_id" : ObjectId("5433d6b4ef08f752c1d1809c"), "name" : "Virtual Machines", "url" : "http://azure.microsoft.com/zh-tw/services/virtual-machines/", "pricing" : "http://azure.microsoft.com/zh-tw/pricing/details/virtual-machines/", "rating" : 8 }
{ "_id" : ObjectId("5433d768ef08f752c1d1809d"), "name" : "Cloud Services", "url" : "http://azure.microsoft.com/zh-tw/services/cloud-services/", "pricing" : "http://azure.microsoft.com/zh-tw/pricing/details/cloud-services/", "rating" : 7 }
{ "_id" : ObjectId("5433d76def08f752c1d1809e"), "name" : "Websites", "url" : "http://azure.microsoft.com/zh-tw/services/websites/", "pricing" : "http://azure.microsoft.com/zh-tw/pricing/details/websites/", "rating" : 8 }
{ "_id" : ObjectId("5433d772ef08f752c1d1809f"), "name" : "Mobile Services", "url" : "http://azure.microsoft.com/zh-tw/services/mobile-services/", "pricing" : "http://azure.microsoft.com/zh-tw/pricing/details/mobile-services/", "rating" : 10 }
{ "_id" : ObjectId("5433d778ef08f752c1d180a0"), "name" : "Notification Hubs", "url" : "http://azure.microsoft.com/zh-tw/services/notification-hubs/", "pricing" : "http://azure.microsoft.com/zh-tw/pricing/details/notification-hubs/", "rating" : 8 }
嘗試設定 criteria 參數過濾出 name 為「Virtual Machines」的 document:
> db.product.find({"name": "Virtual Machines"})
{ "_id" : ObjectId("5433d6b4ef08f752c1d1809c"), "name" : "Virtual Machines", "url" : "http://azure.microsoft.com/zh-tw/services/virtual-machines/", "pricing" : "http://azure.microsoft.com/zh-tw/pricing/details/virtual-machines/", "rating" : 8 }
在 criteria 的部分還支援更進階的 Query Selector,例如用來做大小比較的 $lt、$lte、$gt、$gte,可以用來執行類似 SQL WHERE 語法的查詢,例如下列指令是在 product 這個 collection 中找出所有 rating 大於 9 的 document:
> db.product.find({"rating": {$gt: 9}})
{ "_id" : ObjectId("5433d772ef08f752c1d1809f"), "name" : "Mobile Services", "url" : "http://azure.microsoft.com/zh-tw/services/mobile-services/", "pricing" : "http://azure.microsoft.com/zh-tw/pricing/details/mobile-services/", "rating" : 10 }
接著示範一下 projection 的功能,可以用來指令要回傳的欄位,field: 1 表示要回傳這個欄位,反之 field: 0 則是不回傳,而 _id 在預設情況下都會回傳:
> db.product.find({}, {"_id": 0, "name": 1})
{ "name" : "Virtual Machines" }
{ "name" : "Cloud Services" }
{ "name" : "Websites" }
{ "name" : "Mobile Services" }
{ "name" : "Notification Hubs" }
這邊要特別注意的是,上面的指令意義是僅回傳 name 這個欄位,但 projection 在使用上有規定不能同時使用 inclusion 以及 exclusion,也就是不允許同時存在 0 及 1 的值,但 _id 例外,例如下面的指令看起來很合理,但實際上會發生錯誤:
> db.product.find({}, {"_id": 0, "name": 1, "url": 0, "pricing": 0, "rating": 0})
error: {
    "$err" : "Can't canonicalize query: BadValue Projection cannot have a mix of inclusion and exclusion.",
    "code" : 17287
}
最後,在查詢的語法上,也有支援排序 sort()、取前幾筆 limit()、跳過前幾筆 skip() 的指令,可以參考下面的示範:
> db.product.find().sort({"rating": -1}).limit(3)
{ "_id" : ObjectId("5433d772ef08f752c1d1809f"), "name" : "Mobile Services", "url" : "http://azure.microsoft.com/zh-tw/services/mobile-services/", "pricing" : "http://azure.microsoft.com/zh-tw/pricing/details/mobile-services/", "rating" : 10 }
{ "_id" : ObjectId("5433d6b4ef08f752c1d1809c"), "name" : "Virtual Machines", "url" : "http://azure.microsoft.com/zh-tw/services/virtual-machines/", "pricing" : "http://azure.microsoft.com/zh-tw/pricing/details/virtual-machines/", "rating" : 8 }
{ "_id" : ObjectId("5433d76def08f752c1d1809e"), "name" : "Websites", "url" : "http://azure.microsoft.com/zh-tw/services/websites/", "pricing" : "http://azure.microsoft.com/zh-tw/pricing/details/websites/", "rating" : 8 }
其中,sort 中所帶的參數 1 代表由小到大排序,-1 則是由大到小。
下面這個例子證實了 Update 指令的「取代」行為:
> db.product.update({"name": "Virtual Machines"}, {"rating": 10})
WriteResult({ "nMatched" : 1, "nUpserted" : 0, "nModified" : 1 })
> db.product.find({"name": "Virtual Machines"}) # no result
> db.product.find()
{ "_id" : ObjectId("5433d6b4ef08f752c1d1809c"), "rating" : 10 }
...
若只要針對特定的 field 做更新,可以搭配上面提到的 Update Operator 下指令,例如最常用的 $set 可以單獨對某欄位或修改,不存在則新增,另外也可以透過 $unset 來刪除特定 field:
> db.product.update({"name": "Mobile Services"}, {$set: {"rating": 5, "newfield": "newvalue"}, $unset: {"url":"", "pricing":""}})
WriteResult({ "nMatched" : 1, "nUpserted" : 0, "nModified" : 1 })
> db.product.find({"name": "Mobile Services"})
{ "_id" : ObjectId("5433d772ef08f752c1d1809f"), "name" : "Mobile Services", "rating" : 5, "newfield" : "newvalue" }
再提醒讀者一次,上述指令都只會修改「第一筆 document」,若要一次性修改請在第三個參數 options 補上 {multi: true}。
指令:db.collectionName.remove(query, options)
根據 query 查詢之後,刪除符合的 document
預設行為會刪除所有符合的 document,如果只要刪除第一筆需在 options 中設定 justOne: true
db.product.remove({"name": "Cloud Services"})
WriteResult({ "nRemoved" : 1 })
本文後半段花了很大的篇幅來介紹 MongoDB 的操作,也算是筆者自己的學習筆記,在往後的文章中,還會介紹使用 Python 搭配 pymongo 這個 library 來操作 MongoDB,並建立一個簡單的 REST API 部署在 Azure 上,敬請期待!(其實好像也沒有說一定要跟 Azure 扯上關係了)

