因為用的是Windows10的筆電,已經先請他安裝完以下項目,方便後續開發與操作:
第一步,是建立不需要管那些設定的APP,那些密密麻麻的Configuration真的會把初學者嚇跑的東西,我們選用create-react-app這個專案作為基底。
npm install -g create-react-app

create-react-app my-app
cd my-app/

npm start
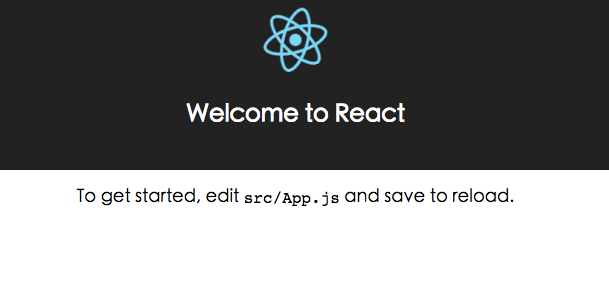
啟動伺服器,而瀏覽器會自動開啟並打開(http://localhost:3000/)的網頁
利用Visual Studio Code打開my-app的資料夾
node_module/ 是安裝那些讓網站能夠動起來的零件,不過先別管裡面裝了什麼。
目前要去了解的是public/和src/這兩個資料夾裡頭的檔案
public/index.html
<!doctype html>
<html lang="en">
  <head>
    <meta charset="utf-8">
    <meta name="viewport" content="width=device-width, initial-scale=1">
    <link rel="shortcut icon" href="%PUBLIC_URL%/favicon.ico">
    <!--
      Notice the use of %PUBLIC_URL% in the tag above.
      It will be replaced with the URL of the `public` folder during the build.
      Only files inside the `public` folder can be referenced from the HTML.

      Unlike "/favicon.ico" or "favicon.ico", "%PUBLIC_URL%/favicon.ico" will
      work correctly both with client-side routing and a non-root public URL.
      Learn how to configure a non-root public URL by running `npm run build`.
    -->
    <title>React App</title>
  </head>
  <body>
    <div id="root"></div>
    <!--
      This HTML file is a template.
      If you open it directly in the browser, you will see an empty page.

      You can add webfonts, meta tags, or analytics to this file.
      The build step will place the bundled scripts into the <body> tag.

      To begin the development, run `npm start`.
      To create a production bundle, use `npm run build`.
    -->
  </body>
</html>
src/index.js
import React from 'react';
import ReactDOM from 'react-dom';
import App from './App';
import './index.css';

ReactDOM.render(
  <App />,
  document.getElementById('root')
);
src/App.js
import React, { Component } from 'react';
import logo from './logo.svg';
import './App.css';

class App extends Component {
  render() {
    return (
      <div className="App">
        <div className="App-header">
          <img src={logo} className="App-logo" alt="logo" />
          <h2>Welcome to React</h2>
        </div>
        <p className="App-intro">
          To get started, edit <code>src/App.js</code> and save to reload.
        </p>
      </div>
    );
  }
}

export default App;
我們來依樣畫葫蘆來做一個類似的元件嵌入App這個元件裡面
一樣是在 src資料夾下新增一個MyComponent.js
import React, { Component } from 'react';

class MyComponent extends Component {
  render() {
    return (
      <div>
        <p>Hello World</p>
      </div>
    );
  }
}

export default MyComponent;
class後面以及export後面的元件名稱請注意一下
再修改App.js
import React, { Component } from 'react';
import logo from './logo.svg';
import './App.css';
import MyComponent form './MyComponent' //加入引入MyComponent的片段

class App extends Component {
  render() {
    return (
      <div className="App">
        <div className="App-header">
          <img src={logo} className="App-logo" alt="logo" />
          <h2>Welcome to React</h2>
        </div>
        <p className="App-intro">
          To get started, edit <code>src/App.js</code> and save to reload.
        </p>
        <MyComponent/>
      </div>
    );
    //將MyComponent加到App元件裡面
  }
}

export default App;
於是,加入這個有著Hello World字串、名叫<MyComponent/>元件到我們的頁面上了。
第三天,我開始覺得每天教人,還要每天寫一篇文章是一件很困難的事情了XD
再修改App.js下面的圖
import MyComponent form './MyComponent' //加入引入MyComponent的片段
form應該是from


 iThome鐵人賽