<dependency>
    <groupId>mysql</groupId>
    <artifactId>mysql-connector-java</artifactId>
	<scope>runtime</scope>
</dependency>

<dependency>
    <groupId>org.springframework.boot</groupId>
    <artifactId>spring-boot-starter-jdbc</artifactId>
</dependency>
1.此依賴包含了java對MySQL的connector與Java對MySQL連線的API
2.我們先加入Spring Boot的JDBC依賴來做為練習,之後如果可以會介紹Spring Data JPA 與ORM相關的介紹
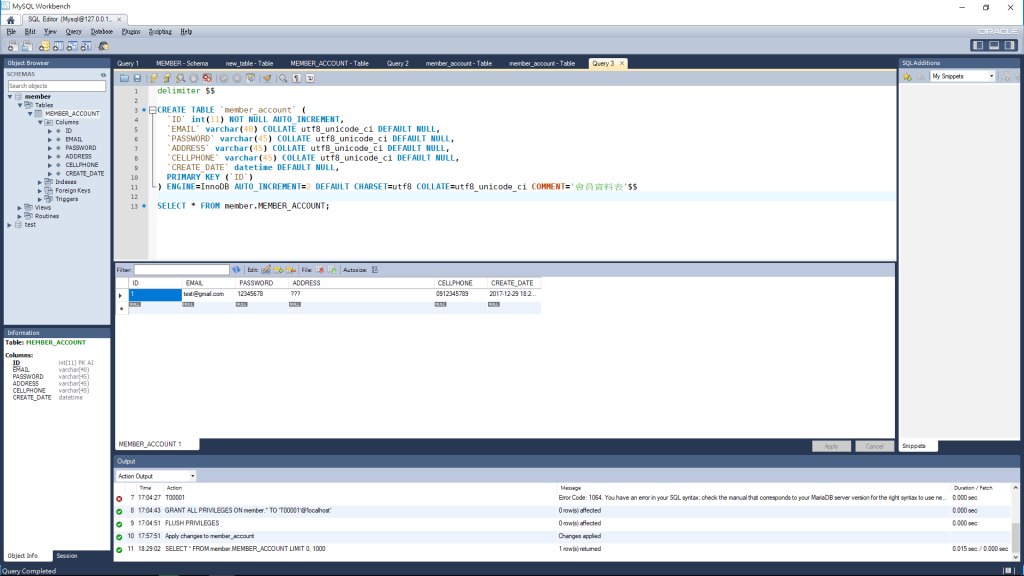
CREATE TABLE `member_account` (
  `ID` int(11) NOT NULL AUTO_INCREMENT,
  `EMAIL` varchar(40) COLLATE utf8_unicode_ci DEFAULT NULL,
  `PASSWORD` varchar(45) COLLATE utf8_unicode_ci DEFAULT NULL,
  `ADDRESS` varchar(45) COLLATE utf8_unicode_ci DEFAULT NULL,
  `CELLPHONE` varchar(45) COLLATE utf8_unicode_ci DEFAULT NULL,
  `CREATE_DATE` datetime DEFAULT NULL,
  PRIMARY KEY (`ID`)
) ENGINE=InnoDB AUTO_INCREMENT=2 DEFAULT CHARSET=utf8 COLLATE=utf8_unicode_ci COMMENT='會員資料表'$$
請先建立你的DataBase與資料表
如果程式發生連線資料庫錯誤異常等訊息
請務必先檢查你的資料庫名稱是否正確!!
請務必檢查你的資料庫使用者帳號,密碼是否正確!!!
請務必檢查你的使用者是否有此資料庫的權限!!!!!
請不要讓幫您檢查的人看到以上的問題...會吐血!!!!
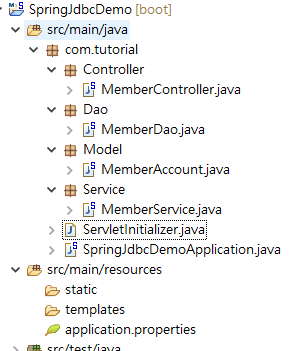
package com.tutorial.Controller;
import org.springframework.beans.factory.annotation.Autowired;
import org.springframework.web.bind.annotation.RequestMapping;
import org.springframework.web.bind.annotation.RestController;
import com.tutorial.Model.MemberAccount;
import com.tutorial.Service.MemberService;
@RestController
public class MemberController {
//透過 @RequestMapping 指定從/會被對應到此hello()方法
@Autowired
MemberAccount memberAccount;
@Autowired
MemberService memberService;
@RequestMapping("/")
public String hello(){
memberAccount = new MemberAccount();
memberAccount.setPassword("12345678");
memberAccount.setEmail("test@gmail.com");
memberAccount.setCellphone("0912345789");
memberAccount.setAddress("台北市");
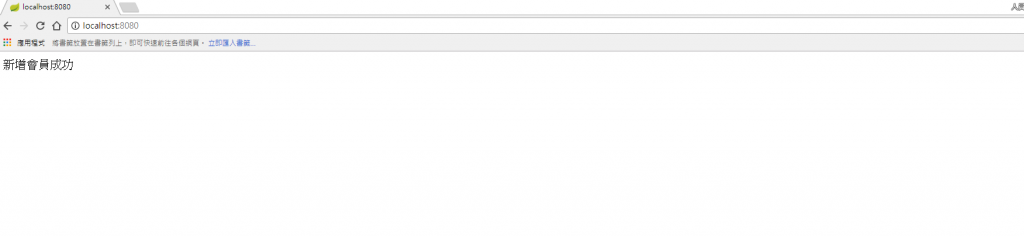
memberService.addMember(memberAccount);
return "新增會員成功";
}
}
這裡我要先解釋一下為什麼我用@RestController,我的目的只是要測試與資料庫的連線是否正常
@RestController的Annoation是用來建立RESTful Web Service的服務
@RestController與@Controller差別在於,@RestController註解中有包含了@ResponseBody的註解
相關細節我們之後會再介紹.
但是如果你是要建構 RESTful Web Service,設計必須謹慎相關的RESTful Web Service的設計方式後面有時間我會再做介紹
package com.tutorial.Model;

import org.springframework.stereotype.Component;

@Component
public class MemberAccount {
  private int id;
  private String email;
  private String cellphone;
  private String password;
  private String address;

  public int getId() {
	return id;
  }

  public void setId(int id) {
	this.id = id;
  }
  public String getEmail() {
	return email;
  }

  public void setEmail(String email) {
	this.email = email;
  }

  public String getCellphone() {
	return cellphone;
  }

  public void setCellphone(String cellphone) {
	this.cellphone = cellphone;
  }

  public String getPassword() {
	return password;
  }

  public void setPassword(String password) {
	this.password = password;
  }

  public String getAddress() {
	return address;
  }

  public void setAddress(String address) {
	this.address = address;
  }


}
在MemberAccount上方我宣告了一個@Component註解,只是要讓此類可被Controller注入
@Component
@Service
@Repository
@RestController
@Controller
這五個註解會在Spring Boot Starter一啟動後就做掃描,傳統的我們Spring會藉由xml的定義將類別定義成一個Bean
Spring Boot就是要解決太多繁雜的xml設定
package com.tutorial.Service;

import org.springframework.beans.factory.annotation.Autowired;
import org.springframework.stereotype.Service;

import com.tutorial.Dao.MemberDao;
import com.tutorial.Model.MemberAccount;

@Service
public class MemberService {
	@Autowired
	MemberDao memberDao;
	public void addMember(MemberAccount memberAccount){
		memberDao.addMember(memberAccount);
	}
}
此步驟是增加了一個member的Service的層,他可以對我們的Model數據層做任何的操作
讓我們在新增方法時非常的方便,還不太了解的話可以再回去看看上一篇Service的介紹
package com.tutorial.Dao;

import org.springframework.beans.factory.annotation.Autowired;
import org.springframework.jdbc.core.JdbcTemplate;
import org.springframework.stereotype.Repository;

import com.tutorial.Model.MemberAccount;

@Repository
public class MemberDao {
	@Autowired
	private JdbcTemplate jdbcTemplate;

	public void addMember(MemberAccount memberAccount){
		System.out.println("EXCUTE INSERT MEMBER");
	  jdbcTemplate.update("INSERT INTO member_account(PASSWORD, EMAIL, ADDRESS,CELLPHONE,CREATE_DATE) "
	  		+ "VALUES (?,?,?,?,NOW())",memberAccount.getPassword(), memberAccount.getEmail(),
	  		memberAccount.getAddress(),memberAccount.getCellphone());
  }
}
@Repository宣告的類定義的是我們數據訪問層
spring.datasource.url=jdbc:mysql://localhost:3306/member
spring.datasource.username=root
spring.datasource.password=123456
spring.datasource.driver-class-name=com.mysql.jdbc.Driver
spring.http.encoding.force=true
新手的你看了滿頭問號
如果你是高手 看到這程式碼與這個應用請高抬貴手不要吐血...
這裡面沒有interface,沒使用ORM或JPA方式做只是讓大家先了解一下資料庫的連線是怎樣運作
Loading class com.mysql.jdbc.Driver'. This is deprecated. The new driver class is com.mysql.cj.jdbc.Driver'. The driver is automatically registered via the SPI and manual loading of the driver class is generally unnecessary.
有跟著做的人提醒一下會報這個錯誤 記得改application.properties配置
spring.jpa.properties.hibernate.dialect = org.hibernate.dialect.MySQL5Dialect
spring.jpa.properties.hibernate.jdbc.time_zone = UTC
spring.datasource.url=jdbc:mysql://localhost:3306/member?serverTimezone=UTC
有timezone報錯的可以新加上面兩行,修改第三行
執行時畫面出現下列的問題??是連線那裡出問題,資料庫在本機。
There was an unexpected error (type=Internal Server Error, status=500).
Failed to obtain JDBC Connection; nested exception is java.sql.SQLException: The server time zone value 'unknown' is unrecognized or represents more than one time zone. You must configure either the server or JDBC driver (via the serverTimezone configuration property) to use a more specifc time zone value if you want to utilize time zone support.
終於成功了,上面的問題我調整application.properties的內容
spring.datasource.url=jdbc:mysql://localhost:3306/member?serverTimezone=UTC
spring.datasource.username=XXXX
spring.datasource.password=XXX
spring.datasource.driver-class-name=com.mysql.cj.jdbc.Driver
不知道有沒有新手和我一樣最近才學習到這個部分呢...?
不知道是版本的因素還是其他原因,第一段連接資料庫的那個dependency會抱錯
因此這邊提供給大家修正個寫法
	<dependency>
		<groupId>com.mysql</groupId>
		<artifactId>mysql-connector-j</artifactId>
		<scope>runtime</scope>
	</dependency>
groupId 和 artifactID的部份有稍微不一樣,我也不確定這樣寫對不對,這也是我爬文後找到的寫法,寫了之後沒有抱錯,給各位參考