
每日一句來源:Daily English
The first and greatest victory is to conquer yourself; to be conquered by yourself is of all things most shameful and vile. -- 戰勝自己是最首要、最偉大的勝利,無法克制自己是最令人羞愧、最可憐的失敗。
今天我們就來使用昨天寫的trigger來實做Angular看看,實做一個使用者自行上傳照片的功能
我們今天會使用ngxf-uploader來實做檔案上傳的功能,npm i ngxf-uploader
相關的API可以點網址過去觀看。
透過他我們可以簡單的出脫動檔案,上傳檔案的功能
首先加入module
...
import { NgxfUploaderModule } from 'ngxf-uploader';

@NgModule({
  imports: [
    // 由於我們沒有要使用httpClient來上傳,我們使用firebase的方法,因此我們不使用他提供的service
    NgxfUploaderModule
    ...
  ],
  declarations: [
    ...
  ]
})
export class UserModule { }
接著我們就能在component使用他的API了
<button mat-raised-button color="primary" (click)="fileSelect.click()">
  上傳檔案
</button>

<div class="block"
     (ngxf-drop)="uploadFile($event)"
     drop-class="drop"
     accept="image/*,.svg" multiple>
  <label class="upload-button">
    choice file.
  </label>
</div>
<input type="file" #fileSelect
  (ngxf-select)="uploadFile($event)"
  [ngxf-validate]="{ size: { min: 50, max:1000000 } }"
  accept="image/*,.svg">
要注意如果有使用multiple的話她回傳的會是一個 File[],在使用上要注意,accept在drop上也可以給
ts
// 注入錯誤訊息的型別
import { FileError } from 'ngxf-uploader';
...

uploadFile(file: File | FileError): void {
  console.log(file);
  // 判斷是檔案還是錯誤訊息
  if (!(file instanceof File)) {
    this.alertError(file);
    return;
  }
  const filePath = `/users/${new Date().getTime()}_${file.name}`;
  this.fileHandler = this._upload.fileHandler(filePath);

  this.fileHandler.upload({ file: file })
    .subscribe(RxViewer);

  this.uploadPercent$ = this.fileHandler.task.percentageChanges();
  this.fileURL$ = this.fileHandler.task.downloadURL();
  this.meta$ = this.fileHandler.task.snapshotChanges().map(d => d.metadata);
}
我們可以加入這個判斷來知道透過ngxf-uploader獲得了什麼資訊
alertError(msg: FileError) {
  switch (msg) {
    case FileError.NumError:
      alert('Number Error');
      break;
    case FileError.SizeError:
      alert('Size Error');
      break;
    case FileError.TypeError:
      alert('Type Error');
      break;
  }
}
接著我們繼續修改聊天室為她加上檔案上傳的功能
我們一樣擺上input並給定ngxf-select並且設定相關限制
<input type="file" #fileSelect
  (ngxf-select)="uploadFile($event)"
  [ngxf-validate]="{ size: { min: 50, max:1000000 } }"
  accept="image/*,.svg">
也為整個聊天區塊加上拖曳的功能,並且一樣綁上參數,在增加一個當我們拖曳過去後的效果大概像這樣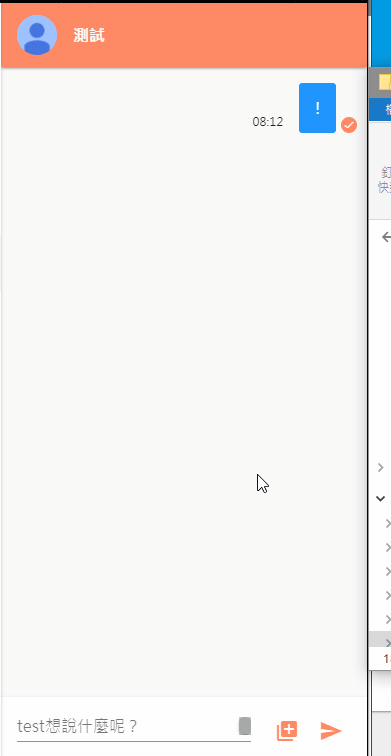
<section class="message-container" fxLayout="column nowrap"
  (ngxf-drop)="uploadFile($event)"
  drop-class="drop"
  accept="image/*,.svg">

  <div class="block">
    <mat-icon class="mat-size-5 c-white">cloud_upload</mat-icon>
  </div>
  ...
再來修改送出訊息的地方,因為在form裡面,我們要給定type="button"才不會觸發這個form的送出事件,並且給予click事件點擊我們的input file。
<div class="t-al-c pad-l-r-1">
  <button mat-icon-button type="button" (click)="fileSelect.click()">
    <mat-icon color="accent">add_to_photos</mat-icon>
  </button>
  <button mat-icon-button>
    <mat-icon color="accent">send</mat-icon>
  </button>
</div>
接著來到TS的部分,我們可以將fileErrorHandler搬移至我們的upload.service.ts,並且加上我們的警告視窗。
@Injectable()
export class UploadService {

  constructor(
    private _storage: AngularFireStorage,
    private _alc: AlertConfirmService) { }

  fileHandler<T>(path: string) {
    return new FileHandler<T>(this._storage, path);
  }

  fileErrorHandler(errror: FileError) {
    switch (errror) {
      case FileError.NumError:
        this._alc.alert('檔案數量錯誤');
        break;
      case FileError.SizeError:
        this._alc.alert('檔案大小錯誤');
        break;
      case FileError.TypeError:
        this._alc.alert('檔案格式錯誤');
        break;
    }
  }
}
由於我們現在多了檔案類型的訊息,我們可以定義一個列舉來存放種類
message.model.ts
export enum MESSAGE_TYPE {
  MESSAGE = 'message',
  FILE = 'file'
}

export interface MessageModel extends BaseModel {
  sender: string;
  addressee: string;
  content: string;
  type: MESSAGE_TYPE;
}
接著回到component,加上uploadFile的方法,得到檔案後先做錯誤的判斷,接著我們實作上傳檔案
uploadFile(file: File | FileError) {
  if (!(file instanceof File)) {
    this._upload.fileErrorHandler(file);
    return;
  }

  const filePath = `${new Date().getTime()}_${file.name}`;
  const fileHandler = this._upload.fileHandler(filePath);

  // 我們這裡把兩個rx一起送出,並且為我們的訊息加上類型
 return this.getMessageObs(filePath, MESSAGE_TYPE.FILE)
  .mergeMap(() => fileHandler.upload({ file: file }))
  .subscribe(RxViewer);
}
接著我們可以測試看看是否上傳成功,並建立縮圖。
目前筆者測試很奇怪有時圖片是不會產生的,或許是目前storage的trigger感覺尚存在問題,且從訊息中心那並未得到任何錯誤,感覺像是並且完全沒有觸發,我想是尚有BUG,也或是因為筆者是免費版本的關係,但由於沒有錯誤訊息,暫時無法了解原因,若將來筆者有所了解再告知大家,不過我們這裡至少知道了有此功能能使用。
最後我們可以使用先前教過大家的pipe來顯示檔案,並且當檔案載入中的時候給予一個小動畫
<ng-container *ngIf="message.content | img | async as img; else imgloading">
  <div class="message-img mat-elevation-z2"
    [style.backgroundImage]="img | safe:'background-image'">
    <img  [src]="img">
  </div>
</ng-container>
<ng-template #imgloading>
  <div class="message-img" fxLayoutAlign="center center">
    <mat-progress-spinner mode="indeterminate" color="accent" [diameter]="20"></mat-progress-spinner>
  </div>
</ng-template>
我們會發現資料並無法正確的顯示,因為當我們的trigger在執行時,我們的檔案實際上是尚未建立完成的,若這時我們去取得this._storage.ref(path).getDownloadURL()當然就得到空的了,因此我們這裡還需要下一點功夫,明天再跟大家進一步了解解決辦法。
今天使用ngxf-uploader來實做檔案上傳及拖曳上傳,簡單的實作並結合trigger實作縮圖,讓我們在顯示使用這圖片的時候可以使用小縮圖,降低使用者載入的速度,筆者有注意到,目前storage的trigger感覺尚存在許多問題,筆者會發現有時縮圖並不會產生,並且完全沒有觸發,我想是尚有BUG,或是因為我們是免費版本的關係,但由於沒有錯誤訊息,暫時無法了解原因,若將來筆者有所了解再告知大家,明天我們將進一步解決圖片載入的問題。
https://github.com/ZouYouShun/ngxf-uploader
https://ngxf-uploader.firebaseapp.com/upload


 iThome鐵人賽