本系列文章已重新編修,並在加入部分 ES6 新篇章後集結成書,有興趣的朋友可至天瓏書局選購,感謝大家支持。
購書連結 https://www.tenlong.com.tw/products/9789864344130
讓我們再次重新認識 JavaScript!
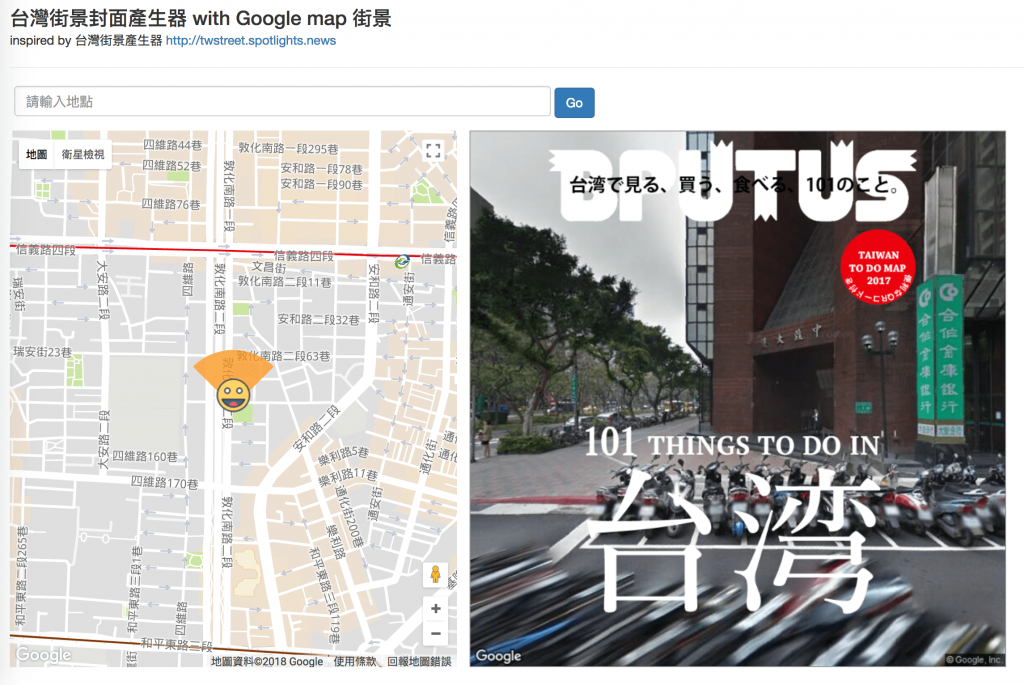
最近看到有幾位朋友鐵人賽的主題是跟 GIS 相關的,突然想起之前因為看到「台灣街景封面產生器」覺得有趣,於是自己也寫了一個「台灣街景封面產生器 with Google map 街景」版
然後這是我做的
台灣街景封面產生器 with Google map 街景
那麼今天就來簡單說明一下製作原理吧。
申請 Google Map API 的過程就不解釋了,詳細流程可以參考 gelab 的 [Day 23] 在WebGIS中加入Google街景,或是 King Tzeng 的 [day3]-創造自己的地圖服務應用,Google Maps API申請流程 一文。
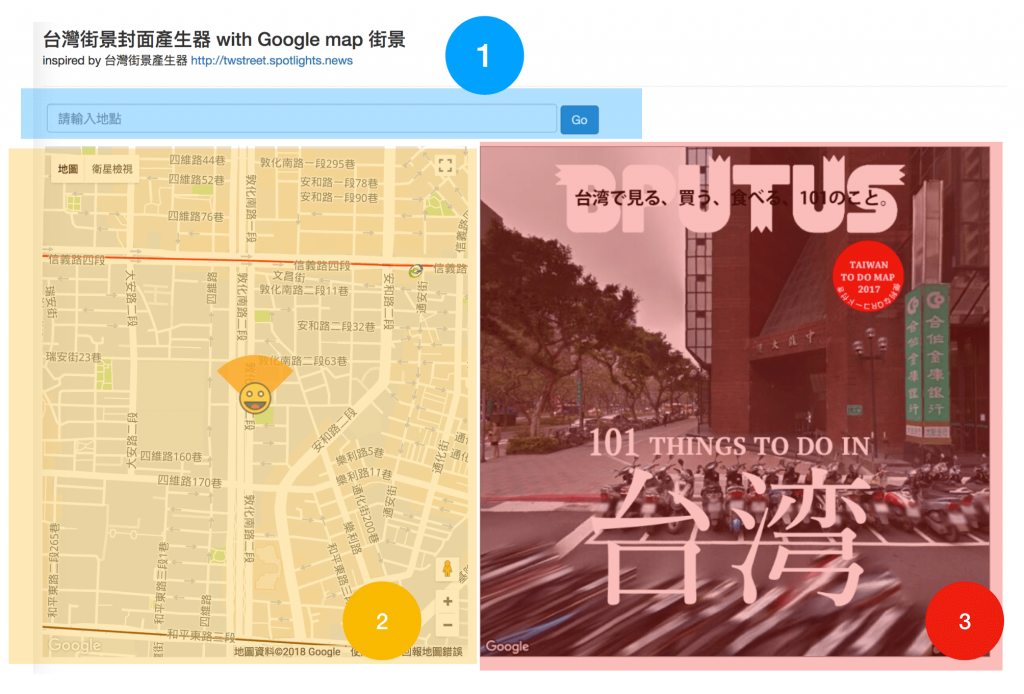
整個產生器頁面,我把它分成三個部分,

首先是輸入框的部分。
輸入框做的事情很簡單,就是提供一個欄位給使用者輸入「地標」或是「地址」,然後給 Google Map API 做解析:
var address = document.getElementById('address').value;
var geocoder = new google.maps.Geocoder();

geocoder.geocode({ 'address': address }, function(results, status) {
  if (status === google.maps.GeocoderStatus.OK) {

    // 把地圖帶到 google 回傳的經緯度, 並且設定 marker 位置
    map.panTo(results[0].geometry.location);
    marker.setPosition(results[0].geometry.location);

    // 將回傳的經緯度作為參數丟給 imageReload()
    imageReload(results[0].geometry.location.lat(), results[0].geometry.location.lng());
  }
  else {
    alert('此地點無法解析.');
  }
});
這裡是透過 Google Map API 提供的 Geocoder 來幫助我們對地址、地標名稱作查詢經緯度的工作。 當 geocoder.geocode 可以正確解析我們送出的文字時,如果成功就會回傳 google.maps.GeocoderStatus.OK 與經緯度資訊,我們就可以繼續後續的工作。
當拿到經緯度時,我們需要做的事有:
接著是左側地圖的部分。
左側地圖需要做的事情其實跟一般 Google Map 做的事情差不多,差別在於那顆笑臉的 icon 是可以「拖曳」與「旋轉角度」的。
拖曳其實很單純,只要將 marker 的 draggable 打開就好:
marker = new RichMarker({
  position: new google.maps.LatLng(..., ...),
  map: map,
  draggable: true,
  content: `<div id="marker">
    <img src="https://cdn2.iconfinder.com/data/icons/new-year-resolutions/64/resolutions-09-48.png" alt="" />
    <div class="handle"></div>
  </div>`
});

marker 旋轉的部分則是透過頭上的 掃把頭 光芒與滑鼠事件來判斷拖曳行為,並且取得對應角度:
$('.handle').on('mousedown', function(e) {
  e.preventDefault();
  e.stopPropagation();

  h_x = e.pageX;
  h_y = e.pageY;
  dragging = true;

  if (!target_wp.data("origin")){
    target_wp.data("origin", {
      left: target_wp.offset().left,
      top: target_wp.offset().top
    });
  }

  o_x = target_wp.data("origin").left;
  o_y = target_wp.data("origin").top;

  last_angle = target_wp.data("last_angle") || 0;
});

$('#map').on({
  'mousemove': function(e){
    var s_rad, s_x, s_y;

    if (dragging) {
      s_x = e.pageX;
      s_y = e.pageY; // start rotate point

      // start rotate
      if (s_x !== o_x && s_y !== o_y) {
        s_rad = Math.atan2(s_y - o_y, s_x - o_x);
        s_rad -= Math.atan2(h_y - o_y, h_x - o_x);
        s_rad += last_angle;
        degree = (s_rad * (360 / (2 * Math.PI))).toFixed(5);

        target_wp.css('transform', 'rotate(' + degree + 'deg)');
        target_wp.css('transform-origin', '50% 50%');
      }
    }
  },
  'mouseup mouseleave': function(e){
    dragging = false;
    var s_x = e.pageX, s_y = e.pageY;
    var s_rad = Math.atan2(s_y - o_y, s_x - o_x);

    s_rad -= Math.atan2(h_y - o_y, h_x - o_x);
    s_rad += last_angle;

    if( target_wp ) {
      target_wp.data("last_angle", s_rad);
    }

    heading = degree;
    window.setTimeout(function(){ imageReload( marker.getPosition().lat(), marker.getPosition().lng() ); }, 100);
  }
});

這樣我們就可以取得對應的「可視範圍角度」。
最後是街景的部分。
Google 街景除了我們平常熟知的全景照片操作之外,其實也提供了靜態照片的服務:Google Street View Image API
用法很簡單:
https://maps.googleapis.com/maps/api/streetview?size=400x400&location=40.720032,-73.988354&fov=90&heading=235&pitch=10&key=[YOUR_API_KEY]
像這樣,如果傳入的經緯度、角度等參數有對應的照片的話,就會顯示對應的圖片。
所以當左側地圖的位置、角度被改變了之後,我們就可以即時向 Google Street View Image API 去請求照片,然後將我們事先準備好的封面標題圖

(感謝台灣街景封面產生器提供)
再透過 canvas 的 context.drawImage 來做合成
var canvas = document.getElementById("myCanvas");
var context = canvas.getContext("2d");

// 取得 Google Street View Image 靜態圖
var sources = {
  photo: photo,
  stview: "https://maps.googleapis.com/maps/api/streetview?key="+ mapKey +"&size=900x900&location="+ lat +","+ lng +"&heading="+ heading +"&pitch=" + pitch
};

loadImages(sources, function(images) {
  context.drawImage(images.stview, 0, 0, 700, 700);
  context.drawImage(images.photo, 0, 0, 700, 700);
});
成品就像這樣

Demo 網址:https://kuro.tw/twstreet/
歡迎大家試玩 XD
那麼以上就是今天的介紹,希望各位喜歡,下次見。
