iT邦幫忙

2019 iT 邦幫忙鐵人賽

DAY 12
0
Software Development

iOS APP開發學習筆記 系列 第 12

DAY12 利用xib客製化TableViewCell

  • 分享至 

  • xImage
  •  

昨天介紹了TableView如何使用,並利用Storyboard客製化Cell,今天要來介紹用另外一種方式來客製化Cell,利用的是xib。有些時候,我們可能希望客製化一個Cell可以給多個TableView共用,這時你就可以將Cell獨立出來在xib檔中。

使用方式

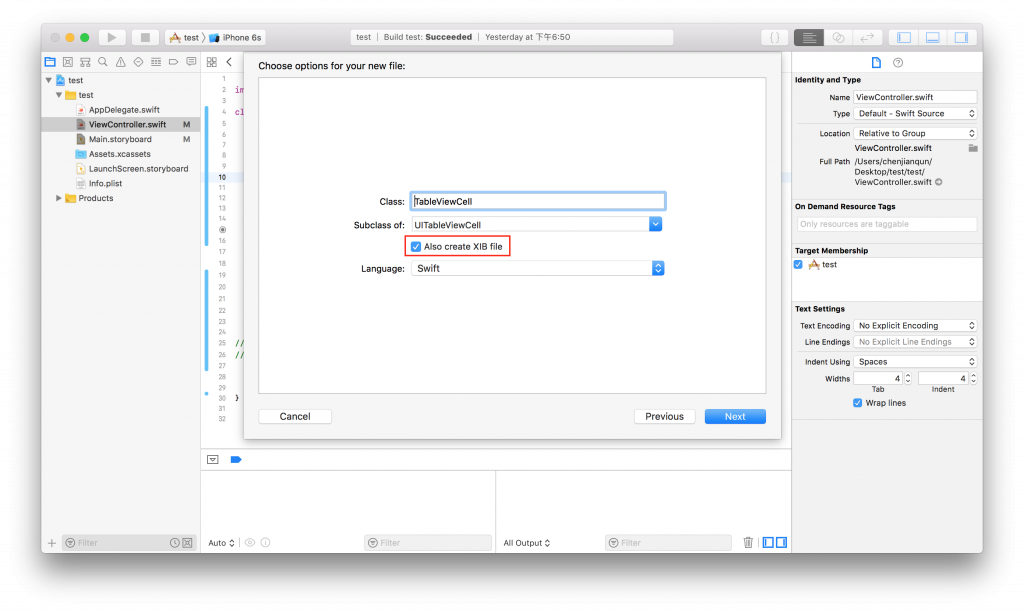
建立TableView部分都一樣,昨天的文章有提到,這邊就不贅述了,接著在創建TableViewCell檔案時勾選下方的Also create XIB file。
https://ithelp.ithome.com.tw/upload/images/20181026/20107549sxCCRmyv4O.png

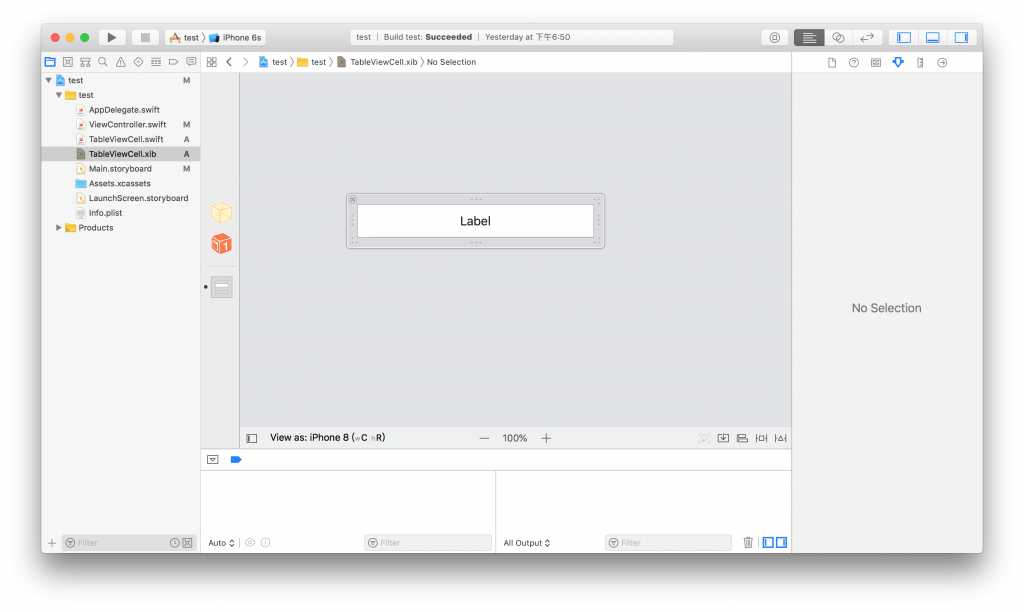
創建完成後就會在左邊檔案多出一個.xib檔
https://ithelp.ithome.com.tw/upload/images/20181026/20107549AqhPfJ9zZm.png

先到.xib中拉一個view對齊上下左右,接著將想自訂的元件拉進去並做約束。
https://ithelp.ithome.com.tw/upload/images/20181026/20107549g6VEhwNiOg.png

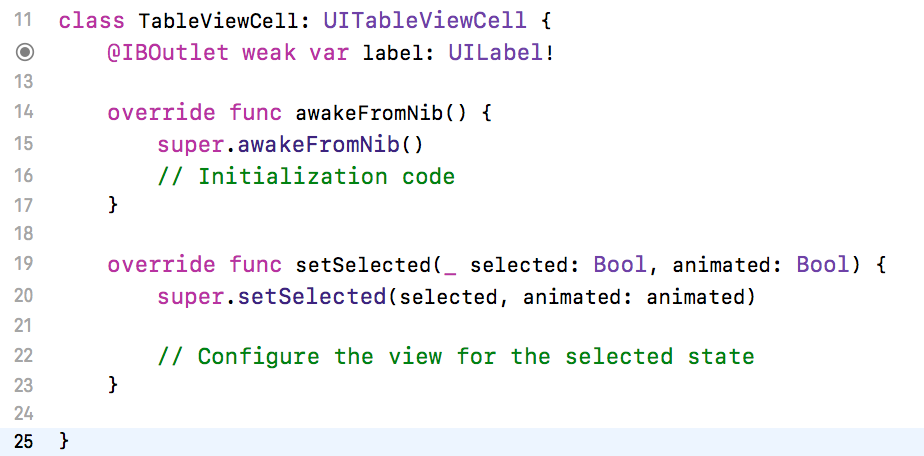
並將xib中的元件拉到TableViewCell中做關聯。
https://ithelp.ithome.com.tw/upload/images/20181026/20107549EolRAIBiiK.png

接下來再ViewController的Viewdidload()中加入以下程式碼用來註冊.xib。

self.tableView.register(UINib(nibName: "TableViewCell", bundle: nil),forCellReuseIdentifier: "Cell")
  • nibName:.xib檔的名稱
  • forCellReuseIdentifier:為之後在cellForRow中會用到的CellID。

接著在cellForRow()中跟昨天提到的作法相同
https://ithelp.ithome.com.tw/upload/images/20181026/20107549aQAy5QOX3x.png

就完成了!


上一篇
DAY11 Tableview
下一篇
DAY13 UIAlertController
系列文
iOS APP開發學習筆記 30
圖片
  直播研討會
圖片
{{ item.channelVendor }} {{ item.webinarstarted }} |
{{ formatDate(item.duration) }}
直播中

尚未有邦友留言

立即登入留言