上次介紹完Laravel的架構介紹,
這次就來介紹它的MVC並實做一次。
先創一個專案名叫project,終端機輸入
laravel new project
先用終端機進入到mysql裡創建一個名為project的資料庫,終端機輸入
create database project;
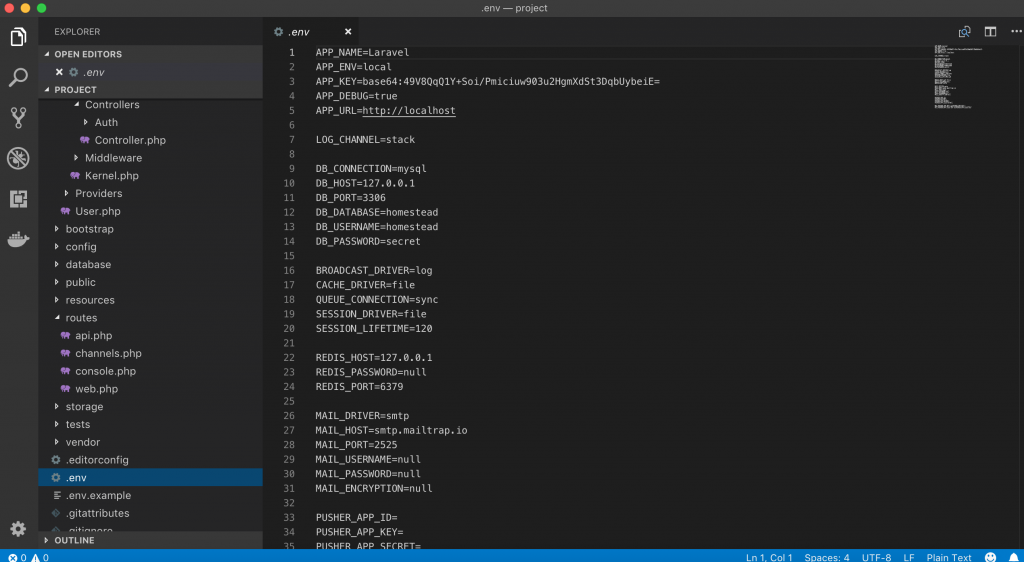
之後使用文本編輯器開起專案先設定.env連接到資料庫,
把DB_DATABASE、DB_USERNAME、DB_PASSWORD更改成自己設定即可。
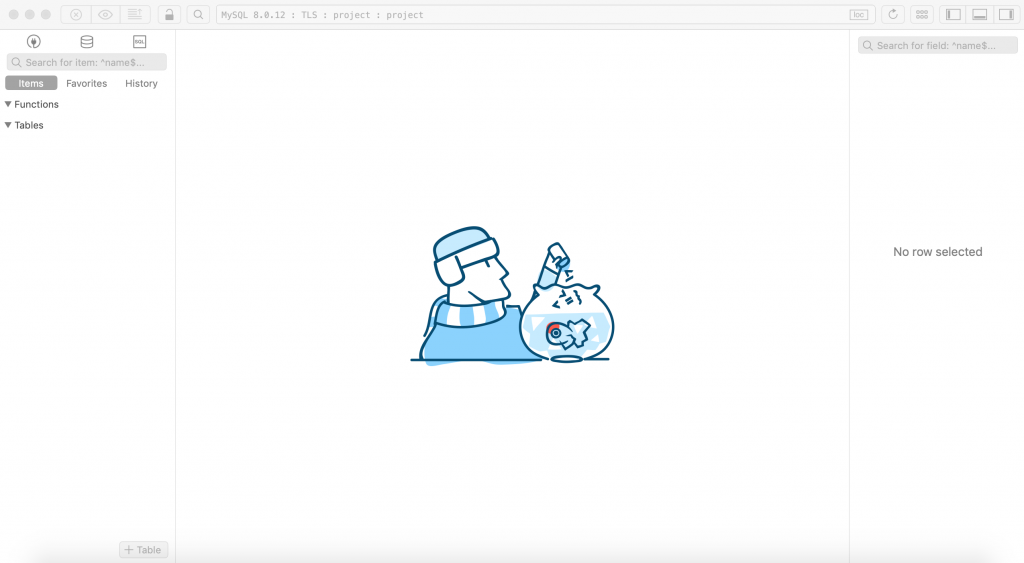
再來開啟資料庫管理工具連接到資料庫,
目的只是方便確認目前資料庫裡的資料概況,
畢竟用圖形工具還是比較美觀且好讀取,
因目前來尚未建立Table所以是空白狀態。
之後開始建立Model和Migration,終端機輸入
php artisan make:model Project -m
這邊會得到兩個檔案,分別是model和migration,
先到migration裡加入column
public function up()
    {
        Schema::create('projects', function (Blueprint $table) {
            $table->increments('id');
            $table->string('title');
            $table->string('body');
            $table->timestamps();
        });
    }
這邊加入title、body兩個欄位,終端機輸入
php artisan migrate
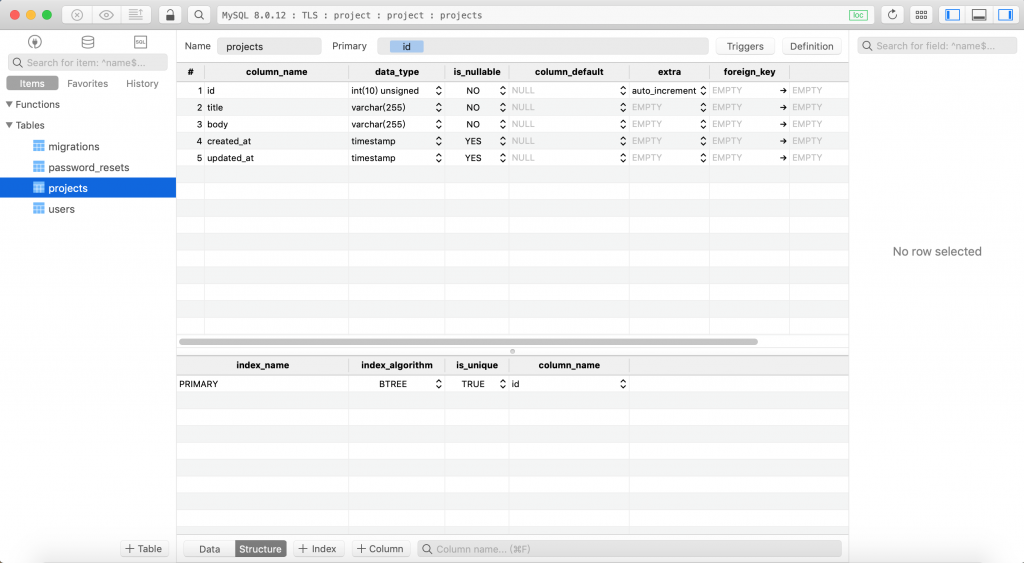
把畫面轉到資料庫管理工具重整後會看到,
一個名為projects的Table以及新增的兩個欄位。
再來手動輸入title和body的內容,這裡新增三筆資料。

再進到Project.php也就是Model檔裡加入
class Project extends Model
{
    protected $fillable = [
        'title', 'body',
    ];
}
下一步建立Controller並設定Route,終端機輸入
php artisan make:controller ProjectsController
建立完後新增function到ProjectsController裡
<?php

namespace App\Http\Controllers;

use Illuminate\Http\Request;
use App\Project;                                             //使用Project的model

class ProjectsController extends Controller
{
    public function index()                                  //建立名為index的function
    {
        $projects = Project::all();                          //用變數代替資料庫資料

        return view('index', compact('projects'));           //回傳變數到view
    }
}
之後到web.php加入Route
Route::get('/project', 'ProjectsController@index'); //讓URL導向project
接下來創建我們的View,到views的資料夾裡創名為index.blade.php檔案,blade是Laravel模板預設的名稱方便判讀。
<!DOCTYPE html>
<html lang="en">
<head>
    <meta charset="UTF-8">
    <meta http-equiv="X-UA-Compatible" content="ie=edge">
    <title>Project</title>
</head>
<body>

    <div class="container"></div>

        <h1>Project</h1>

    @foreach($projects as $project)                      //多筆資料使用迴圈

        <h3>
            {{$project->title}}                          //顯示title

                <li>{{$project->body}}</li>              //顯示body

        </h3>

    @endforeach

    </div>

</body>
</html>
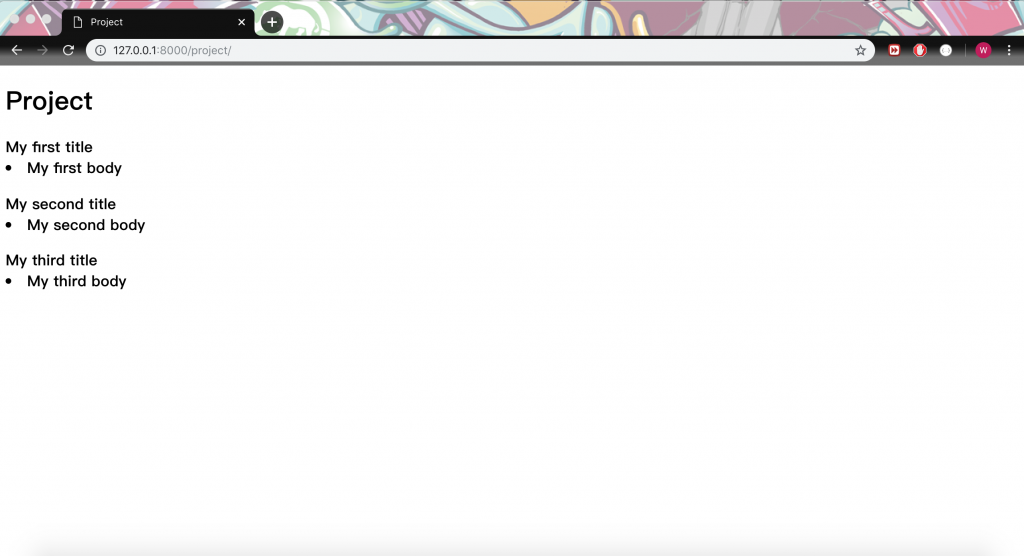
到這步驟我們基本MVC + Route都已經設定完成,
使用內建伺服器開啟網頁輸入http://127.0.0.1:8000/project
看到以下畫面
這樣就對MVC有了初步的認識,
自己多動手去做進而去把每一步都串連再一起,
才是真的有把專業知識那為己用哦~
本篇介紹到此,下次見~