Target:了解到如何申請 Google 金鑰。
Apply:未來Google Api的一些使用。
Step:
1.註冊Google帳號
2.Google搜尋「Google Cloud Platform」,如下圖所示。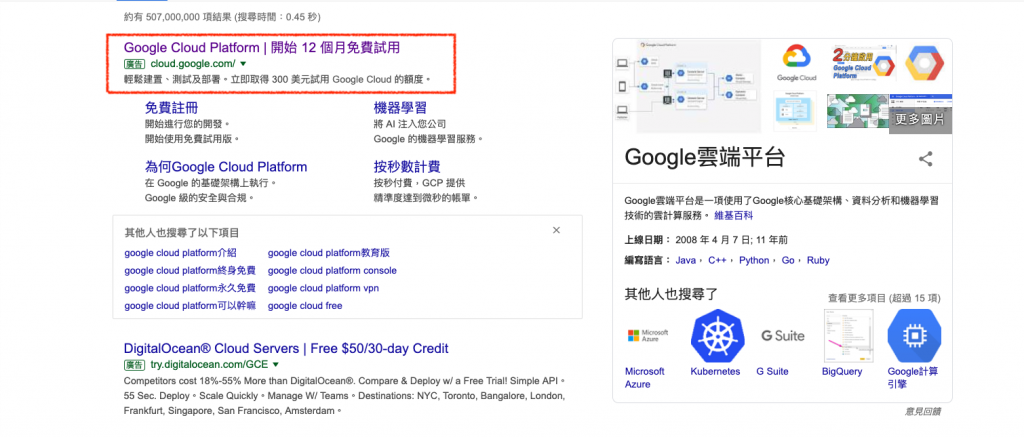
3.點進去,你會看到這個畫面,然後點「前往主控台」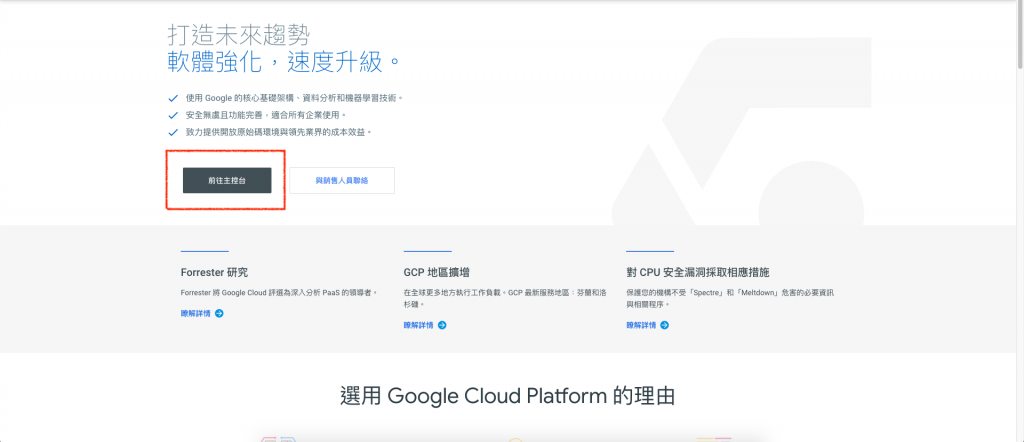
4.按下左邊上面那個三條線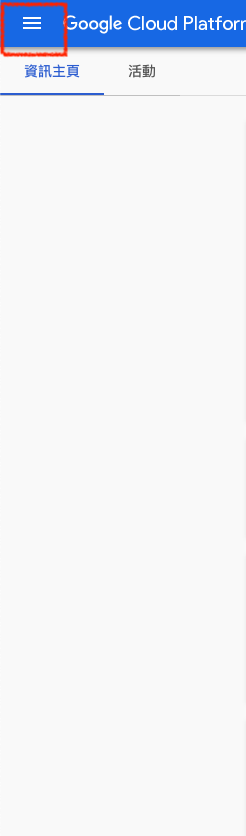
5.會出現如下圖所示的畫面,再點資訊主頁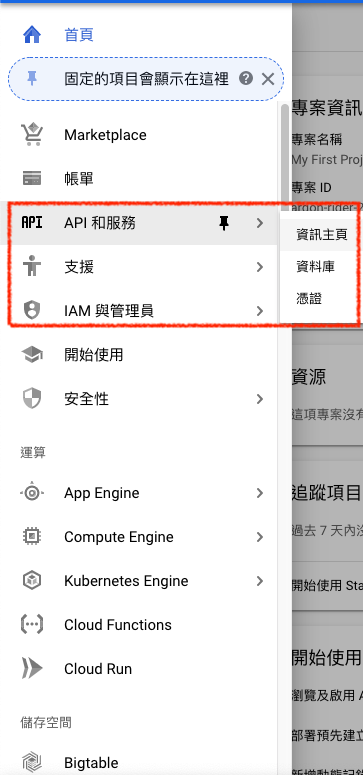
6.點選紅色框框的部分(為了要新增專案)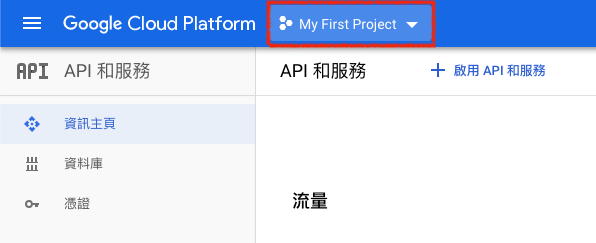
7.點下去看到這個畫面,並按下新增專案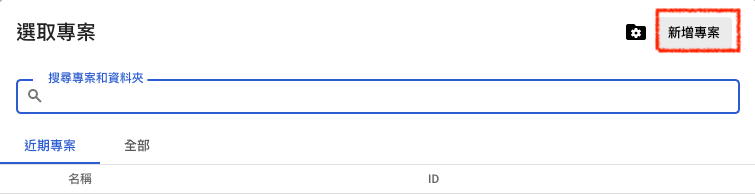
8.新增專案名字,看你要命名為何!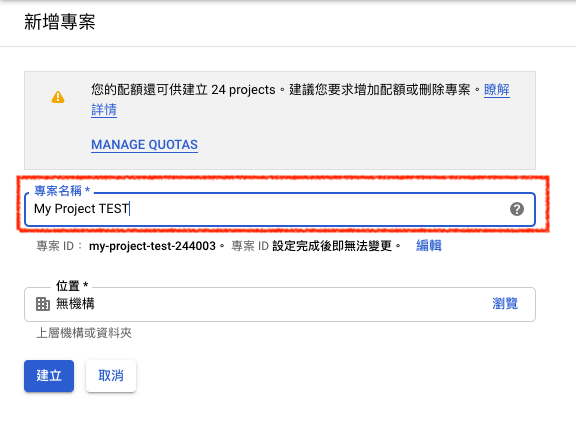
9.命名完後,點選你的專案名字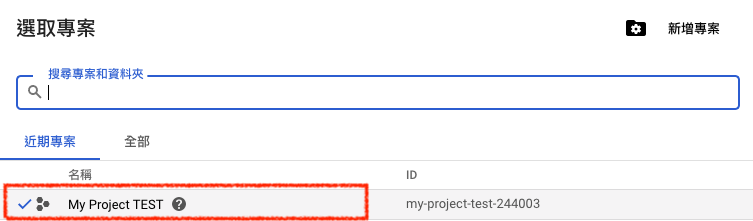
10.理論上會出現這個畫面(如果沒有,再按左邊那三條線->API和資訊服務->資訊主頁)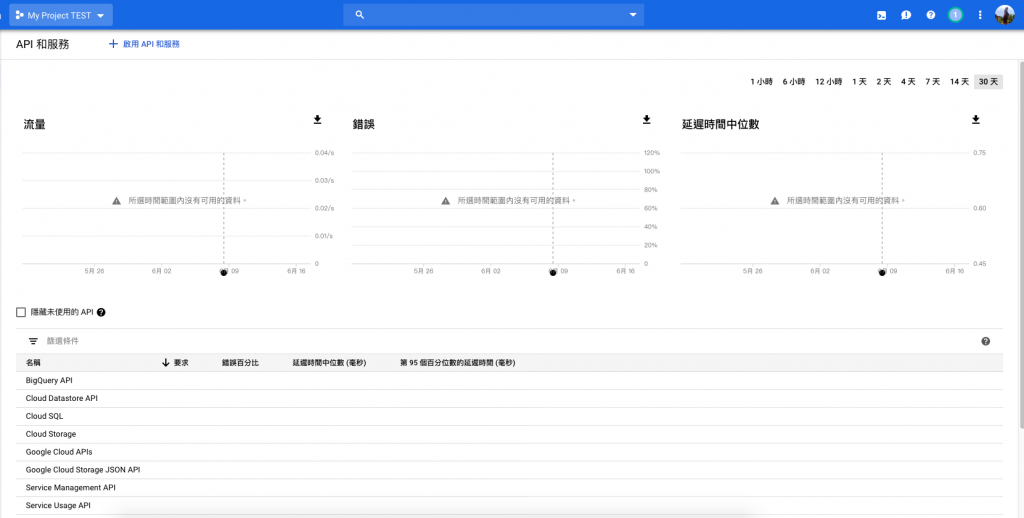
11.接下來按「憑證」,並點選建立憑證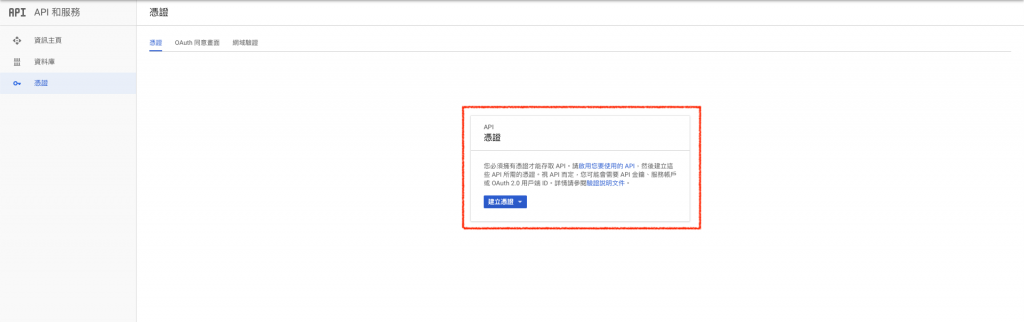
12.按下API金鑰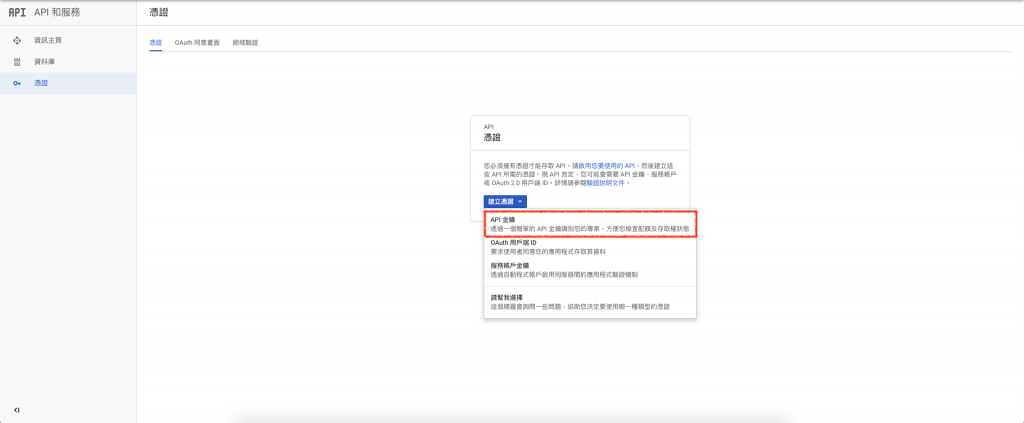
13.按下後,就會為您這個專案產生金鑰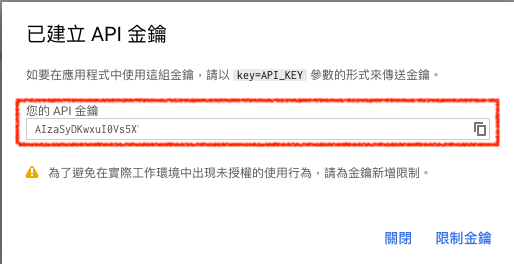
14.如果要對此專案的金鑰,做一些限制,可以再按限制金鑰,就會出現以下畫面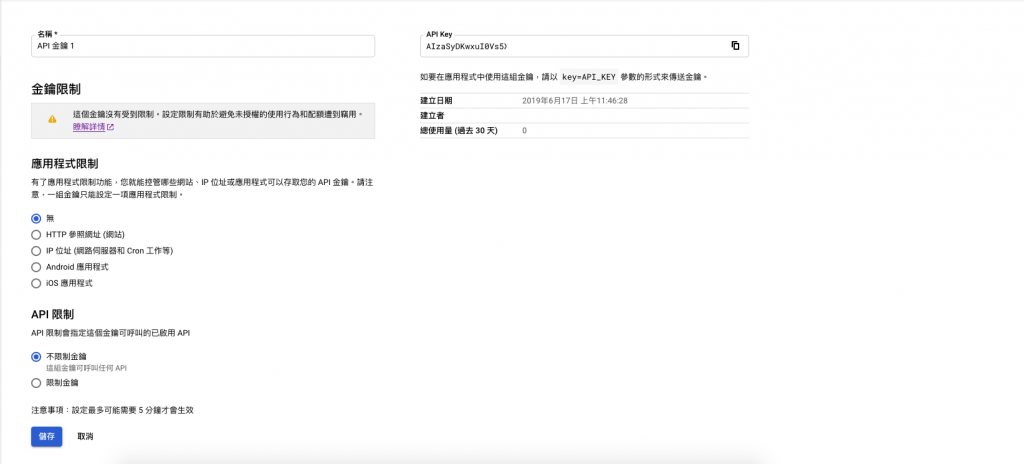
以上
 不明
不明

 iThome鐵人賽