先是在我的macAir上設定了我的tmux環境後,當我要在我的桌機上的linux base系統上設定同樣的設定時,雖然我已在Hackmd上有做條列式的紀錄,但突然想到不如來寫個文吧,上一次寫文是鐵人賽,因睡過頭而在第11天失敗的google ml課程。上一次寫文的動力是完成的獎品(書包)還有隊友的陪伴(一起努力的那股熱血),這次,沒有獎品也沒有隊友,而是為了當之後又荒廢了一陣子或是又要重設環境時,看自己的紀錄可以很快的複習,其次我在查資料時除了官方的manual或tutorial,亦深深的受惠於網路上像這樣的文章,不管是非官方的筆記紀錄, 教學, 報導,中文(順代一提,不到萬不得已不看簡體字文章)或英文(英文佔多數),我希望回饋給這個我索取了許多卻從來沒有回饋的網路社群,讓其他人再經歷與我相同處境時能多一個參考資料。除此之外,我也希望能增進自己的寫作與表達能力,我是個寡言的人,不遇知交或很好的朋友我是不會久聊,而麻煩的是我的朋友很少,於是長久處在自己一個人的狀態,沒有機會常把自己的想法傳達給別人,我的表達能力著實刊憂,清楚這是一大劣勢的我希望在發文的過程中也可以練練自己的表達能力。
這裡應該是個hen新手友善的地方,就從唯一發過文的IT邦幫忙開始吧(?)
# install zsh with apt
sudo apt install zsh
# check if zsh is well installed
zsh --version
# make it yout default shell
chsh -s $(which zsh)
This is the Z Shell configuration function for new users,
zsh-newuser-install.
You are seeing this message because you have no zsh startup files
(the files .zshenv, .zprofile, .zshrc, .zlogin in the directory
~).  This function can help you with a few settings that should
make your use of the shell easier.

You can:

(q)  Quit and do nothing.  The function will be run again next time.

(0)  Exit, creating the file ~/.zshrc containing just a comment.
     That will prevent this function being run again.

(1)  Continue to the main menu.

(2)  Populate your ~/.zshrc with the configuration recommended
     by the system administrator and exit (you will need to edit
     the file by hand, if so desired).

--- Type one of the keys in parentheses ---
sh -c "$(curl -fsSL https://raw.github.com/robbyrussell/oh-my-zsh/master/tools/install.sh)"
# install tmux using apt
sudo apt install tmux
# clone the package
git clone https://github.com/tmux-plugins/tpm ~/.tmux/plugins/tpm
# List of plugins
set -g @plugin 'tmux-plugins/tpm'
set -g @plugin 'tmux-plugins/tmux-sensible'

# Other examples:
# set -g @plugin 'github_username/plugin_name'
# set -g @plugin 'git@github.com/user/plugin'
# set -g @plugin 'git@bitbucket.com/user/plugin'

# Initialize TMUX plugin manager (keep this line at the very bottom of tmux.conf)
run -b '~/.tmux/plugins/tpm/tpm'
# type this in terminal if tmux is already running
tmux source ~/.tmux.conf
# 將以下指令放入~/.tmux.conf
set -g @plugin 'jimeh/tmux-themepack'
git clone --depth=1 https://github.com/romkatv/powerlevel10k.git ~/powerlevel10k
echo 'source ~/powerlevel10k/powerlevel10k.zsh-theme' >>! ~/.zshrc

> diff /tmp/.zshrc.PRYh6Isxzq ~/.zshrc
0a1,7
> # Enable Powerlevel10k instant prompt. Should stay close to the top of ~/.zshrc.
> # Initialization code that may require console input (password prompts, [y/n]
> # confirmations, etc.) must go above this block; everything else may go below.
> if [[ -r "${XDG_CACHE_HOME:-$HOME/.cache}/p10k-instant-prompt-${(%):-%n}.zsh" ]]; then
>   source "${XDG_CACHE_HOME:-$HOME/.cache}/p10k-instant-prompt-${(%):-%n}.zsh"
> fi
>
38a46,48
>
> # To customize prompt, run `p10k configure` or edit ~/.p10k.zsh.
> [[ ! -f ~/.p10k.zsh ]] || source ~/.p10k.zsh
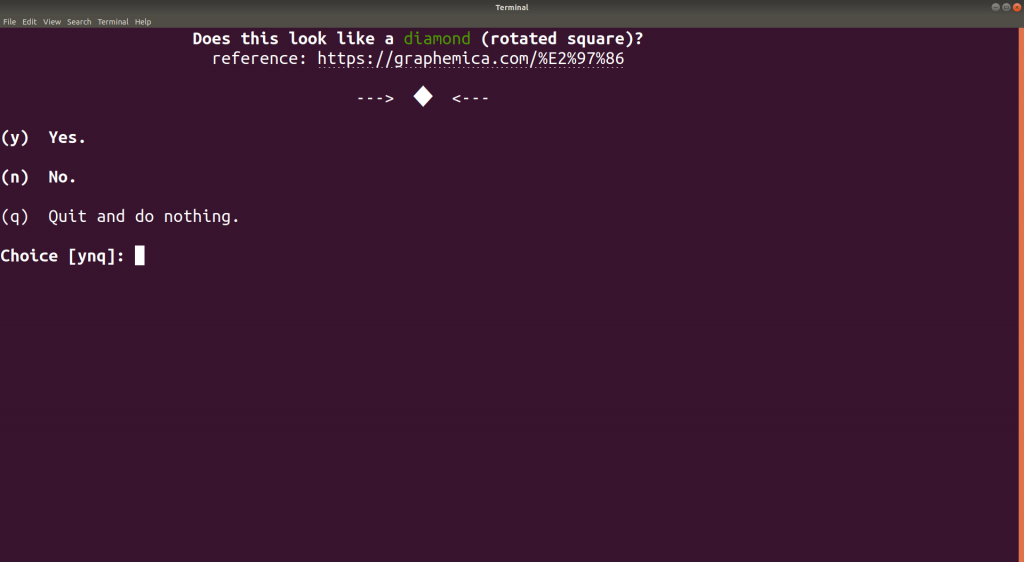
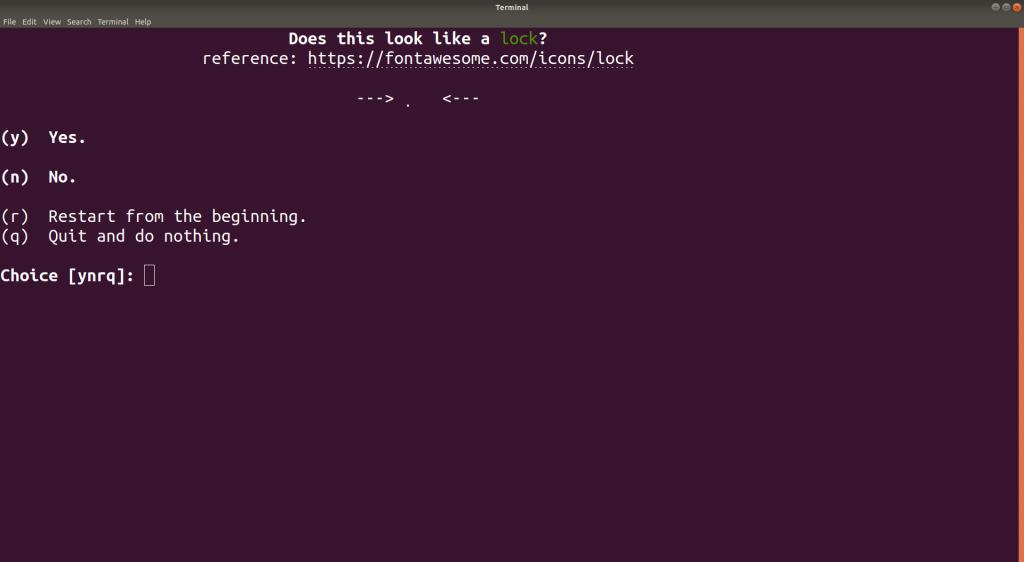
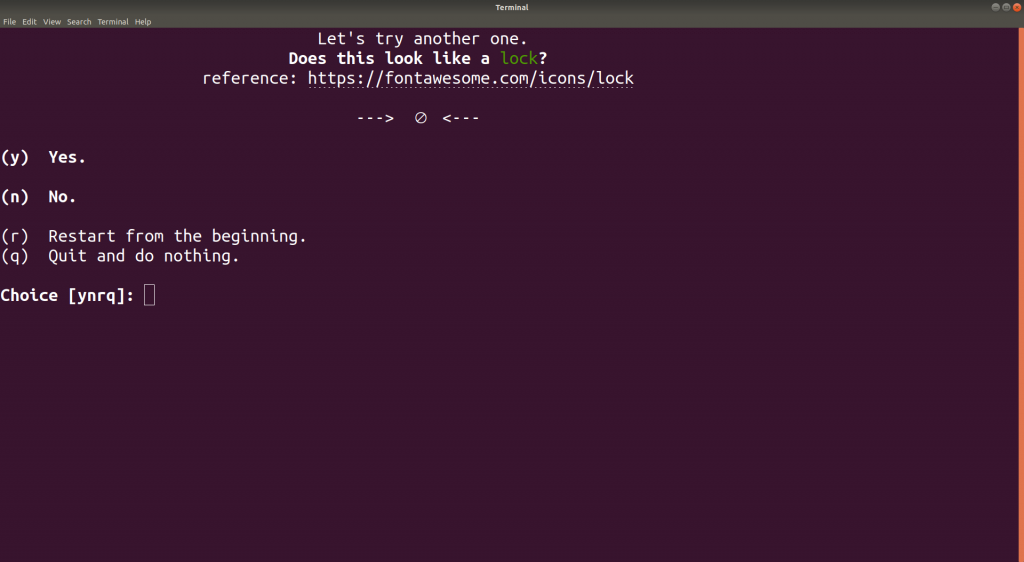
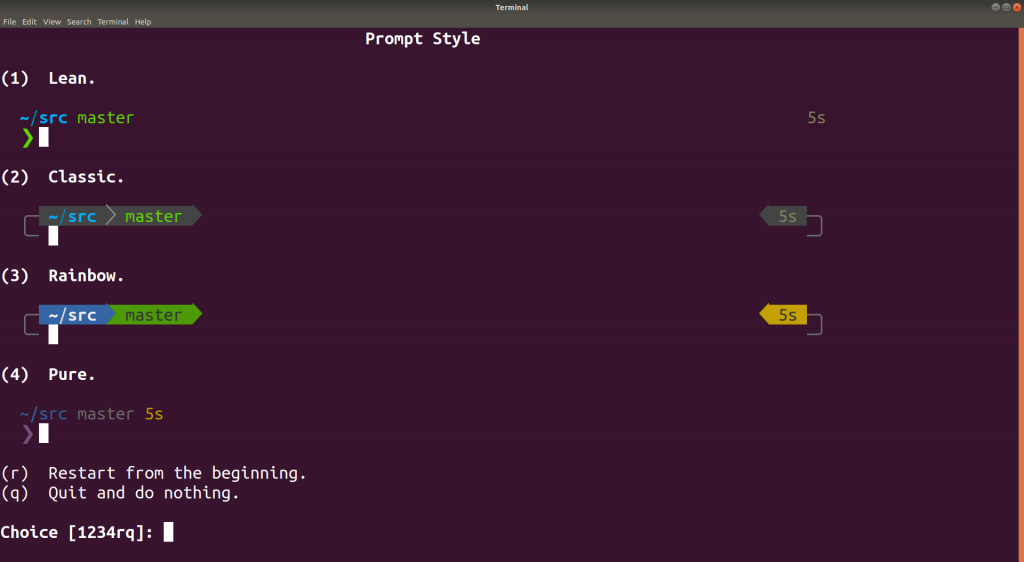
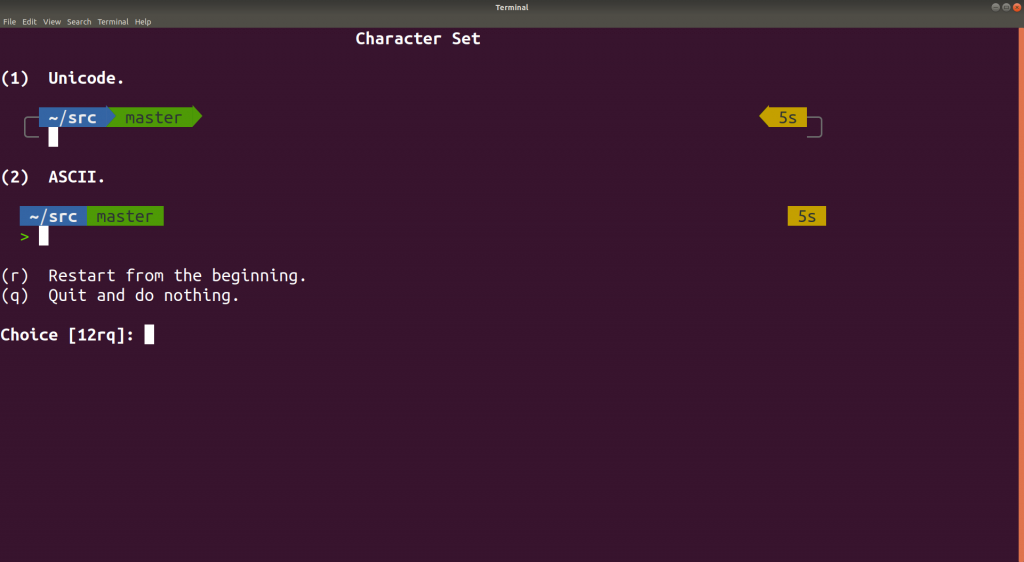
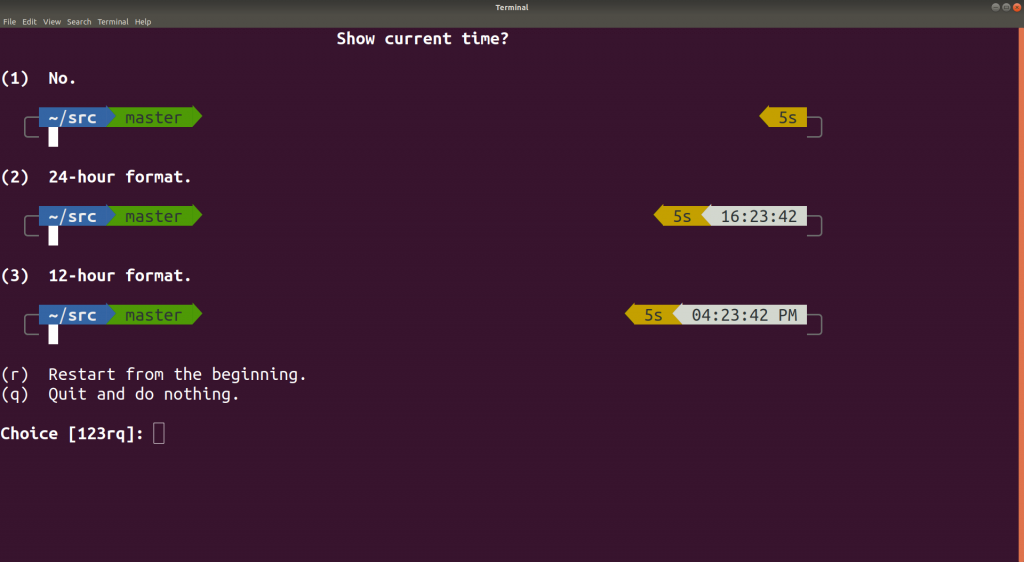
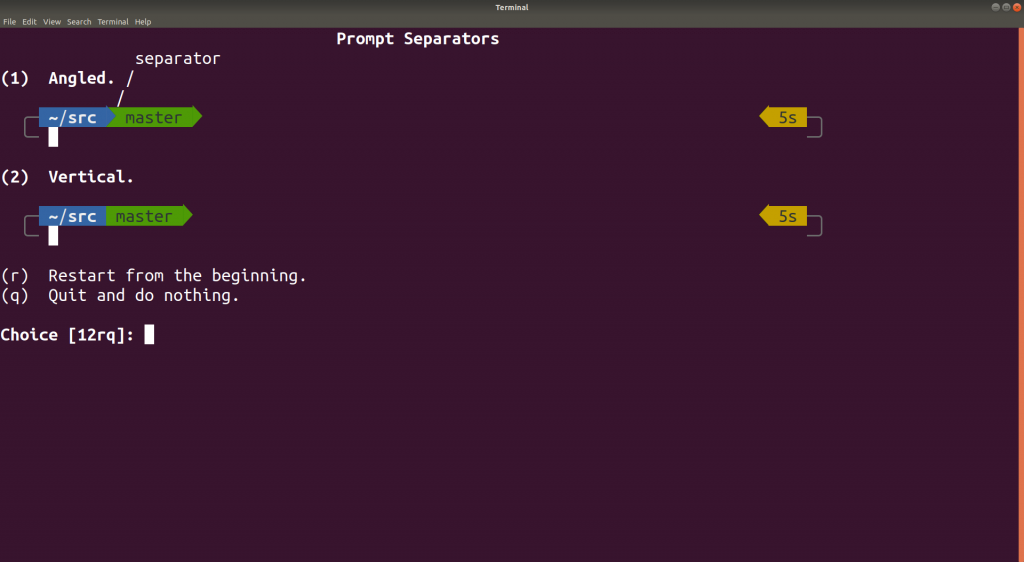
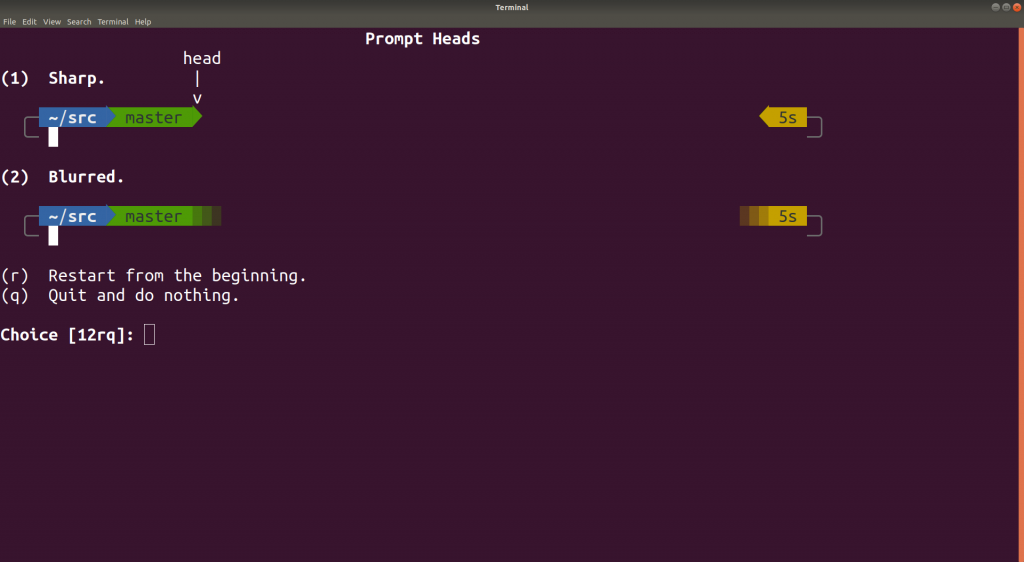
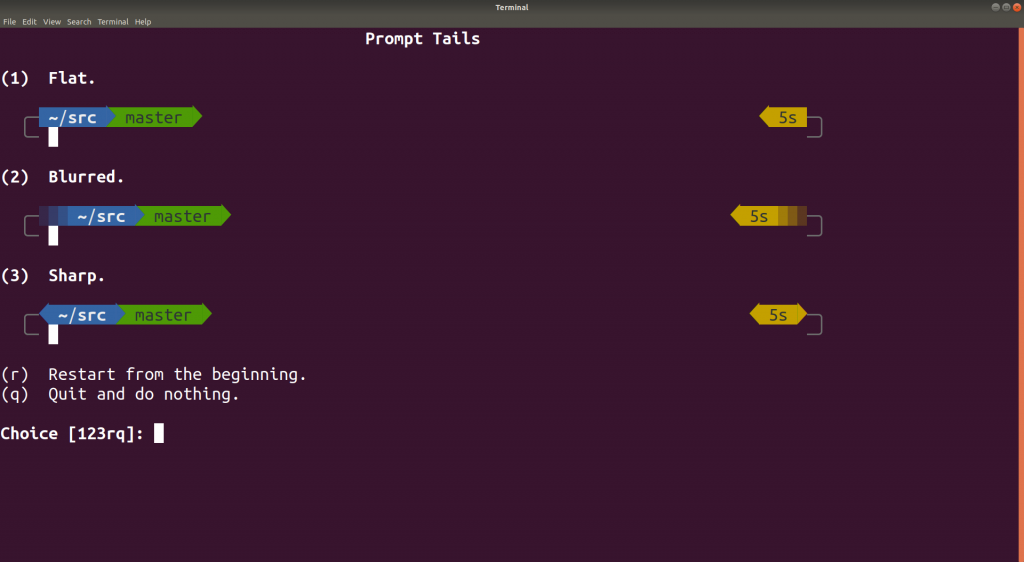
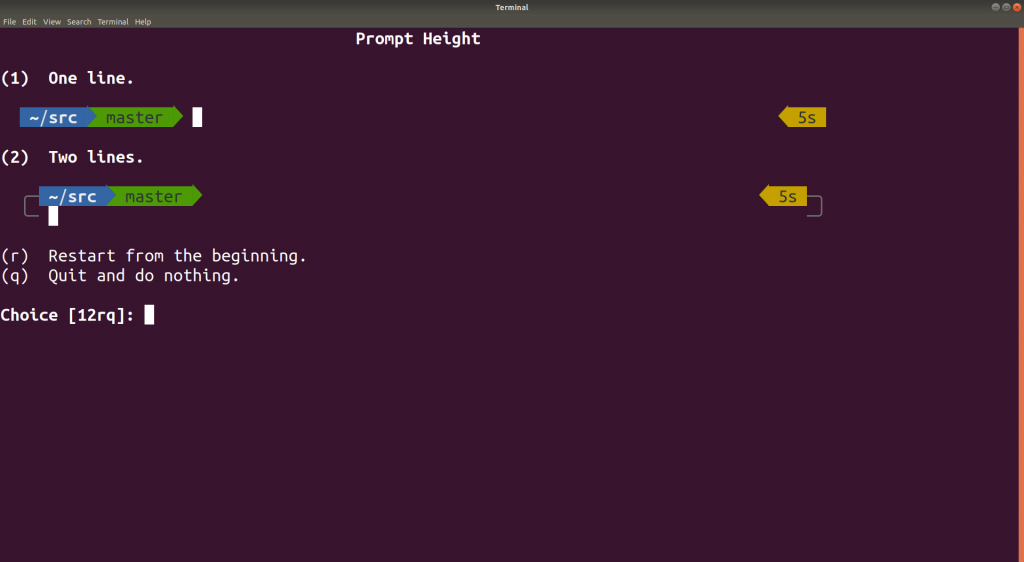
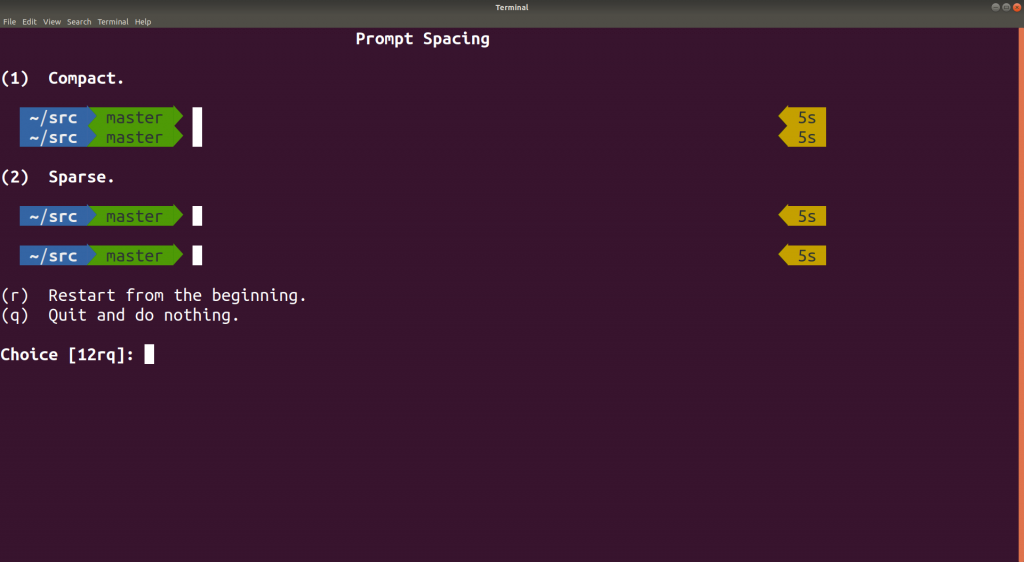
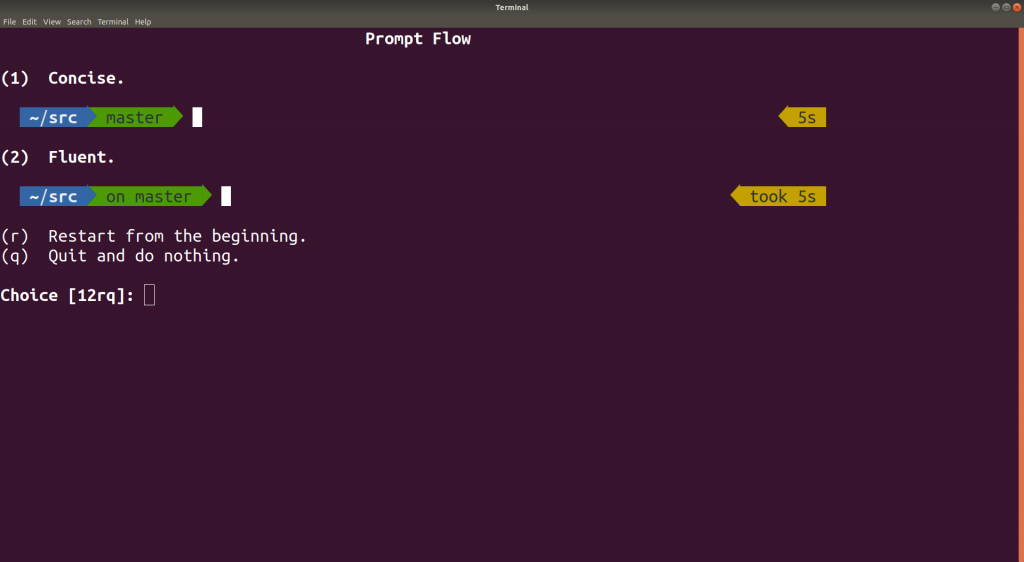
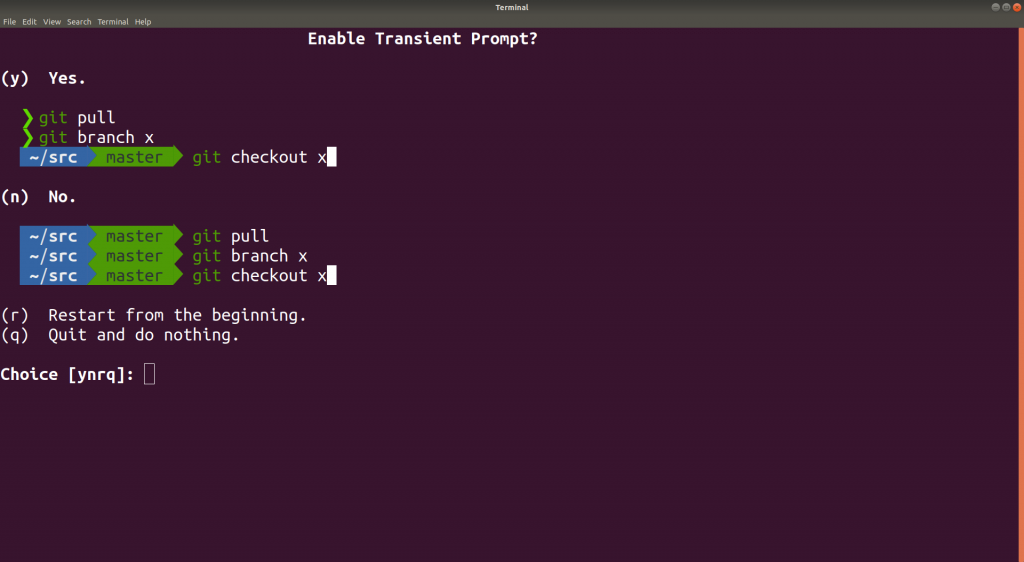
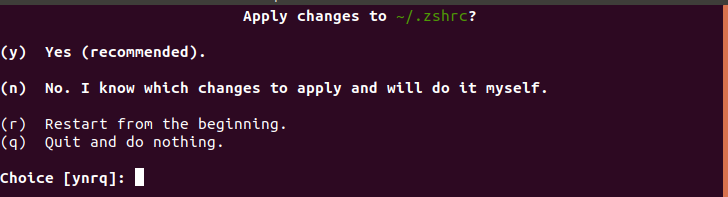
p10k configure
Install Menlo for Powerline and set it as your font for the Ubuntu Sub System
Right Click Ubuntu Terminal Window
Click Properties
Click the Font Tab
Set Font to Menlo for PowerLine
Click Ok
Restart the Ubuntu App
突然想到 來立一個flag好了,下次來做個shortkeys, environment settings,alias的紀錄,包括vimrc, .tmux.conf
再立一個flag 繁體字的安裝紀錄ibus, x11, hime, blablabla
再立! 難道爆的arch linux安裝紀錄
再再立! 用英文寫!
未來說不定可以像大大一樣,把自己的這些紀錄放到github host上
分類跟上面不太一樣請見諒,這是從我的筆記複製過來的
cat filename|pbcopyorsed -n ?,?p filename|pbcopy
Ctrl + Shift + c&v
Install Menlo for Powerline and set it as your font for the Ubuntu Sub System
Right Click Ubuntu Terminal Window
Click Properties
Click the Font Tab
Set Font to Menlo for PowerLine
Click Ok
Restart the Ubuntu App
Esc = Ctrl + [
set -goq @themepack-status-left-area-right-format "#(whoami)#=={battery_percentage}"==# ~/.tmux.conf
# this is nd default prefix and set it to ctrl-a
unbind C-b
set -g prefix C-x
bind C-x send-prefix
# make delay shorter
set -sg escape-time 0
# set default color to 256color
set -g default-terminal "screen-256color"
# start pane number from 1 similar to windows
# set -g pane-base-index 1
# resize panes
bind -r H resize-pane -L 5
bind -r J resize-pane -D 5
bind -r K resize-pane -U 5
bind -r L resize-pane -R 5
# Use Alt-vim keys without prefix key to switch panes
bind -n M-h select-pane -L
bind -n M-j select-pane -D
bind -n M-k select-pane -U
bind -n M-l select-pane -R
# switch between sessions
bind -r ( switch-client -p
bind -r ) switch-client -n
# don't rename windows automatically
set-option -g allow-rename off
#### key bindings ####
# reload config file
bind r source-file ~/.tmux.conf \; display ".tmux.conf reloaded!"
# quickly open a new window
# bind N new-window
# synchronize all panes in a window
bind y setw synchronize-panes
# pane movement shortcuts (same as vim)
bind h select-pane -L
bind j select-pane -D
bind k select-pane -U
bind l select-pane -R
# new pane shortcuts
bind v split-window -v
bind / split-window -h
#### copy mode : vim ####
# start selection with 'space' and copy using 'y'
# bind -t vi-copy 'y' copy-selection
# paste using 'p'
# unbind p
# bind p paste-bufferthe tmux configuration file
# enable vi mode
setw -g mode-keys vi
#### status bar: powerline ####
set-option -g status on
# set-option -g status-interval 2
# set-option -g status-justify "centre"
# set-option -g status-left-length 30
# set-option -g status-right-length 10
# set-option -g status-left "#(~/tmux-powerline/powerline.sh left)"
# set-option -g status-right "#(~/tmux-powerline/powerline.sh right)"
# set -g status-right '#{battery_status_bg} Batt: #{battery_icon} #{battery_percentage} #{battery_remain} | %a %h-%d %H:%M '
set -g @batt_icon_status_charging '⚡'
set -g @batt_icon_status_discharging '?'
# List of plugins (prfix+I to reload)
set -g @plugin 'tmux-plugins/tpm'
set -g @plugin 'tmux-plugins/tmux-sensible'
set -g @plugin 'jimeh/tmux-themepack'
set -g @plugin 'tmux-plugins/tmux-battery'
set -goq @themepack-status-right-area-right-format "%H:%M:%S #{battery_icon}#{battery_percentage}"
set -g @themepack 'src/yellow'
# Initialize TMUX plugin manager (keep this line at the very bottom of tmux.conf)
run -b '~/.tmux/plugins/tpm/tpm'
" ~/.vimrct
set number
set relativenumber
syntax on
set tabstop=4
set softtabstop=4
set shiftwidth=4
set exrc
set secure
set noexpandtab
" Let clangd fully control code completion
let g:ycm_clangd_uses_ycmd_caching = 0
" Use installed clangd, not YCM-bundled clangd which doesn't get updates.
let g:ycm_clangd_binary_path = exepath("clangd")
 毛毛毳
毛毛毳

 iThome鐵人賽