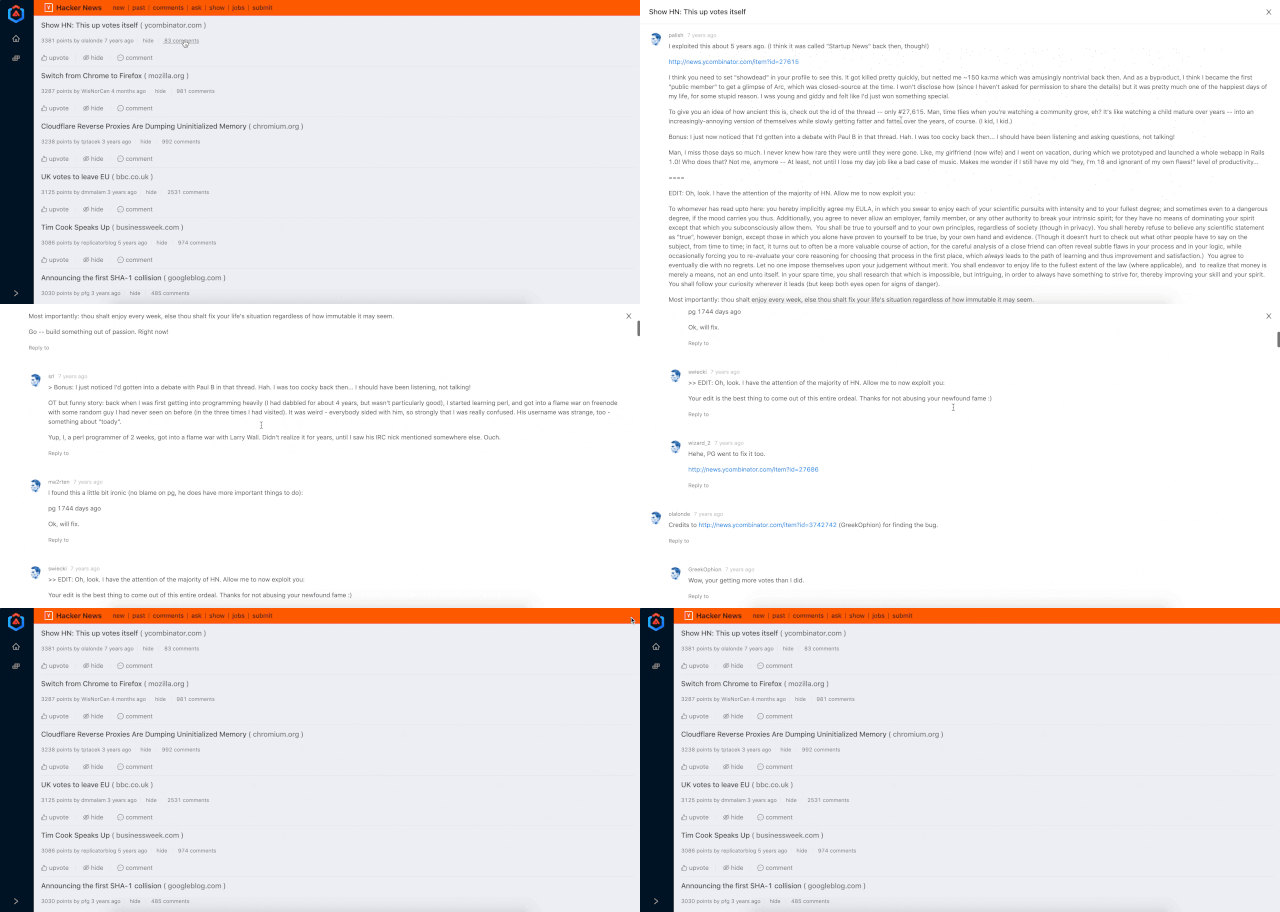
分頁完成後,我們項目主要工作目前只剩下 comments 內容展示部分,其它的都是一些查詢分類的工作,我們會在今明兩天完成這個項目剩下的問題,一些業務邏輯的內容如果有興趣的同學可以自行補充完善。
我們先來看一下 hacker news 基本的評論包含了哪些內容:
從內容上看,至少包含幾個屬性:作者、評論時間、評論內容、回覆,NG-ZORRO 也爲我們提供了 Comment 組件來渲染評論信息。
先準備好評論頁的組件 StoryDetailComponent
$ cd ng-zorro-ironman2020
$ ng g c components/demos/hacker-news/story-detail --skip-import
nz-comment 包含這幾個部分:
nz-comment:評論主體,支持 nzAuthor、nzDatetime 顯示作者和創建時間信息nz-comment-avatar:要顯示爲評論頭像的元素(如果有的話)nz-comment-content:評論的主要內容nz-comment-action:在評論內容下面呈現的操作項非常完善的組件,基本能夠涵蓋我們需要的一切,我們嘗試拿 nz-comment 渲染 API 返回的單條評論數據看一下:在線示例。
但是我們不僅需要顯示單條評論,還需要顯示該評論下的回覆評論,實現遍歷渲染。我們可以使用 Angilar NgTemplateOutlet 指令來實現內嵌視圖,ngTemplateOutletContext 則允許我們爲 EmbeddedViewRef 附加一個上下文對象,這樣我們就可以在模板裏使用這個對象。
Tips:在上下文對象中使用 $implicit 這個 key 會把對應的值設置爲默認值。
看一下官方的例子是怎麼使用的:
@Component({
  selector: 'ng-template-outlet-example',
  template: `
	<ng-container *ngTemplateOutlet="greet"></ng-container>
	<ng-container *ngTemplateOutlet="eng; context: myContext"></ng-container>
	<ng-container *ngTemplateOutlet="svk; context: myContext"></ng-container>

	<ng-template #greet><span>Hello</span></ng-template>
	-> name is $implicit
	<ng-template #eng let-name><span>Hello {{name}}! </span></ng-template>
	-> person is localSk
	<ng-template #svk let-person="localSk"><span>Ahoj {{person}}! </span></ng-template>
`
})
export class NgTemplateOutletExample {
  myContext = {$implicit: 'World', localSk: 'Svet'};
}
我們用同樣的方法來顯示評論內容,看一下我們是如何操作的:
<!--comment body-->
<ng-template #commentTemplateRef let-comment="comment">
  <nz-comment [nzAuthor]="comment.author" nzDatetime="{{comment.created_at | timeAgo}}">
	<nz-avatar nz-comment-avatar nzIcon="user" [nzSrc]="comment?.avatar || 'https://zos.alipayobjects.com/rmsportal/ODTLcjxAfvqbxHnVXCYX.png'"></nz-avatar>
	<nz-comment-content>
	  <p [innerHTML]="comment.text"></p>
	</nz-comment-content>
	<nz-comment-action>Reply to</nz-comment-action>
	<!--注意這一行,如果存在評論回覆,遍歷複用渲染-->
	<ng-container *ngIf="comment.children && comment.children.length">
	  <ng-template ngFor let-child [ngForOf]="comment.children">
		<ng-template [ngTemplateOutlet]="commentTemplateRef" [ngTemplateOutletContext]="{ comment: child }">
		</ng-template>
	  </ng-template>
	</ng-container>
  </nz-comment>
</ng-template>

<!--comment list loop-->
<ng-container *ngFor="let item of listOfComments">
  <ng-template [ngTemplateOutlet]="commentTemplateRef" [ngTemplateOutletContext]="{ comment: item }"> </ng-template>
</ng-container>
因爲 children 屬性是完全一致的數據結構,所以我們可以直接複用設計的 nz-comment 結構。StoryDetailComponent 中直接請求詳情接口即可:
export class StoryDetailComponent implements OnInit {
  @Input() storyId: string;
  loading = true;
  listOfComments: IReplyComment[];
  getStory() {
    this.loading = true;
    this.hackerNewsService.getStoryByAlgolia(this.storyId).subscribe(data => {
      this.listOfComments = data.children || [];
      this.loading = false;
      this.cdr.markForCheck();
    });
  }
  constructor(
    private hackerNewsService: HackerNewsService,
    private cdr: ChangeDetectorRef
  ) {}
  ngOnInit() {
    this.getStory();
  }
}

對於一些 comments 數據較多的接口,請求返回會稍慢一些,我們使用 nz-skeleton 來顯示等待頁面(更多骨架屏內容可查看 官方文檔 ):
<nz-skeleton [nzLoading]="loading" [nzActive]="true"></nz-skeleton>
設計評論頁面已經完成,我們結合之前的知識,使用 Drawer 抽屜組件來顯示評論詳情,我們修改一下 hacker-news.component.ts:
showDetail(story: Hit) {
  this.nzDrawerService.create({
	nzTitle        : story.title,
	nzContent      : StoryDetailComponent,
	nzWidth        : '100%',
	nzPlacement    : 'right',
	nzContentParams: {
	  storyId: story.objectID
	}
  });
這樣我們已經可以通過點擊 comments 功能查看該新聞下的評論了,看一下我們最終的成果:
今天主要介紹了一個不算太常用的組件 Comment,對於博客類或新聞信息類項目比較有用,但是對於中後臺項目中運用得倒是不算頻繁,穿插介紹了一個與 Spin 組件 類似的組件 Skeleton骨架屏,兩者都主要用於加載等待過渡,給用戶良好的交互體驗,大家可以按需選擇。
