iT邦幫忙

第 11 屆 iThome 鐵人賽

DAY 6
1
IoT

30天入門智慧家庭系列 第 6

Day 6 Home Assistant Configurator

  • 分享至 

  • xImage
  •  

Configurator

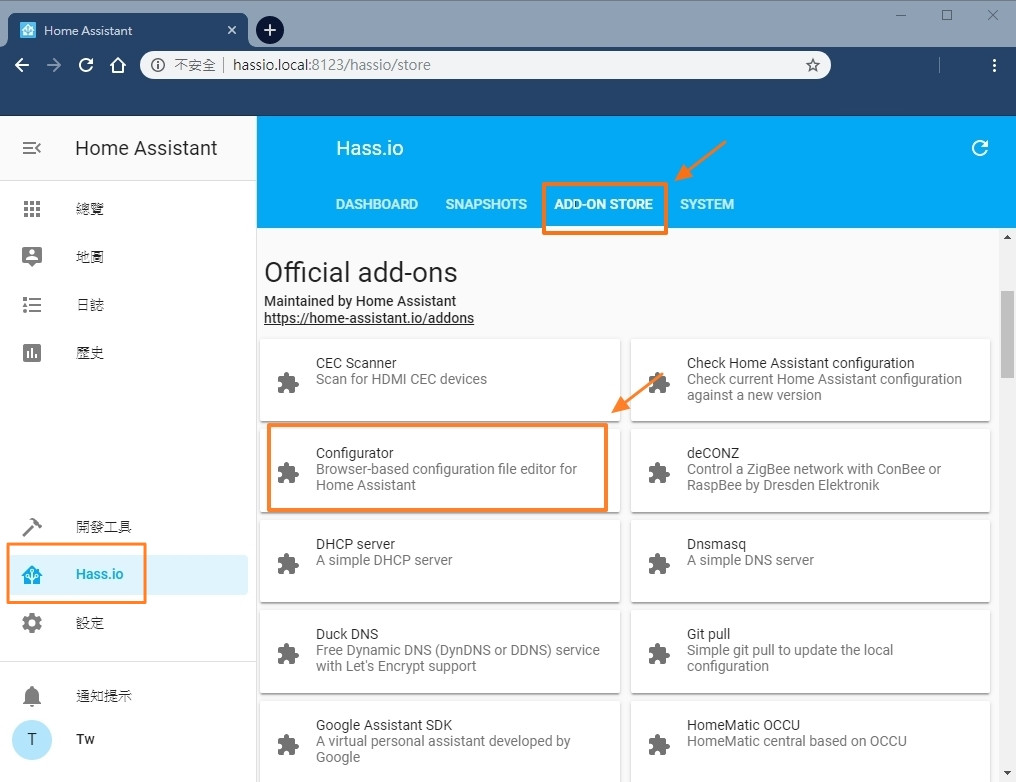
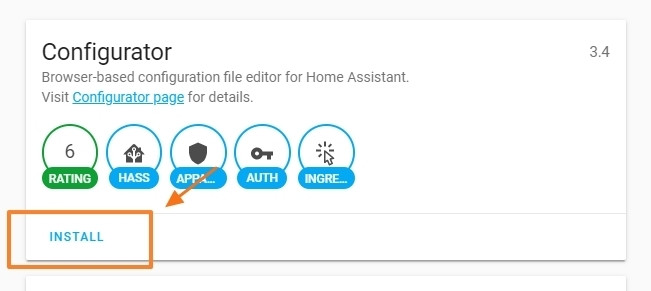
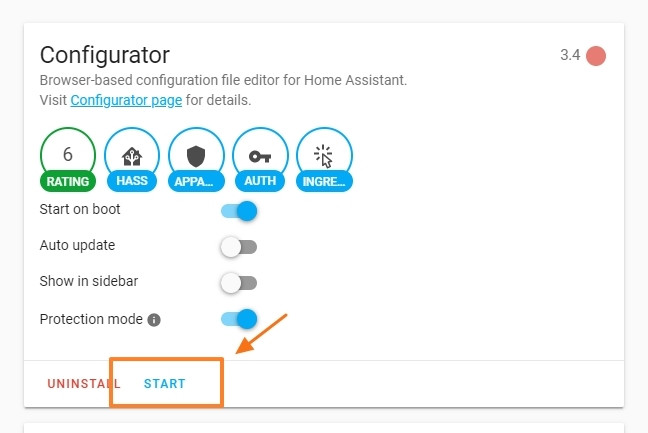
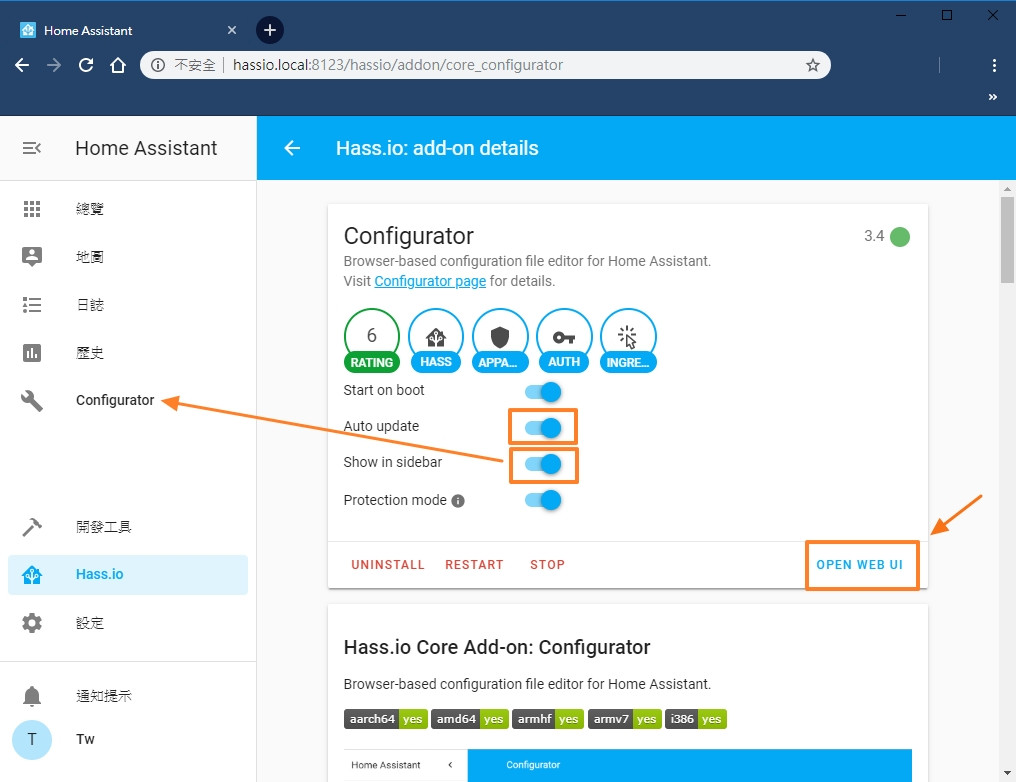
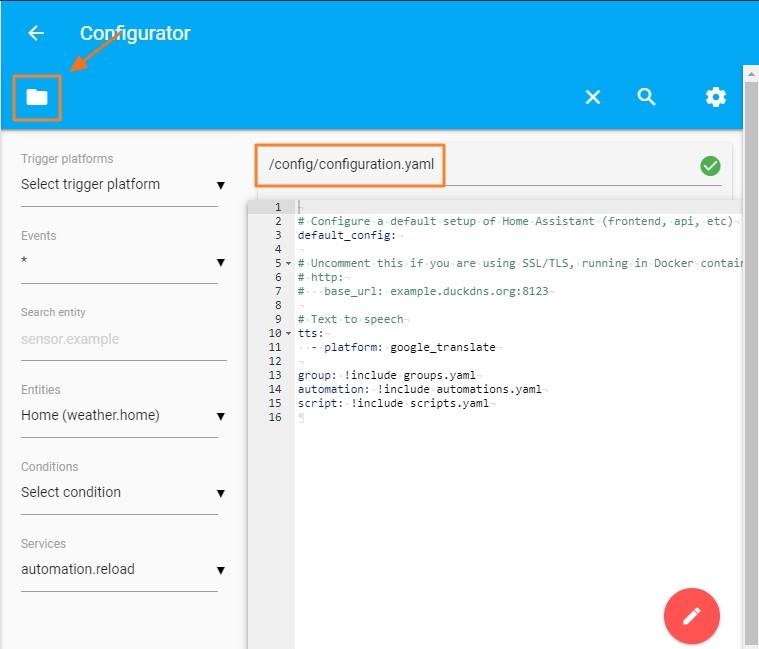
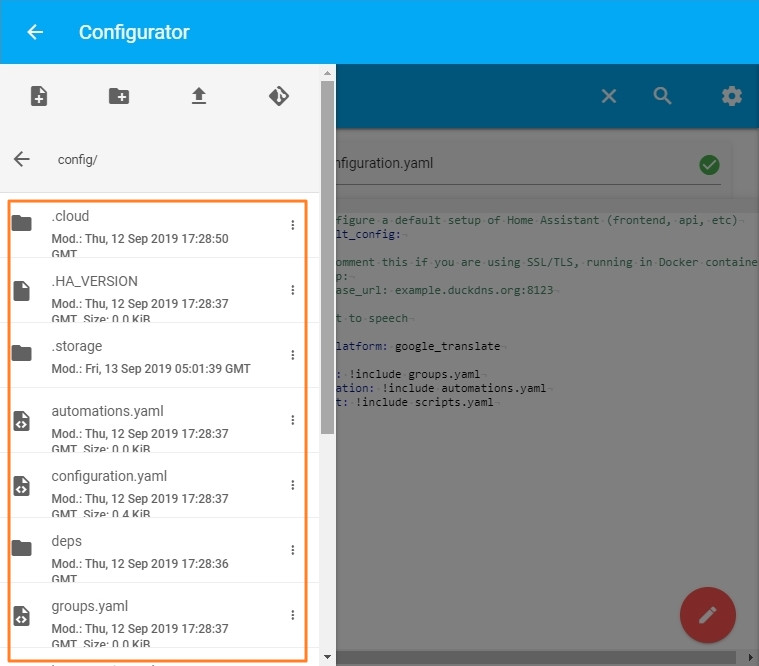
Home Assistant 提供一個 web 環境的編輯工具 –– Configurator,它讓我們使用瀏覽器就能編輯 Home Assistant 內的檔案,一般會拿來編輯 configuration.yaml、Scripts.yaml、automations.yaml 儲存設定參數、腳本、自動化的文件。

Configurator 安裝

  1. 左欄點選 "Hass.io" 進入後,在 ADD-ON STORE 頁面找到 Configurator 這個 add-on
    https://ithelp.ithome.com.tw/upload/images/20190922/20120058qdgOrDJ9P8.jpg
  2. 點擊 INSTALL 安裝這個 Add-on,安裝完成後按下 START 執行
    https://ithelp.ithome.com.tw/upload/images/20190922/20120058lW32vREgVo.jpg
    https://ithelp.ithome.com.tw/upload/images/20190922/20120058w4qGyXE4op.jpg
  3. 可以將 Auto Update 與 Show in sidebar 打開。之後會自動更新,確保最新功能,另外加到側欄方便我們後續的設定。
  4. 點擊 OPEN WEB UI 進入 configurator 的設定頁
    https://ithelp.ithome.com.tw/upload/images/20190922/20120058YVKvF1Y4Bl.jpg
  5. 進入設定頁後預設會看到 configuration.yaml,Hassio 就是依靠這個文件來設定基本的參數。
  6. 如果沒有可點選左上角的資料夾
    https://ithelp.ithome.com.tw/upload/images/20190922/2012005835PpybX8yW.jpg
  7. 裡面可以看到 configuration.yaml 打開即可,另外也可以看到其他的 .ymal 設定檔
    https://ithelp.ithome.com.tw/upload/images/20190922/20120058iD4OSmHz1W.jpg
  8. 每次設定後存檔需要再重新啟動 Hassio 後,設定的內容才會生效。
    https://ithelp.ithome.com.tw/upload/images/20190922/20120058ROPc0I70Dk.jpg

Snapshot

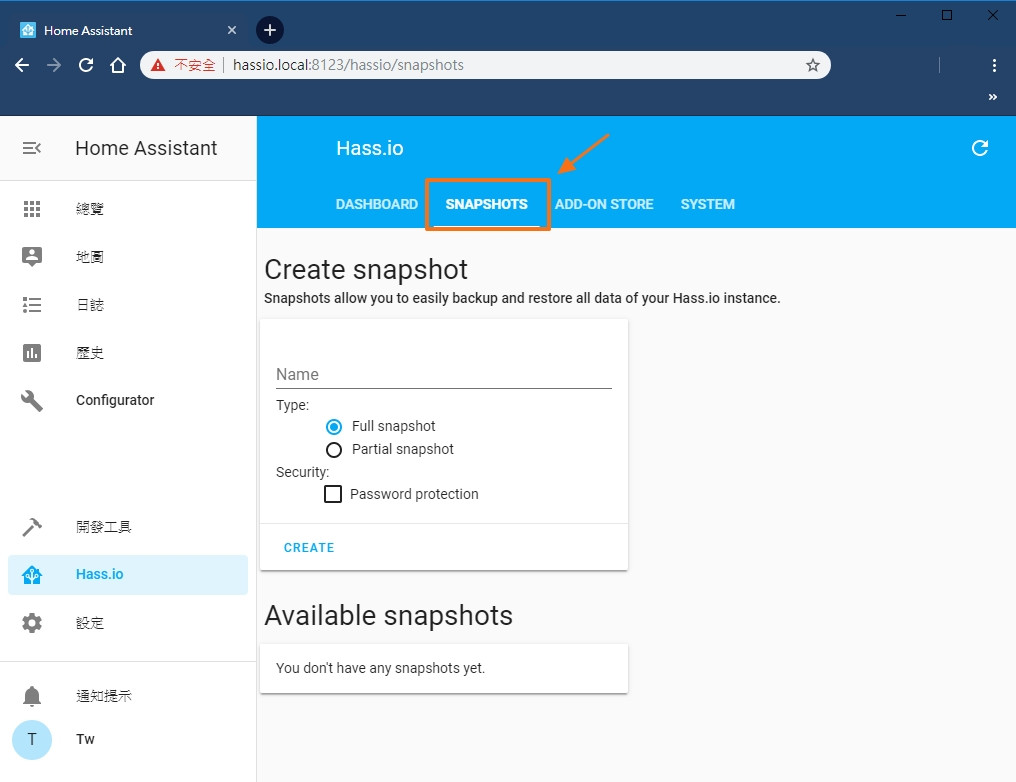
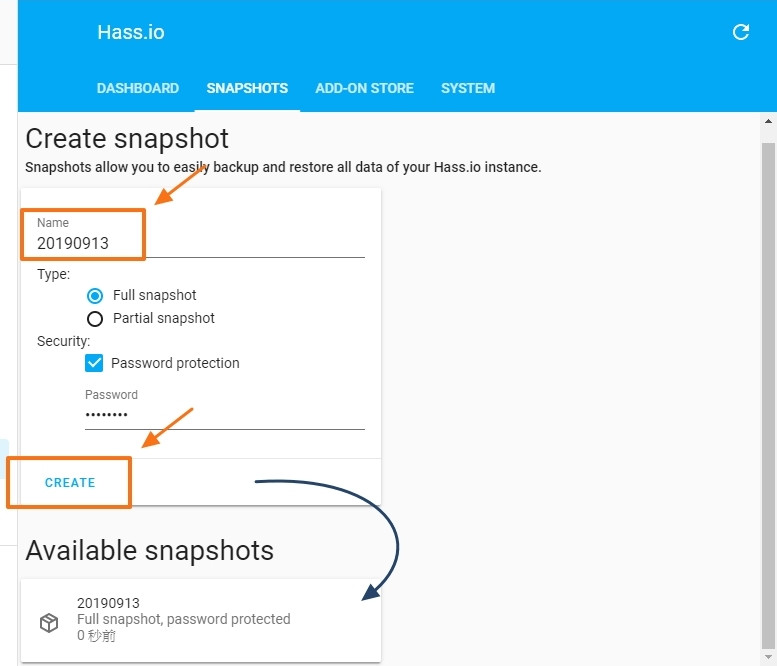
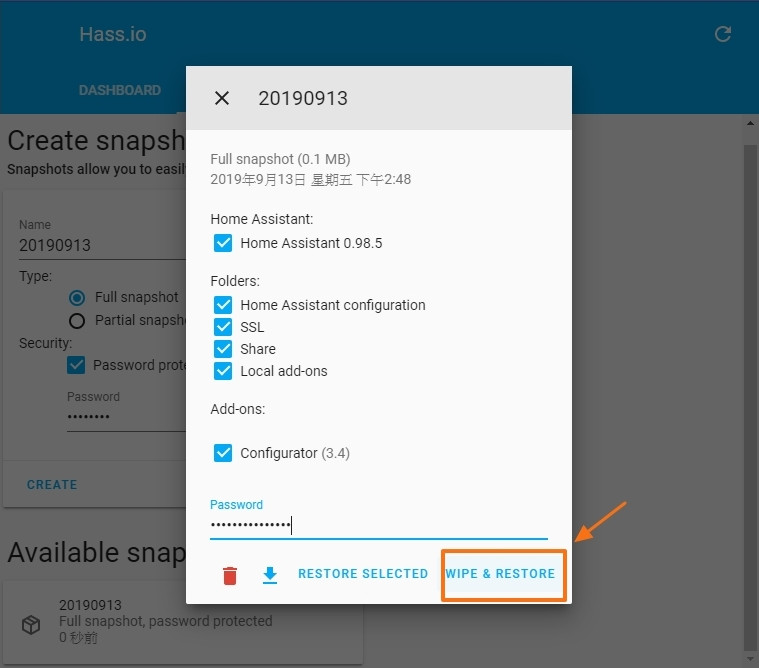
Home Assistant 也提供 Snapshot 的功能,當我們要安裝新的 Add-on 或是測試新設備時,可以先備份 Home Assistant,如果出了什麼意外,透過 Snapshot 就可以還原,不需要重灌整個系統。

  1. 點擊左欄的 Hass.io 進入後,找到 SNAPSHOTS
    https://ithelp.ithome.com.tw/upload/images/20190922/20120058j9Xkr3SBp5.jpg
  2. 打上 Name,通常會以今天日期或是做了什麼設定當備份名稱,保險起見輸入 password,在按下 CREATE 生成備份檔
    https://ithelp.ithome.com.tw/upload/images/20190922/20120058GsPQxmRjPw.jpg
  3. 要還原時,點擊備份檔,選擇要還原的項目,再按下 WIPE& RESTORE,Home Assistant就會重啟並回復囉。
    https://ithelp.ithome.com.tw/upload/images/20190922/20120058AkAYEC7eeY.jpg

小結

今天建立了 Home Assistant 的 Configurator,之後我們就可以使用 Web 介面更改我們的 Home Assistant 設定。除了 Configurator,Home Assistant 也提供一個透過共用資料夾的方式更改 Home Assistant 內文件的 Add-on,叫做 Samba share,有興趣的朋友可試試看。
明天開始要在 Home Assistant 裡新增 SSH 套件,讓我們可以更安全的訪問 Home Assistant。


上一篇
Day5 安裝 Home Assistant
下一篇
Day7 SSH介紹 SSH Server安裝
系列文
30天入門智慧家庭15
圖片
  直播研討會
圖片
{{ item.channelVendor }} {{ item.webinarstarted }} |
{{ formatDate(item.duration) }}
直播中

1 則留言

0
eric19740521
iT邦新手 1 級 ‧ 2020-05-17 13:12:27

我在主畫面沒看到
Hass.io
我的Home Assistan 是在群暉 docker上面安裝的
homeassistant-home-assistant image

我要留言

立即登入留言