ESP8266 主要的任務就是接收 MQTT broker 傳來的我們訂閱的 Topic 內容,如果是 "1",就將 GPIO2 拉 High 點亮 LED;如果是 "0" 就熄滅。
以下是參考的韌體:
#include <ESP8266WiFi.h>
#include <PubSubClient.h>
// Update these with values suitable for your network.
long serial_speed = 115200;
const char* ssid = "你的SSID";
const char* password = "你的Wifi密碼";
const char* mqtt_server = "Home_Assistant_IP位址";
int mqtt_port = 1883;
const char* user_name = "mqtt"; // 連接 MQTT broker 的帳號密碼
const char* user_password = "mqtt";

// ESP8266訂閱的主題:收到 0 關閉 LED,1 打開LED
const char* topic_subscribe = "ha/bedroom/light/switch";
const char* topic_publish = "ha/bedroom/light/status";

WiFiClient espClient;
PubSubClient client(espClient);
long lastMsg = 0;
char msg[50];
int value = 0;

void setup_wifi() { // 連接Wifi
  delay(10);
  pinMode(2, OUTPUT);
  digitalWrite(2, LOW);
  // We start by connecting to a WiFi network
  Serial.println();
  Serial.print("Connecting to ");
  Serial.println(ssid);
  WiFi.begin(ssid, password);
  while (WiFi.status() != WL_CONNECTED) {
    delay(500);
    Serial.print(".");
  }
  randomSeed(micros());
  Serial.println("");
  Serial.println("WiFi connected");
  Serial.println("IP address: ");
  Serial.println(WiFi.localIP());
}

void callback(char* topic, byte* payload, unsigned int length)
{
  Serial.print("Command from MQTT broker is : [");
  Serial.print(topic);
  int p =(char)payload[0]-'0';

  if(p==0) // MQTT 傳來 0 熄滅 D2 上的 LED
  {
    digitalWrite(2, LOW);
    Serial.println(" Turn Off LED! " );
  }

  if(p==1) // MQTT 傳來 1 點亮 D2 上的 LED
  {
    digitalWrite(2, HIGH);
    Serial.println(" Turn On LED! " );
  }
  Serial.println();
} //end callback

void reconnect() {
  // Loop until we're reconnected
  while (!client.connected()) {
    Serial.println("Attempting MQTT connection...");
    // Create a random client ID
    String clientId = "ESP8266Client-";
    clientId += String(random(0xffff), HEX);
    // Attempt to connect
    if (client.connect(clientId.c_str(),user_name,user_password)) {
      Serial.println("connected");
      client.subscribe(topic_subscribe);
    } else {
      Serial.print("failed, rc=");
      Serial.print(client.state());
      Serial.println(" try again in 5 seconds");
      // Wait 5 seconds before retrying
      delay(5000);
    }
  }
}

void setup() {
  Serial.begin(serial_speed);
  setup_wifi();
  client.setServer(mqtt_server, mqtt_port);
  client.setCallback(callback);

}
void loop() {

  if (!client.connected()) {
    reconnect();
  }
  client.loop();
}
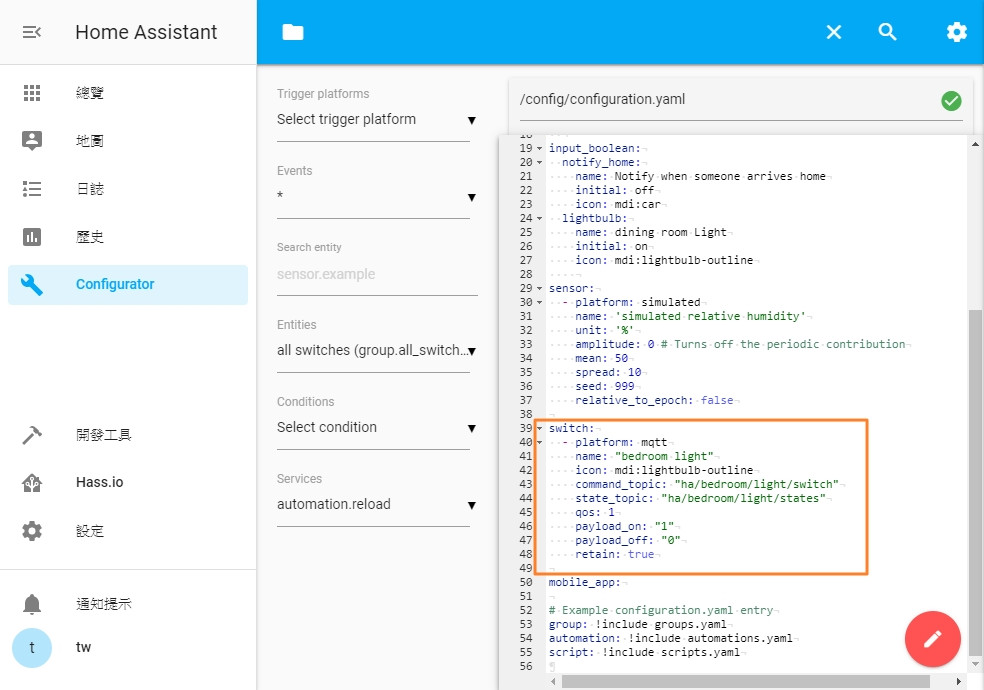
switch:
  - platform: mqtt
    name: "bedroom light"
    icon: mdi:lightbulb-outline
    command_topic: "ha/bedroom/light/switch" # 當觸發開關時,Publish 的 Topic 名稱
    state_topic: "ha/bedroom/light/states" # 訂閱(取得狀態用)的 Topic 名稱
    qos: 1
    payload_on: "1" # 當 on 時發送 "1"當內容
    payload_off: "0" # 當 off 時發送 "0"當內容
    retain: true
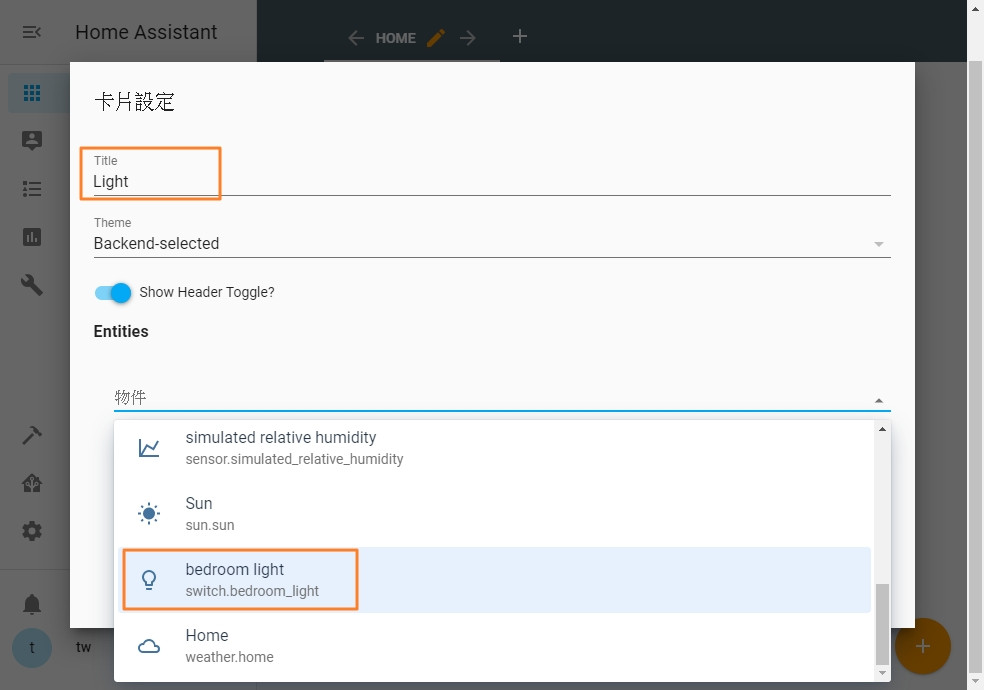
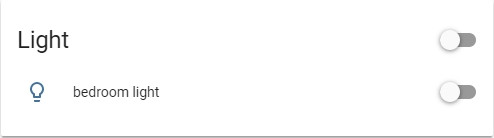
3. 接下來到總攬,我們要把剛剛加入的 switch 顯示在 UI 上。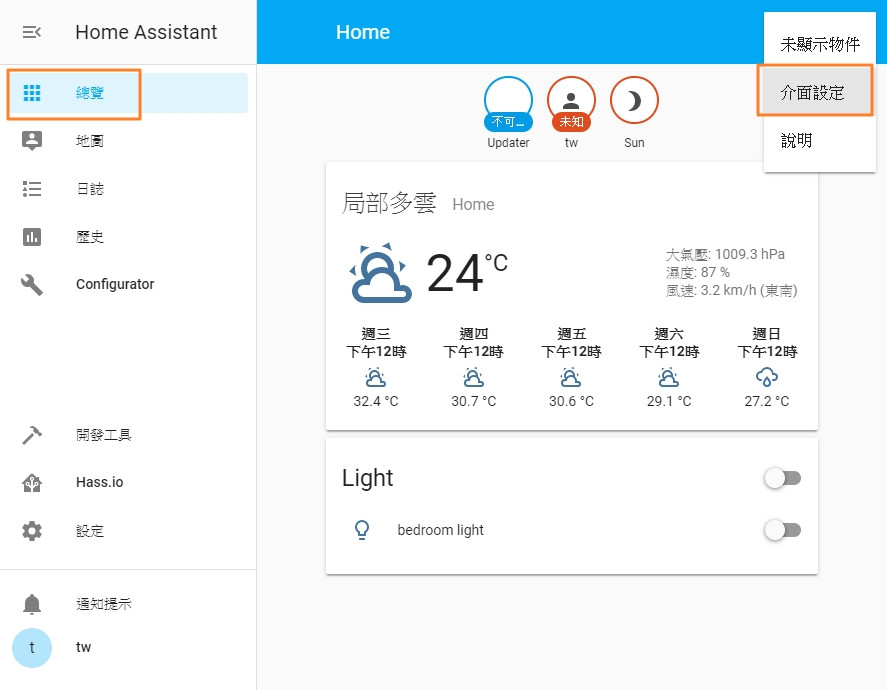

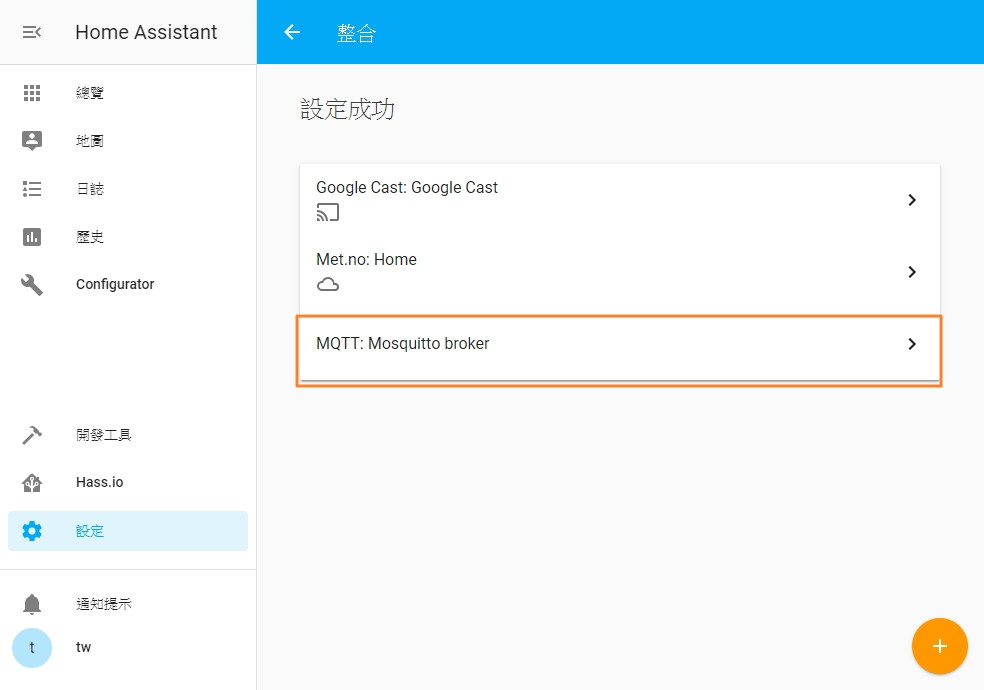
今天終於做好了第一個實作,途中遇到了 Mosquitto MQTT broker 傳不出的問題,UI 也抓不到設定的 switch 物件問題,查了許久完全沒有答案,最後是靠這 SNAPSHOT 從頭再來一次才裝好。另外,在測試 MQTT 時,有兩個常用的工具 MQTTlens、MQTT.fx,可以幫助我們監看 MQTT 有沒有真的在運作。