iT邦幫忙

第 11 屆 iThome 鐵人賽

DAY 5
2
IoT

30天入門智慧家庭系列 第 5

Day5 安裝 Home Assistant

  • 分享至 

  • xImage
  •  

安裝方式

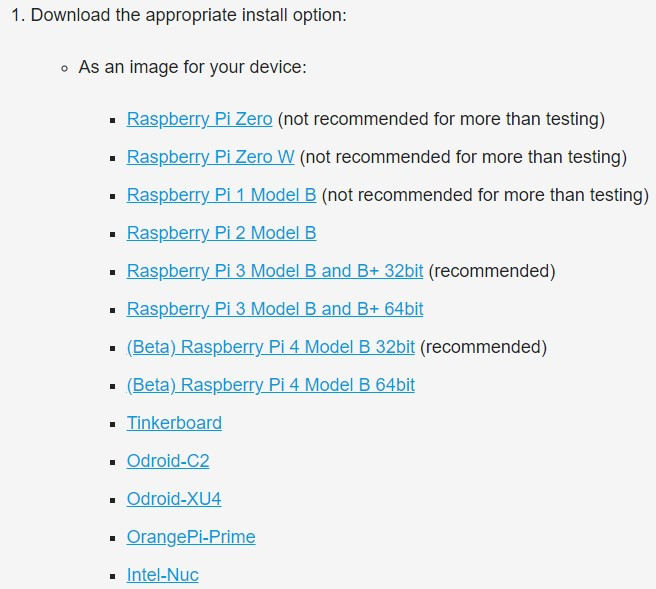
有以下幾種方法裝 Home Assistant:

  1. Hass.io: 適合所有人,最簡單的安裝方式,相對的能更動的地方比較少。
  2. Docker: 適合懂 Docker 或是想將 Home Assistant 安裝在 Raspberry Pi 以外地方。
  3. Hassbian: 適合有 Linux 經驗,Hassbian是一個內建 Home Assistant 的 OS。
  4. 將 Home Assistant 安裝在 Python virtual environment 裡,最進階的安裝方式?

官方參考網址: https://www.home-assistant.io/docs/installation/
官方建議安裝方式: https://www.home-assistant.io/docs/installation/#recommended
另外的安裝方式: https://www.home-assistant.io/docs/installation/#alternative-installs

我們這裡就選擇最簡單平易近人的安裝方式囉~

Hass.io 安裝

  1. 官網依照自己的 Raspberry Pi 型號下載安裝檔。下載完解壓縮後會看到一個映像檔。
    https://ithelp.ithome.com.tw/upload/images/20190921/20120058pLyFsgsjtP.jpg
  2. https://www.balena.io/etcher/ 下載 balenaEtcher,將映像檔燒錄進 SD 卡。
    https://ithelp.ithome.com.tw/upload/images/20190921/20120058cSAQrhs45a.jpg
  3. 打開 balenaEtcher 後,選擇剛下載的映像檔。
    https://ithelp.ithome.com.tw/upload/images/20190921/20120058XJtEuxlmcX.jpg
  4. 選擇目標記憶卡,燒錄。
    https://ithelp.ithome.com.tw/upload/images/20190921/201200587xPBOBfM2t.jpg
  5. 若是想在 Raspberry Pi 上使用 Wifi 連線,準備一 USB 隨身碟,命名為 CONFIG。在隨身碟裡新增一個 network 資料夾,再新增一個沒有副檔名的 my-network 檔案,使用編輯器開啟並輸入以下內容後存檔。
[connection]
id=resin-wifi
type=wifi


[wifi]
hidden=true
mode=infrastructure
ssid=你的SSID名稱


[ipv4]
method=auto


[ipv6]
addr-gen-mode=stable-privacy
method=auto


[wifi-security]
auth-alg=open
key-mgmt=wpa-psk
psk=你的Wifi密碼


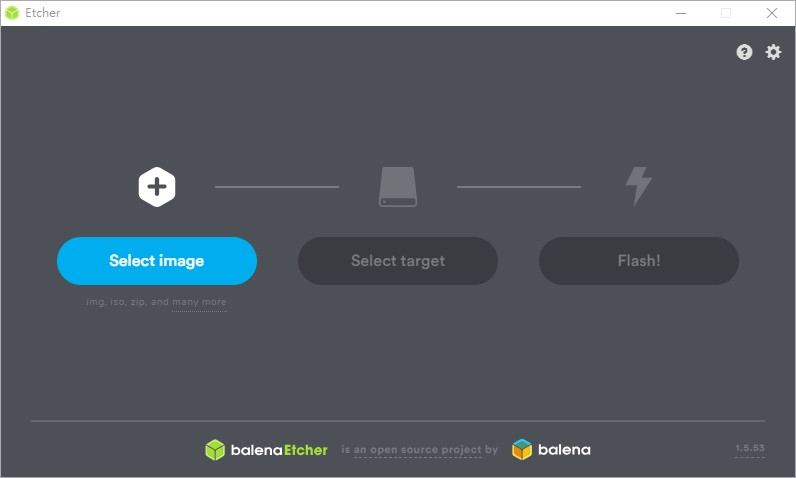
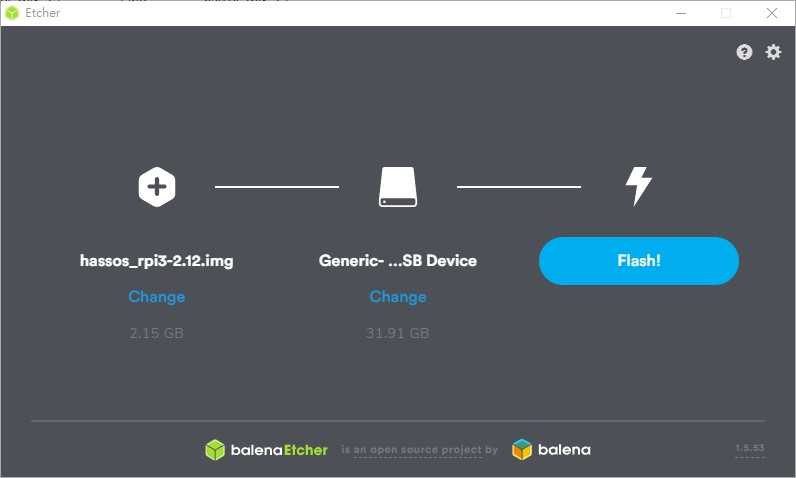
7. 準備好隨身碟後,與 SD 卡一起連接上 Raspberry Pi。(若使用有線網路則接上網路線)
8. 插入電源開機。第一次開機 Hass.io 會自動下載最新版的 Home Assistant 並執行,耗時約 20 分鐘。
等待的時間可以先打開電腦瀏覽器輸入 http://hassio.local:8123 。使用這個網址的前提是,電腦要與 Raspberry Pi 在同個網域下。如果是不同網域,則使用 http://192.x.x.x:8123 來連接 (192.x.x.x是樹梅派的IP位址)。
https://ithelp.ithome.com.tw/upload/images/20190921/20120058OVurPBMStr.jpg
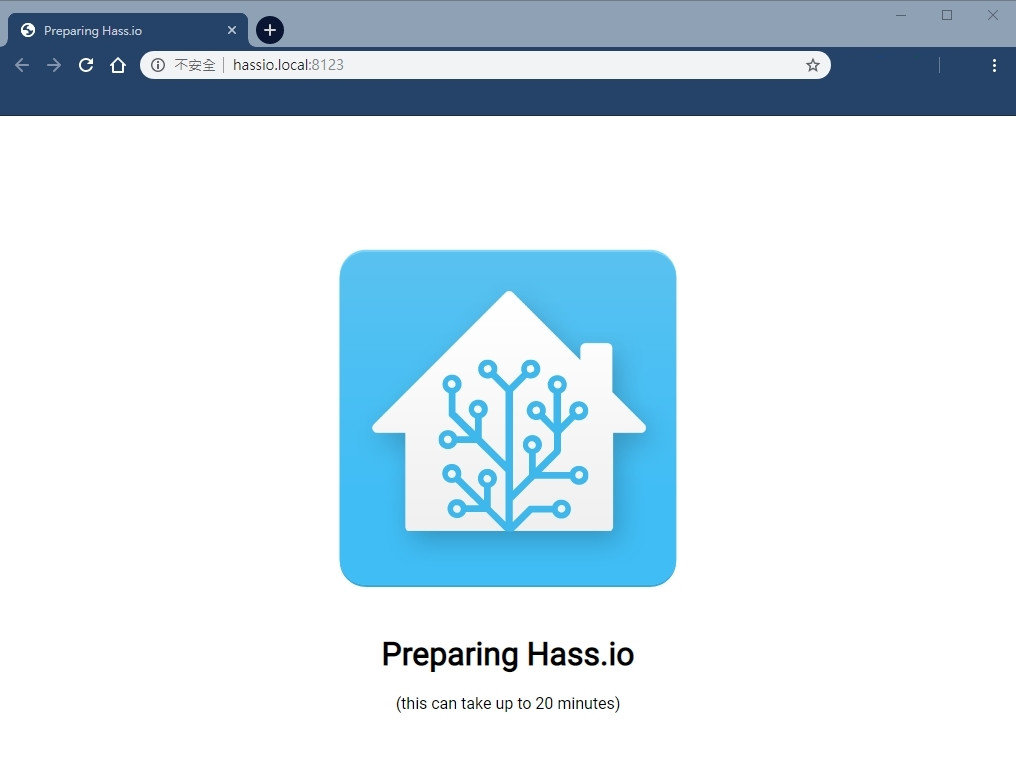
10. 進到 Home Assistant 後,創建一個使用者帳號。
https://ithelp.ithome.com.tw/upload/images/20190921/20120058LbxcmLGQFW.jpg
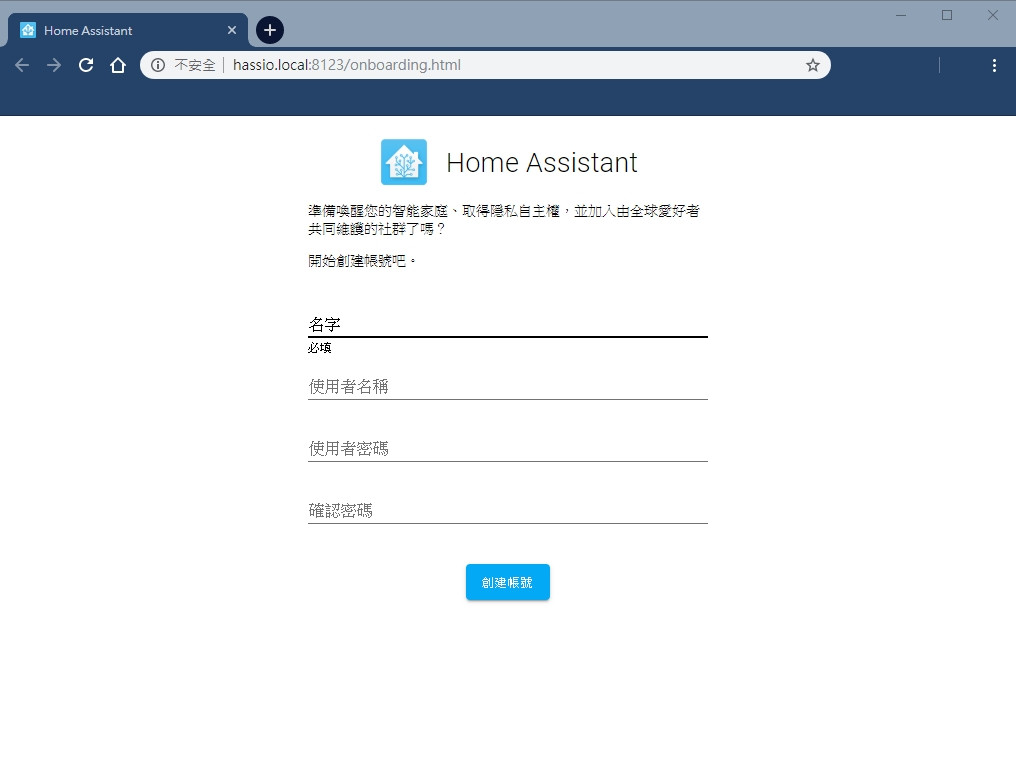
11. 取完名字後,按下偵測會找到所在地。
https://ithelp.ithome.com.tw/upload/images/20190921/20120058cKk1DtIDlq.jpg
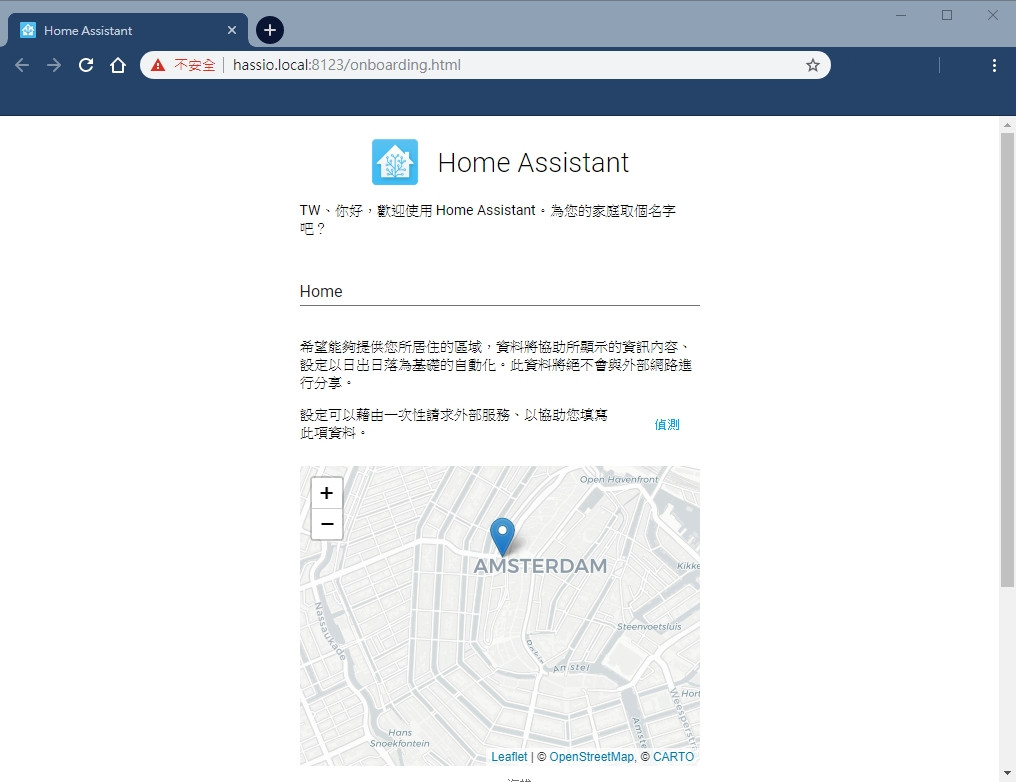
12. 這一頁可以導入現有的裝置,但我們目前有沒裝置,就先點完成。
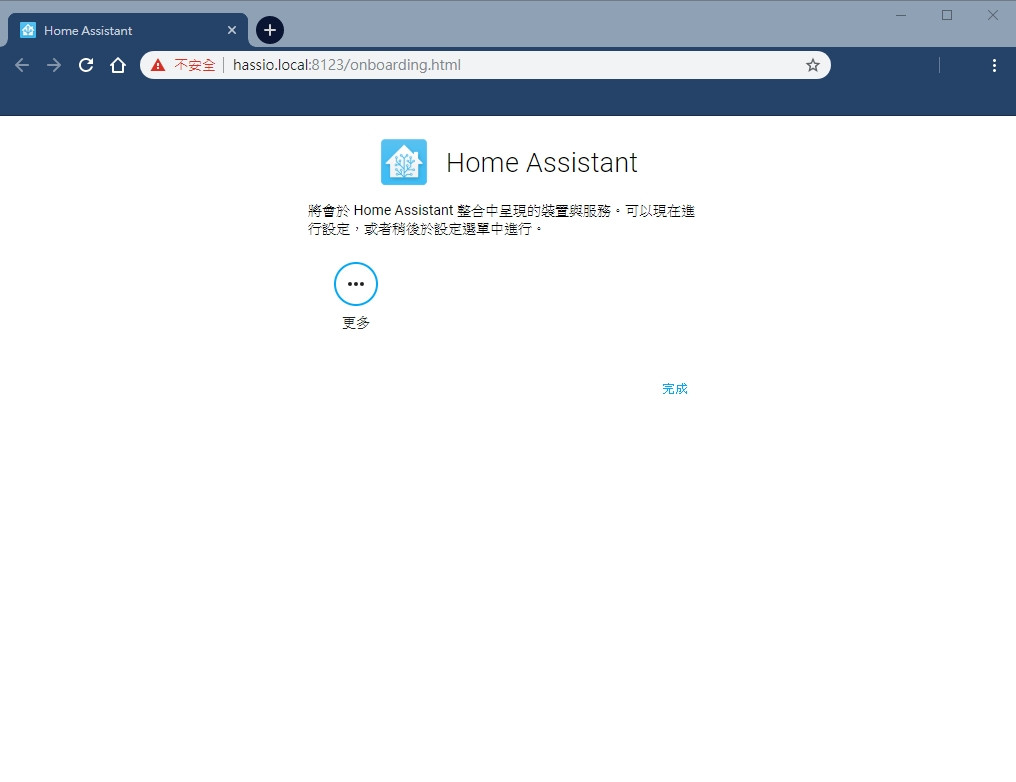
https://ithelp.ithome.com.tw/upload/images/20190921/2012005886QLfm3z7A.jpg
13. 最後完成進入主畫面圖
https://ithelp.ithome.com.tw/upload/images/20190921/20120058PIugq5hZi7.jpg

小結

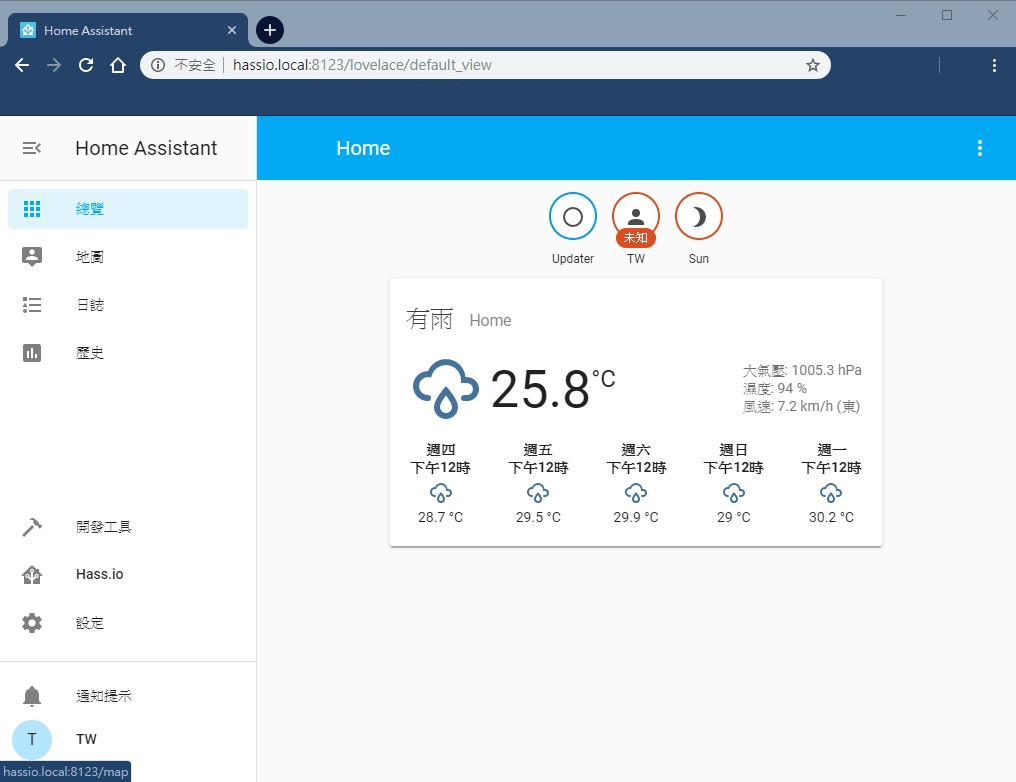
今天使用最簡單的方式安裝 Home Assistant,步驟稍微繁雜,有遇到任何問題歡迎在下面留言提出,明天開始要在 Home Assistant 裡安裝 Configurator,使用 Configurator 可以讓我們更方面的設定 Home Assistant裡的參數。


上一篇
Day4 Raspberry Pi介紹
下一篇
Day 6 Home Assistant Configurator
系列文
30天入門智慧家庭15
圖片
  直播研討會
圖片
{{ item.channelVendor }} {{ item.webinarstarted }} |
{{ formatDate(item.duration) }}
直播中

1 則留言

0
victorhhh
iT邦見習生 ‧ 2020-03-18 20:56:57

大哥你好~想問一下,如果最終目的是想要完全本地控制(不連上internet),用哪一種安裝方式會比較適合呢?我之前是用第一種方式,運行在RPi 4B,斷了internet之後,從192.168.x.x:8123進去HA,UI架構有出來,不過內容是一片空白。爬了一下文發現好像跟NTP有關係?有看到有人說把hassio灌在raspbian上可以解決這個問題?想知道大哥有什麼建議~謝謝!
小弟程式新手,因為接觸homebridge,HA才進入這個領域,還請多多包含~

我要留言

立即登入留言