超緊繃!30天Vue.js學習日記 父與子的敲敲話(2)
在昨天的文章中,我們了解到如何使用props將數據傳給子組件,那有沒有能讓子組件與父組件溝通的方法呢?當然有,我們今天便會針對這個主題介紹:$emit
$emit怎麼用?簡單範例告訴你:
<div id="app">
	{{username}}
	<my-component @pushname="getname" >
	</my-component>
</div>
<script type="text/javascript">
Vue.component('my-component',{
methods: {
    updateUsername() {
      let vue = this;
      vue.$emit("pushname", vue.username);
      console.log(vue.username);
    }
  },
data(){
	return{username:''}
},
template:'<div><input type="text" v-model="username"/><button @click="updateUsername">更新</button></div>'
});
new Vue({
  el:'#app',
  data:{
  	username:'IAN'
  },
  methods: {
    getname(newName) {
      // console.log(newName)
      let vm = this;
      vm.username = newName;
    }
  }
});
</script>
在上述範例中當按鈕被觸及後,會呼叫updateUsername(),並使用$emit將要更新的username傳給我們的根實例,然後我們藉由:<my-component @pushname="getname">
接獲pushname,並觸發getname去做到渲染根實例中的data,是不是很簡單阿?其實還蠻複雜的
在這邊建議大家可以看著範本練習,便會比較了解$emit的用法!
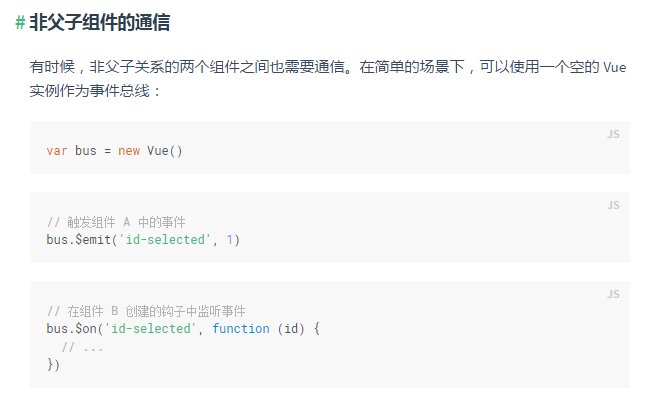
介紹完子組件對父組件的傳遞,那我們能不能讓非父子組件進行溝通呢?
當然可以,我們在這邊提供官網說明:

看來是相當精簡的解說呢XD
不過我還是提供了範例,以防大家看不懂:
<div id="app">
<com1></com1>
<com2></com2>
</div>
<script type="text/javascript">
Vue.component('com1',{
template:'<div><button @click="submit">送出</button></div>',
methods:{
	submit(){
		this.$root.bus.$emit('eventName', 'hello');
		// console.log('sucess');
	}
}
});
Vue.component('com2',{
data(){
	return{
		msg:''
	}
},
template:'<div>{{msg}}</div>',
created(){
    this.$root.bus.$on('eventName', value => {
      this.print(value)
    })
  },
  methods: {
    print(value) {
      let vm = this;
      vm.msg = value;
      // console.log('catch',value);
    }
  },
  beforeDestroy() {
     vm.$root.bus.$off('eventName');
  }
});
new Vue({
	el:'#app',
	data:{
		bus : new Vue()
	}
})
</script>
根據上面的範例,我們先在根實例中創建一個bus 實例,這樣一來com1以及com2就能調用它,組件com1透過$emit將資料傳向bus , com2再藉由$on獲得com1傳遞的值!
本日範例在此下載:
https://drive.google.com/open?id=1cYNaJzdxGuKaQXv4MHuP5L-Jf6lNARNv
今天的教學到這邊結束,我們明天見!
