昨天的內容我們將特徵從影像中萃取出來,接著我們需要搭配Extractor去將該特徵點的描述符計算出來,
而這邊使用到的第二張影像也是從同樣的資料夾的(box_in_scene.png)
cv::Ptr<cv::DescriptorExtractor> ExtractorORB = cv::ORB::create();
cv::Mat descript_of_box, descript_of_scene;
ExtractorORB->compute(image01, FASTkeypoints_ofbox, descript_of_box);
ExtractorORB->compute(image02, FASTkeypoints_ofbox_in_scene, descript_of_scene);
這邊我使用了ORB演算法來做搭配,而ORB本身也有特徵偵測的功能,你也可以試著使用ORB的detect功能
更甚至detectAndCompute一次做到位。
而有些演算法具有尺度不變性、旋轉不變性,可以根據你所使用的情境而做搭配。
比方說這裡使用的兩組影像很明顯box?或是該說書籍有經過旋轉,這個情況我的特徵偵測選擇FAST可能就不是個好選擇,或許使用其他演算法能夠有比較好的匹配表現。
計算完了描述符我們需要搭配BFMatcher來匹配我們偵測出來的特徵點的相異程度,
而特徵的相異程度則根據我們所使用的演算法計算出來的描述符的差異,
暴力匹配法BFMatcher相關的參數設定可以參考openCV的官方說明
https://docs.opencv.org/trunk/d3/da1/classcv_1_1BFMatcher.html
cv::Ptr < cv::BFMatcher> match_description = cv::BFMatcher::create(cv::NORM_HAMMING,false);
std::vector< cv::DMatch > match_result;

match_description->match(descript_of_box, descript_of_scene, match_result);

cv::Mat img_Match_result;
cv::drawMatches(image01, FASTkeypoints_ofbox, image02, FASTkeypoints_ofbox_in_scene, match_result, img_Match_result, cv::Scalar(0, 0, 255), cv::Scalar(0, 0, 255), std::vector<char>(), 4);
cv::imshow("img_Match_result", img_Match_result);
而沒有過濾的結果就會像這個樣子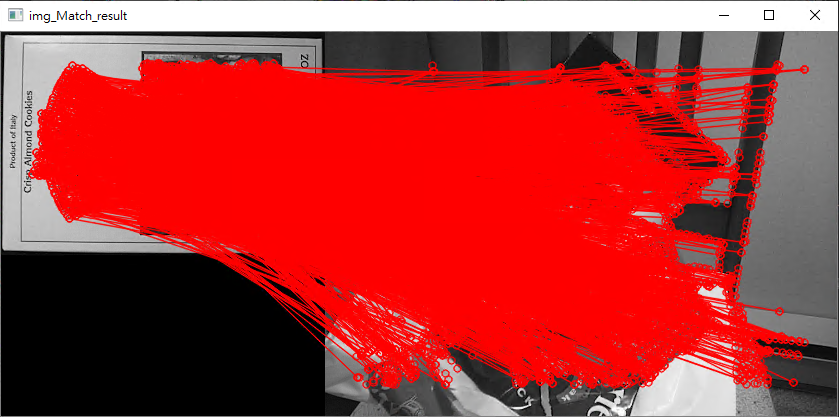
這麼多組匹配再沒有過濾的情況下你很難知道,哪些是正確的匹配哪些是錯誤的匹配。
當然造成這種結果也會有很多原因,有可能是你的特徵點偵測沒有偵測出適合的特徵點,
或是你的描述符沒有辦法區別出這些特徵的差異。
for (auto i = match_result.begin(); i != match_result.end(); i++)
{
	std::cout << "queryID: " << i->queryIdx << " trainID:" << i->trainIdx << " distance: " << i->distance << std::endl;
}
std::sort(match_result.begin(), match_result.end());
std::cout << "after sort//-------------------------------------------------//" << std::endl;
for (auto i = match_result.begin(); i != match_result.end(); i++)
{
	std::cout << "queryID: " << i->queryIdx << " trainID:" << i->trainIdx << " distance: " << i->distance << std::endl;
}
這邊簡單的做個排序,並將match裡面的內容輸出出來,你可以觀察queryID跟teainID所代表的意義。
sort根據distance的大小排序
queryID:image01特徵點的ID
teainID:image02特徵點的ID
每一個match會把queryID 跟 trainID 做配對,並依據他們的描述符算出一個代表它們兩個點之間的差異程度的distance距離。
std::vector< cv::DMatch > match_result_sorted;
for (size_t i = 0; i < 10; i++)
{
	match_result_sorted.push_back(match_result[i]);
}

cv::Mat img_Match_result_sorted;
//cv::drawMatches(image01, FASTkeypoints_ofbox, image02, FASTkeypoints_ofbox_in_scene, //match_result_sorted, img_Match_result_sorted, cv::Scalar(0, 0, 255), //cv::DrawMatchesFlags::NOT_DRAW_SINGLE_POINTS, std::vector<char>(), 4);
cv::drawMatches(image01, SURFkeypoints_ofbox, image02, SURFkeypoints_ofscene, match_result_sorted, img_Match_result_sorted, cv::Scalar::all(-1), cv::Scalar::all(-1), std::vector<char>(), cv::DrawMatchesFlags::NOT_DRAW_SINGLE_POINTS);

cv::imshow("img_Match_result", img_Match_result_sorted);
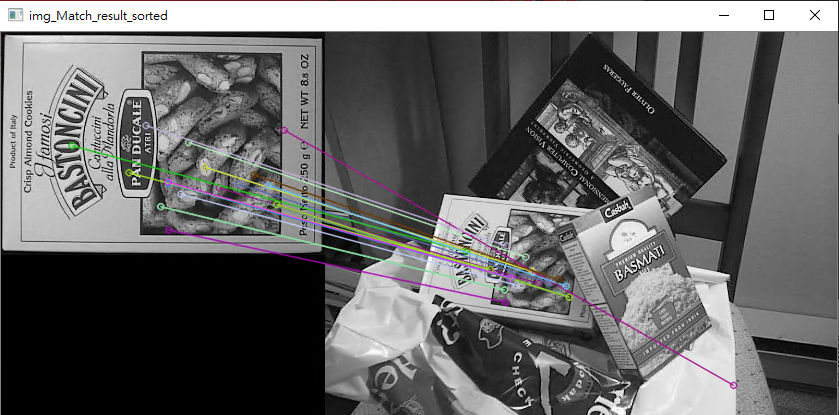
而我將排序過後的前10組匹配單獨畫出來,其結果.........摁很糟。
也許換個演算法試試看會好一些。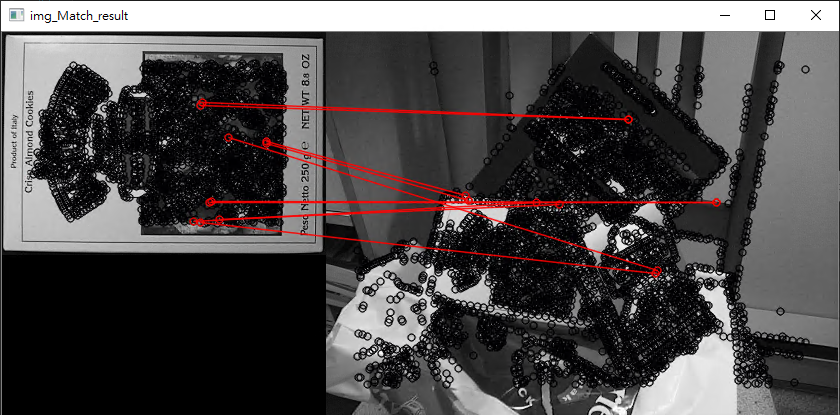
比方說openCV範例示範的SURF
https://docs.opencv.org/trunk/dc/dc3/tutorial_py_matcher.html
抱歉 亂用drawMatches 我把舊的寫法註解掉了
修改之後畫SURF 使用detectorAndComputer的匹配結果
一樣有做過濾只取前20組匹配結果,結果看起來比之前好上許多。