上一篇設定好路由模組的設定,這一篇要實際應用設定好的路由模組,來實際切換頁面,顯示英雄的資料。
目前英雄列表的資料格式為:
{
  "status": 200,
  "data": [
    {
      "id": 1,
      "name": "兩津勘吉",
      "age": 35,
      "description": "閃啦閃啦!撞到不負責"
    },
    {
      "id": 2,
      "name": "秋本麗子",
      "age": 25,
      "description": "阿兩~~"
    },
    {
      "id": 3,
      "name": "野比大雄",
      "age": 12,
      "description": "哆啦A夢~~~"
    },
    {
      "id": 4,
      "name": "江戶川柯南",
      "age": 8,
      "description": "真相只有一個"
    }
  ]
}
實際應用,繼續延續之前的英雄列表的範例。
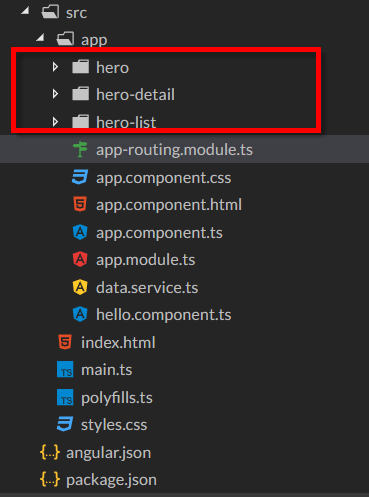
之前的英雄列表都寫在app component的元件裡面。現在另開一個heroList的元件,顯示英雄列表的元件搬移到heroList上面
另外再新增heroDetail準備顯示英雄的詳細資料。
app.component.html
<router-outlet></router-outlet>
使用router-outlet的標籤,路由模組會在配對到路徑的時候,將內容取代為設定好的元件內容。
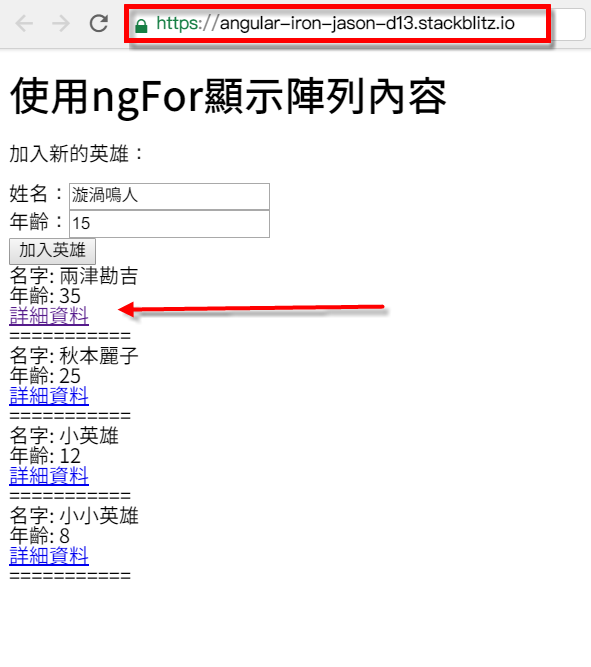
由於在上一篇已經設定好路由,在一進入時,會讀取heroList元件的內容
heroList的內容多一個詳細資料的連結:
<div>
  <a routerLink="{{hero.id}}">詳細資料</a> //使用angular的routerLink取代href
</div>
在使用連結的時候,使用Angular的routerLink標籤取代html的href標籤。使用Angular標籤可以和Angular路由的模組搭配,處理很多路由轉換的細節。
此處的連結綁定英雄的id
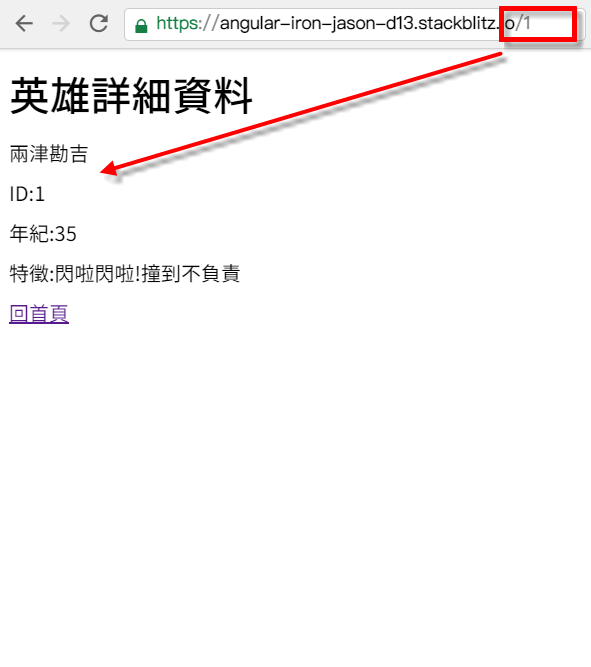
點擊連結之後,會連結到英雄詳細資料的頁面,頁面的連結這時候會帶上點擊的id
在上一篇已經設定好,如果路徑帶有id,就會切換到heroDetail的元件
{ path:':id',component:HeroDetailComponent }
接下來要做的事情就是透過id去顯示這個id的英雄。如下圖
hero-detail.component.ts
import { Component, OnInit } from '@angular/core';
import { DataService } from '../data.service'
import { ActivatedRoute } from '@angular/router';  //匯入ActivatedRoute 取得當前路由資訊
import { map,tap } from 'rxjs/operators'
@Component({
  selector: 'app-hero-detail',
  templateUrl: './hero-detail.component.html',
  styleUrls: ['./hero-detail.component.css']
})
export class HeroDetailComponent implements OnInit {
  id:number
  hero
  constructor(
    private route: ActivatedRoute, //將ActivatedRoute 宣告為 route
    private dataService:DataService
  ) { }
  ngOnInit() {
    this.route.params.subscribe(params => { //當元件啟動時,呼叫route取得當前頁面的參數
           console.log(params) // {id: "1"}
           this.id = params.id;
           this.dataService.getData()
           .pipe(map(e=>e.data))
           .subscribe(heros=>{
             this.hero=heros.filter(e=>e.id==this.id)[0] //透過頁面的參數,篩選出符合的英雄資料
             console.log(this.hero)
           })
        });
  }
}
Angular裡面有一個ActivatedRoute可以取得當前頁面的參數
匯入ActivatedRoute,並且在此元件宣告
取得頁面參數也是一個非同步事件。注意,因為Angular深度整合RXJS,所以幾乎所有的非同步事件都是可被觀察的對象(Observable),需要訂閱(subscribe)才能取得資料
訂閱之後,先把參數(params)印出來,會與網頁上方的數字符合
再來透過取得的參數,使用Javascript的filter方法將此id的英雄篩選出來
如此一來,英雄詳細頁面的取得路由資料的設定就大功告成啦
英雄設定頁面等html細節,因為不在本篇的討論範圍內,所以沒有在此列出來,詳細的內容可以看今日的線上範例
今天的範例內容可以在這裡看到:範例內容
本次的範例包含這兩篇路由系列的所有完整範例,建議可以搭配這兩篇一起觀看整個範例
今天學到的事情有:
