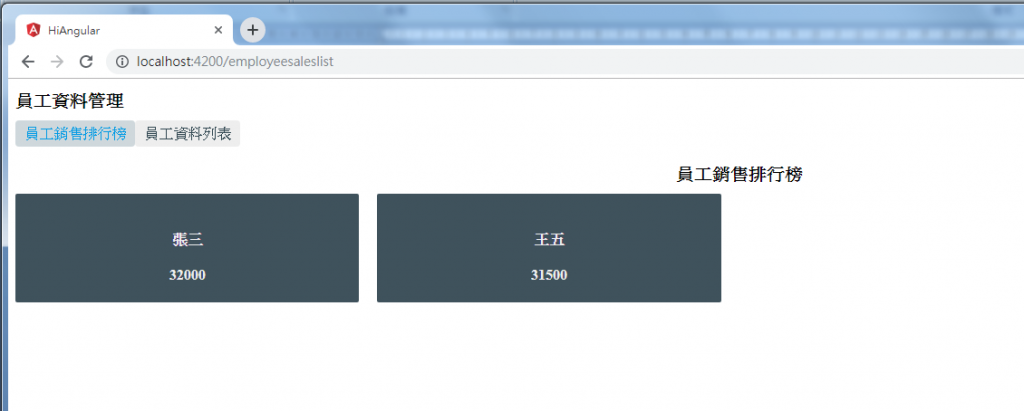
首先,就先來做員工資料列表與員工銷售排行榜的切換,主要將原來的app-routing.module.ts再增加員工銷售排行榜的連結,最後,再增加一個預設的路由,也就是網頁的起始網頁是那個。預計的路由的path參數為空白,而redirectTo參數就是要指到那個compoent,最後的參數pathMatch用預設值即可。程式碼如下:
import { NgModule } from '@angular/core';
import { Routes, RouterModule } from '@angular/router';

import { EmployeeListComponent } from './employee-list/employee-list.component';
import { EmployeeDetailComponent } from './employee-detail/employee-detail.component';
import { EmployeeSalesListComponent } from './employee-sales-list/employee-sales-list.component';

const routes: Routes = [
  { path: '', redirectTo: '/employeesaleslist', pathMatch: 'full' },
  { path: 'employeelist', component: EmployeeListComponent },
  { path: 'employeesaleslist', component: EmployeeSalesListComponent }
];

@NgModule({
  imports: [RouterModule.forRoot(routes)],
  exports: [RouterModule]
})
export class AppRoutingModule { }
而切換的動作,主要是在app.component.html,用HTML標籤的Angular屬性routerLink來設定要連接到那個網頁,並且要配合對應的css,來顯示。來起來,是不是很像之前,學過的框架結構。程式碼如下:
<h1>員工資料管理</h1>
<nav>
    <a routerLink="/employeesaleslist">員工銷售排行榜</a>
    <a routerLink="/employeelist">員工資料列表</a>
</nav>
<router-outlet></router-outlet>
對應的app.component.css,如下:
h1 {
  font-size: 1.2em;
  margin-bottom: 0;
}
h2 {
  font-size: 2em;
  margin-top: 0;
  padding-top: 0;
}
nav a {
  padding: 5px 10px;
  text-decoration: none;
  margin-top: 10px;
  display: inline-block;
  background-color: #eee;
  border-radius: 4px;
}
nav a:visited, a:link {
  color: #334953;
}
nav a:hover {
  color: #039be5;
  background-color: #cfd8dc;
}
nav a.active {
  color: #039be5;
}
網頁執行結果:

切換的工作,比較簡單,接下來,就是要分別連結到明細資料畫面,不過,這方面,就比較複雜。下回分解。
