上一篇我們能夠去取得交易及收據的資訊,這一篇將會透過 web3.js 來發起交易,算是蠻重要的一個功能!
web3.js 發起交易的函式需帶入的參數型別是 Object ,內含的參數包含以下幾個:
web3.eth.defaultAccount ,型別為 string
string
number|string|BigNumber
number|string|BigNumber
number|string|BigNumber
string
number
我們可以將參數格式設置介面來管理參數設定,透過 AngularCLI 產生 Interface :
ng g i types/transaction
然後按照格式來設置:
export interface TransactionParameter {
    from: string;
    to?: string;
    value?: number|string;
    gas?: number|string;
    gasPrice?: number|string;
    data?: string;
    nonce?: number;
}
為了往後方便管理所有的參數格式將 Interface 從 index.ts 中 export :
export * from './transaction';
我們在 ProviderService 中設計我們的方法:
import { TransactionParameter } from 'src/app/types';

public sendTransaction(params: TransactionParameter): Observable<any> {
    return from(this.web3.eth.sendTransaction(params));
}
在 app.component.ts 中做測試:
constructor(private provider: ProviderService) {
    this.provider.getAccount().pipe(
        take(1),
        mergeMap(accounts => {
            this.provider.defaultAccount = accounts[0];
            const params = {
                from: this.provider.defaultAccount,
                to: '0x579c43911C862E16fEB199233ec2d32e441b7713',
                value: '1000000000000000000'
            } as TransactionParameter;
            return this.provider.sendTransaction(params);
        }),
    );
}
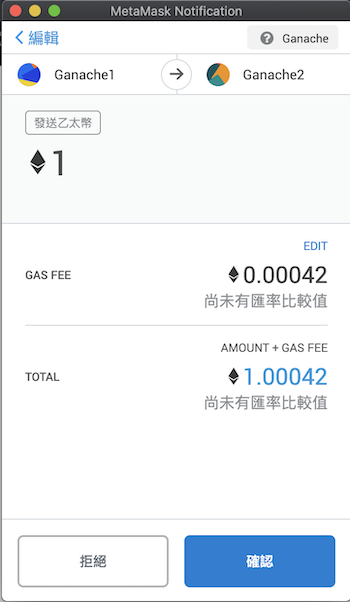
會跳出 MetaMask 來進行轉帳:
按下確認後就轉成功了,我們打開 Ganache 來看剛剛轉帳後的成果:
設計了 Interface 來管理參數格式,並成功透過 web3.js 來發起交易轉帳給其他帳戶。
