首先要安裝Windows Software Development Kit
也就是Windows 10 SDK 這邊可以下載
https://developer.microsoft.com/zh-tw/windows/downloads/windows-10-sdk/
移至makecert.exe目錄
cd Program File (x86)/Windows Kits/10/bin/10.0.18362.0/x64
目錄可能會因為版本有些為不同 依照安裝版本資料夾配置情況修改
(如果有設定過環境變數可以直接找到指令就不需要這個cd了)
馬上輸入指令來生一個Certificate
makecert -r -pe -n "CN=" -b -e -eku 1.3.6.1.5.5.7.3.1 -ss my -sr -sky exchange -sp "Microsoft RSA SChannel Cryptographic Provider" -sy 12
這邊certificate-name, start-date, end-date都是你自己決定
Console設定
搜尋mmc,如果Windows工作列找不到mmc,則直接用File explore找C:/Windows/System32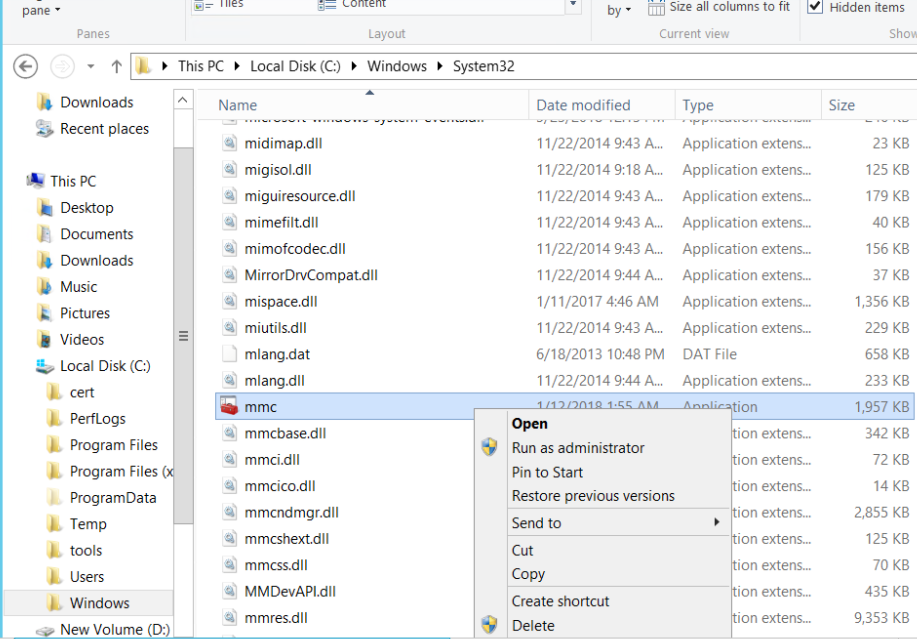
打開你的Console之後
File -> Add/Remove Snap-in -> 左側選擇Certificate -> Add-> 選擇Compute account next -> finish -> ok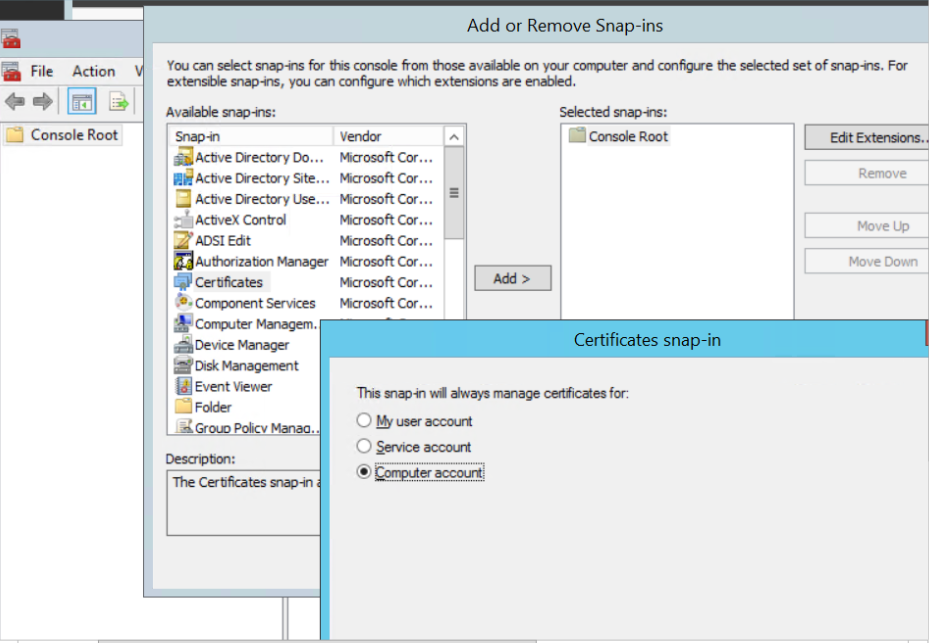
有成功加入後則應在Console Root看到Certificates的列表,右鍵點擊你剛剛設定的 -> All Tasks -> Manage Private Keys
然後設定一下Permission,這邊我是把客戶要求的Service account權限加進來
沒有的話或許可以省略吧
Add 輸入名稱(名稱從Services -> SQL Server(MSSQLSERVER) -> 右鍵Properties -> Log On tab中找)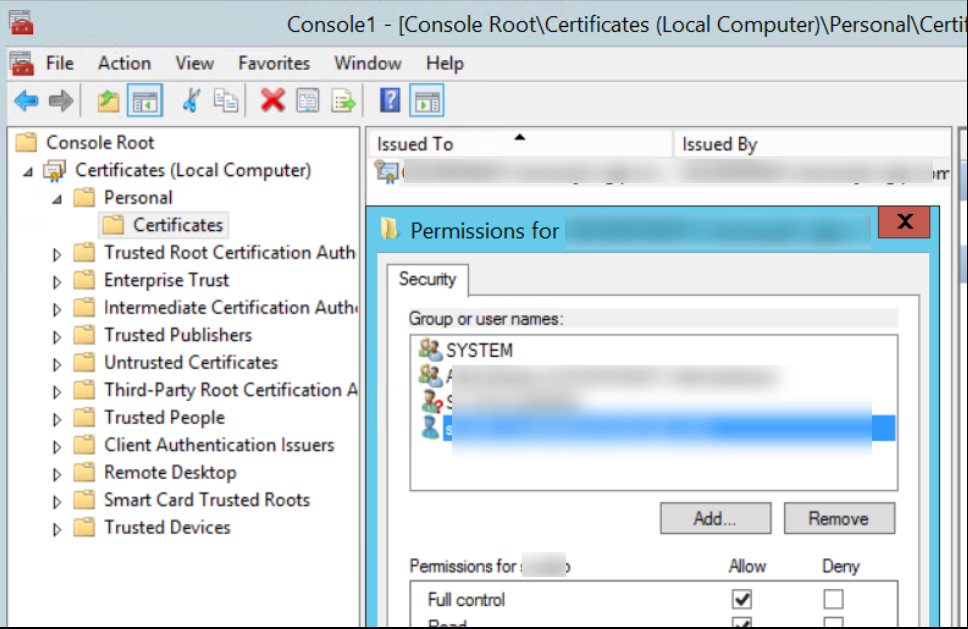
Sql Server Configuration Manager -> SQL Server Network Configuration -> Protocols for MSSQLSERVER -> 右鍵Properties
Flags -> Force Encryption Yes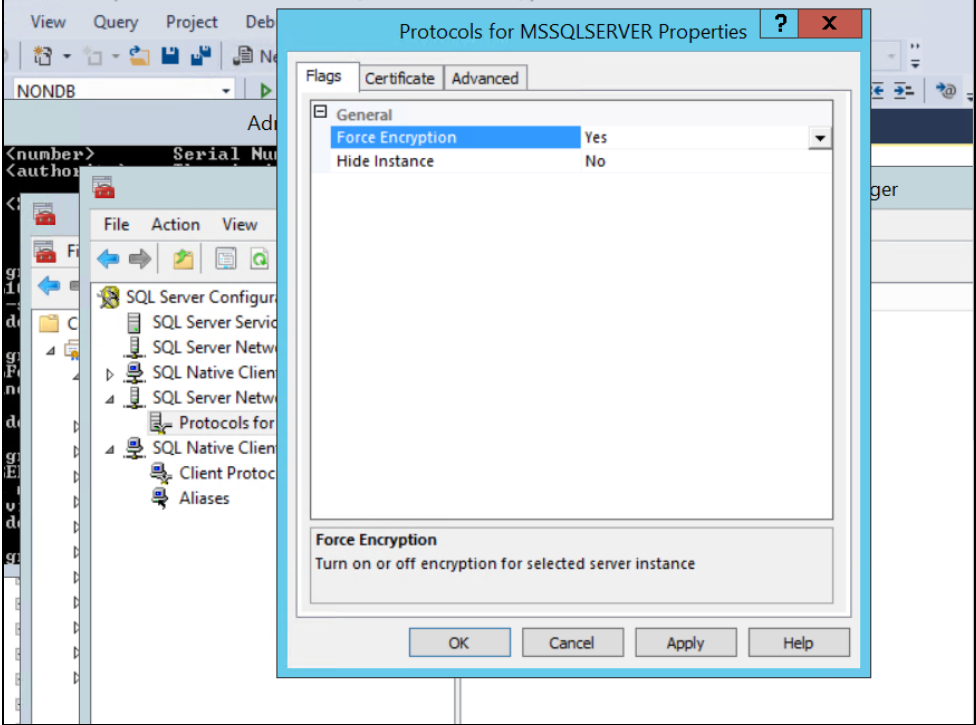
Certificate -> 選擇 -> ok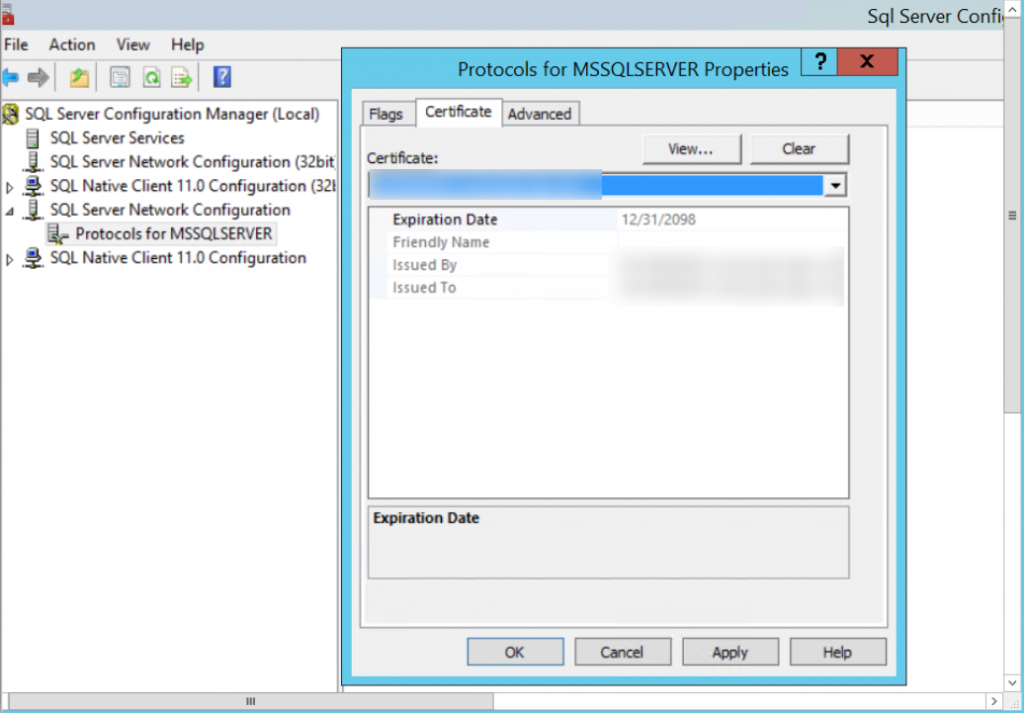
Sql Server Configuration Manager -> SSQL Server Services -> SQL Server/Agent重啟
然後馬上來測試連線吧
來去SSMS連線開啟進階功能,把信任伺服器憑證以及加密連線打開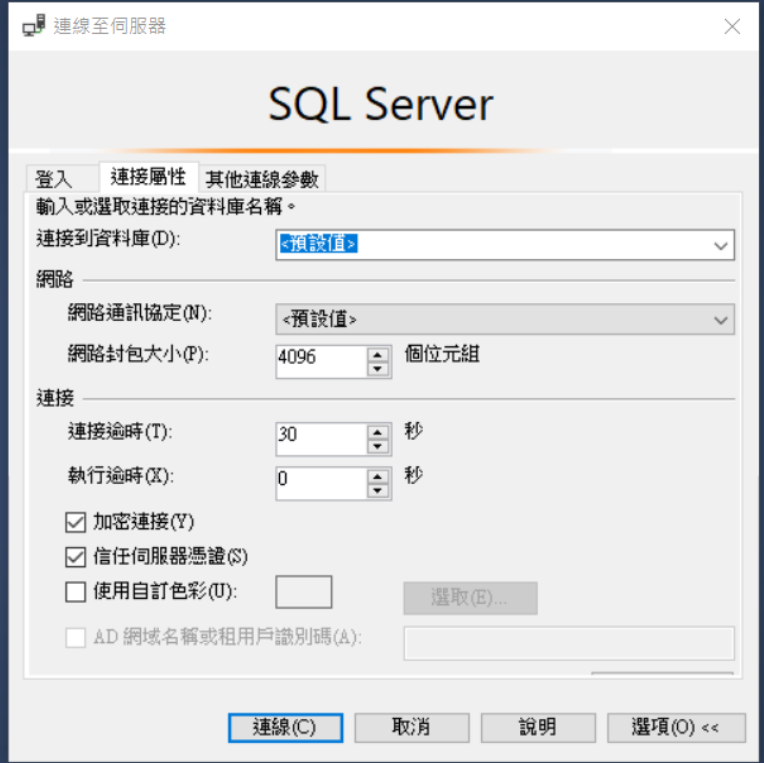
如果可以連線應該就是設定沒問題
如果無法連線可能要去確認一下Certificate
這邊的流程大致上都是爬文爬來的,Reference如下
https://dotblogs.com.tw/yc421206/2019/05/23/enable_sql_server_ssl_connection_encrypt#SQL%20Instance%20%E4%BD%BF%E7%94%A8%E6%86%91%E8%AD%89
https://docs.microsoft.com/zh-tw/azure/vpn-gateway/vpn-gateway-certificates-point-to-site-makecert
https://ithelp.ithome.com.tw/articles/10187837
