最近有需求用到應用程式內購買,距離上一次串內購已經好幾年,Code都不知道丟哪去了
還好Google官方有提供Sample
Google提供的這包Sample裡面有“購買”也有“訂閱”的範例
也有區分Kotlin以及Java的版本
另外還有一包Server,不過看起來是用Type Script寫的,跟我想用的不同所以這邊就得另外找了
Google Play Console -> 選擇應用程式 -> 商店發布 -> 應用程式內商品 -> 受管理商品 -> 建立要納入管理的產品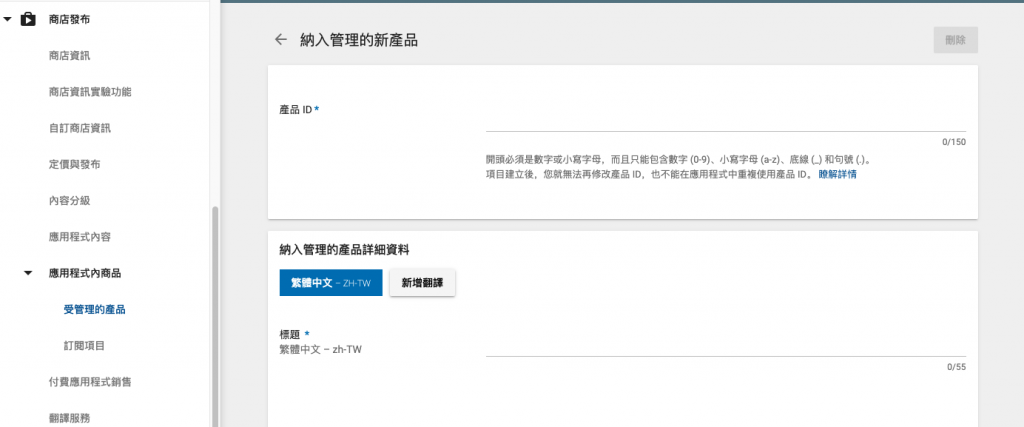
按照欄位資訊填寫建立完成後會在受管理商品列表中看到剛才建置的項目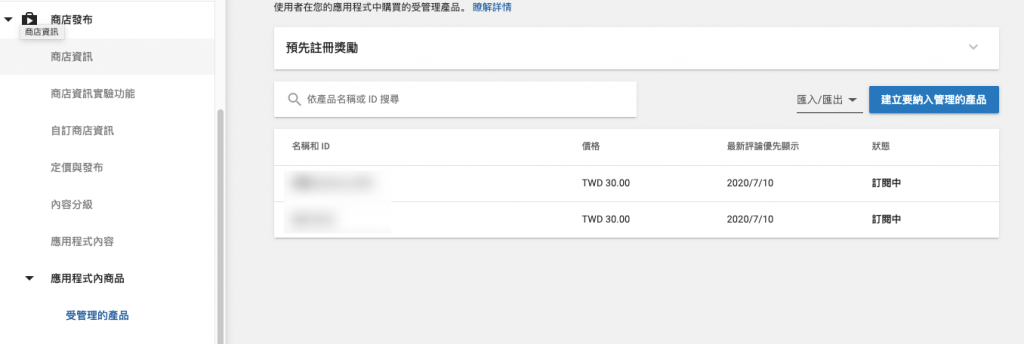
以往都是把Sample裡面主要的Class複製出來再整合成Controller方便使用
實在有點懶惰就再爬爬文,結果發現Android版本早就有人做好啦,android-inapp-billing-v3,看這星星應該是相當穩定的狀態了
使用上就不多說,直接參照android-inapp-billing-v3 Git中的說明吧
前端部分完成了,當然不能就此結束,除非你要做的APP完全是在本機執行
因此當然要加上後端驗證的部分
我們可以在onProductPurchased中的TransactionDetails參數拿到購買成功後回傳的收據
再將此收據中的相關參數送到後端做驗證
驗證通過後才表示購買成功,並完成整個購買流程
後端驗證我們先看到官方建議如何處理
其實就是一個Get的API就能驗證了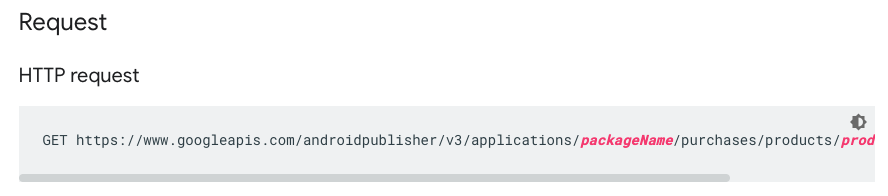
但是要注意,文件的下方還有但書,還需要有Auth驗證身份
不然直接呼叫上面這個Get是得不到結果的
同樣的,這些動作也有人封裝好了in-app-purchase,只要把必要的參數申請好並填寫進去就能使用
接下來就來逐一找到我們會用到的參數是放在哪裡
googlePublicKeyStrLive
Google Play Console -> 選擇應用程式 -> 菜單 開發工具 -> 子選項 服務及API
下圖中這段很長的Base64字串就是這個APP的public key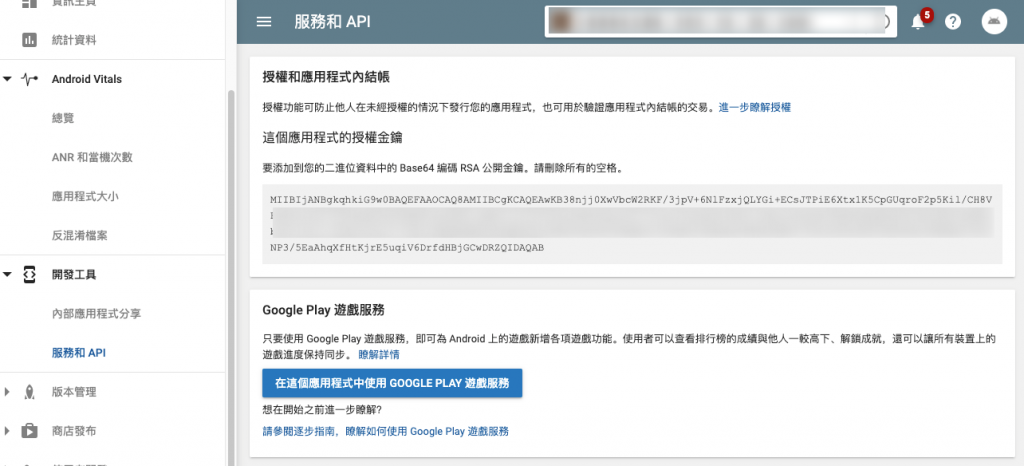
googleServiceAccount(clientEmail, privateKey)
這兩個參數就比較麻煩了
Google Play Console -> 設定 -> 菜單 開發人員帳戶 -> 子選項 API存取權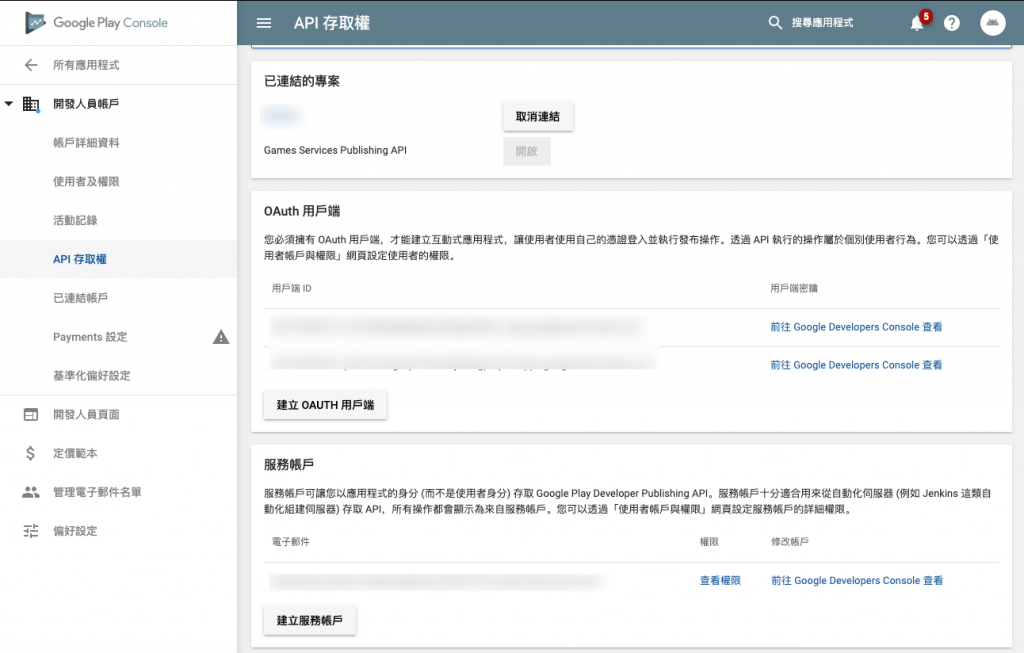
已連結的專案
這邊要連結一個Google Clound的專案,專案連結大概是長這樣
https://console.developers.google.com/apis/dashboard?project=XXXXX
如果還沒有任何一個的話可以先建置一個
服務帳戶(Service Account)
預設應該是沒有綁定任何的帳號,點擊建立帳號服務後會彈出一個流程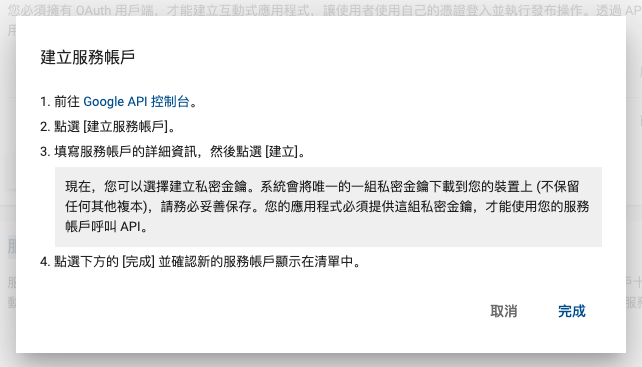
點擊彈窗中的Google API連結會導引到上面已連結專案的Credentials頁面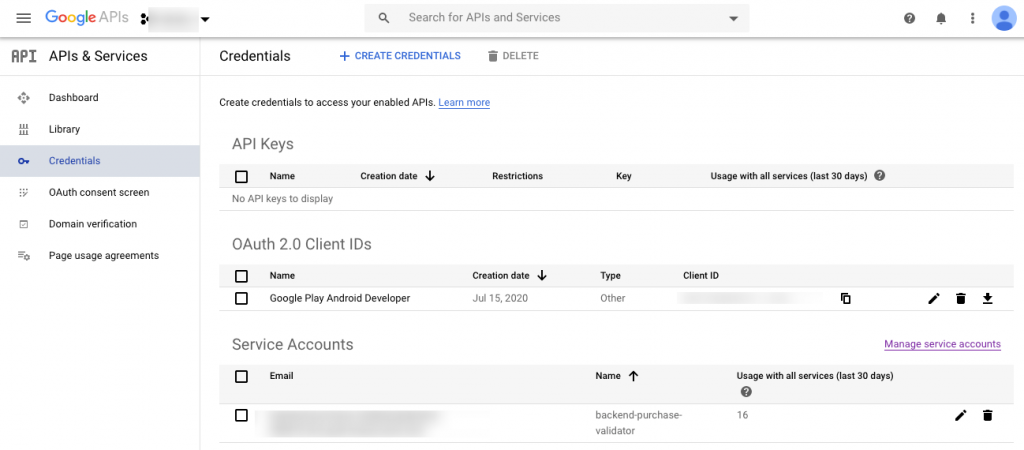
馬上來建置Service Account
Create Credentials -> 選擇Service Account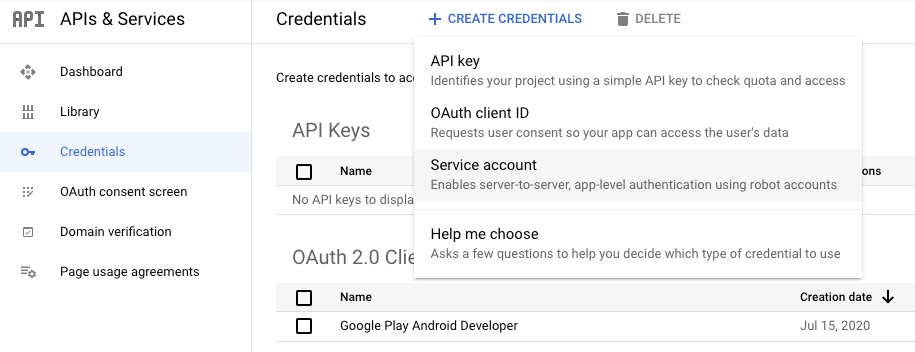
設置名稱,通常我會設置一個比較可以清晰辨識的名稱
在這邊我們目的是用來驗證iab的收據,可能就會用iab來命名
例如 iab-validator等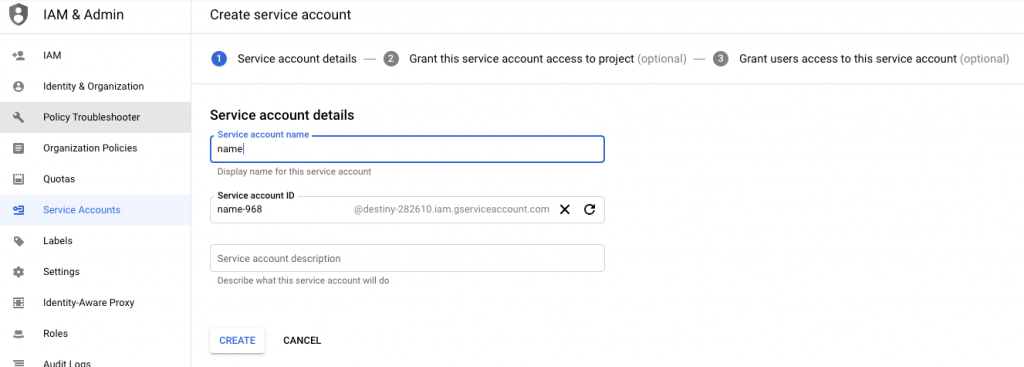
接下來要設置Service Account的角色
由於我們這邊只需要讀取,不需要寫入,因此我就選了Viewer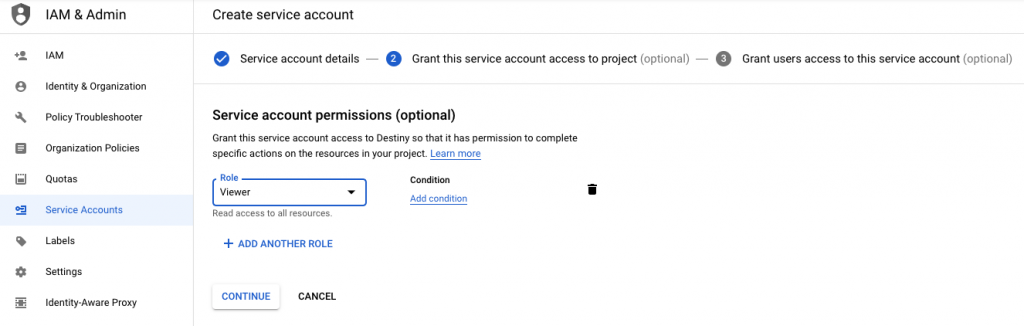
這邊我就完全沒有填寫任何資訊
直接Done完成建置
完成後回到Credentials頁面會看到Service Account地方多了一個項目
點擊進入查看細節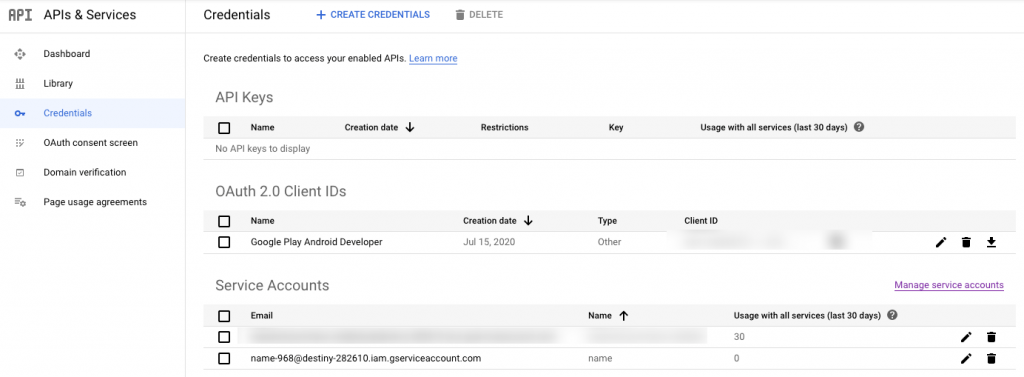
Add key -> Create new key
選擇.json -> Create,這邊要特別注意
下載下來的.json檔請自行留存,弄丟了沒有地方可以找回,就只能建置新的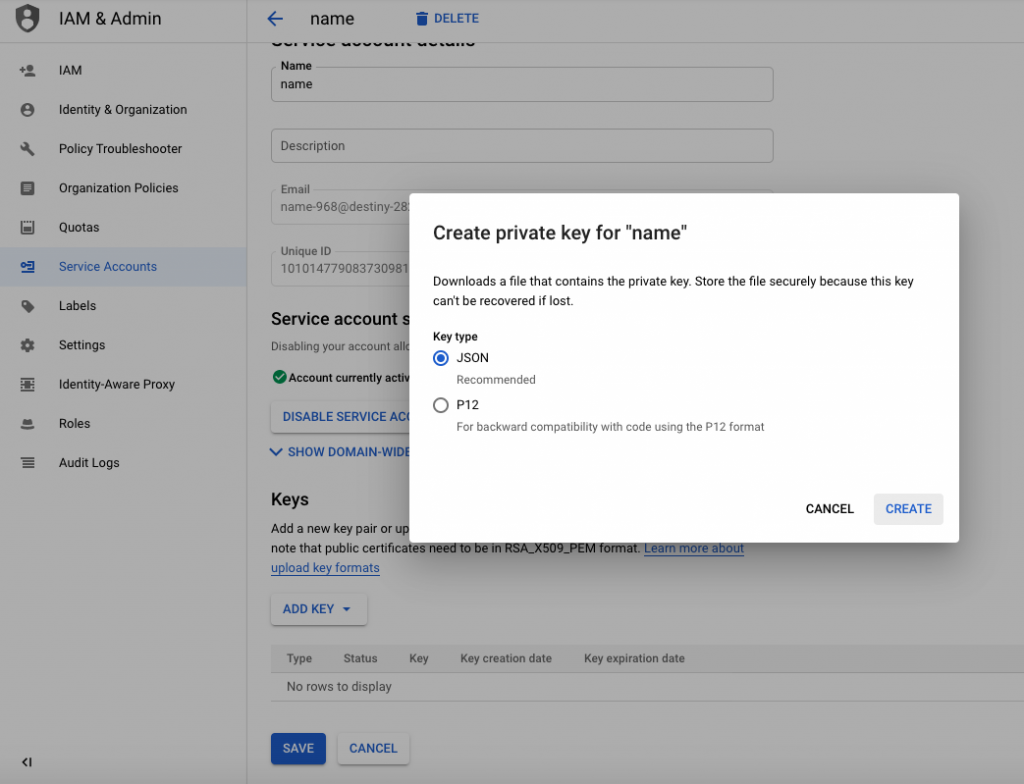
打開.json後可以看到裡面大概有這些內容
client_email以及private_key就是我們要的
看到這邊大概快吐血了,不過還沒結束
回到API存取權頁面,服務帳戶中找到剛剛建置好的Service Account
點擊查看權限,可以看到目前此賬戶擁有的權限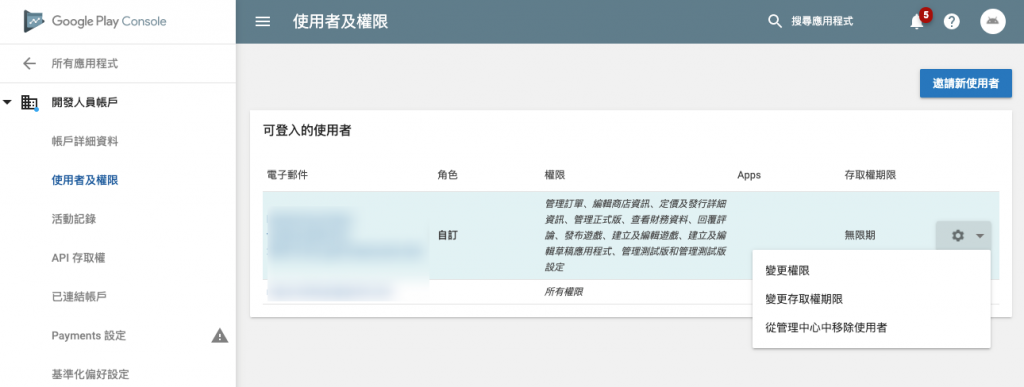
點擊右側設定編輯權限,勾選查看財務資料(其他的要勾不勾就隨意了)
儲存之後就搞定這部分了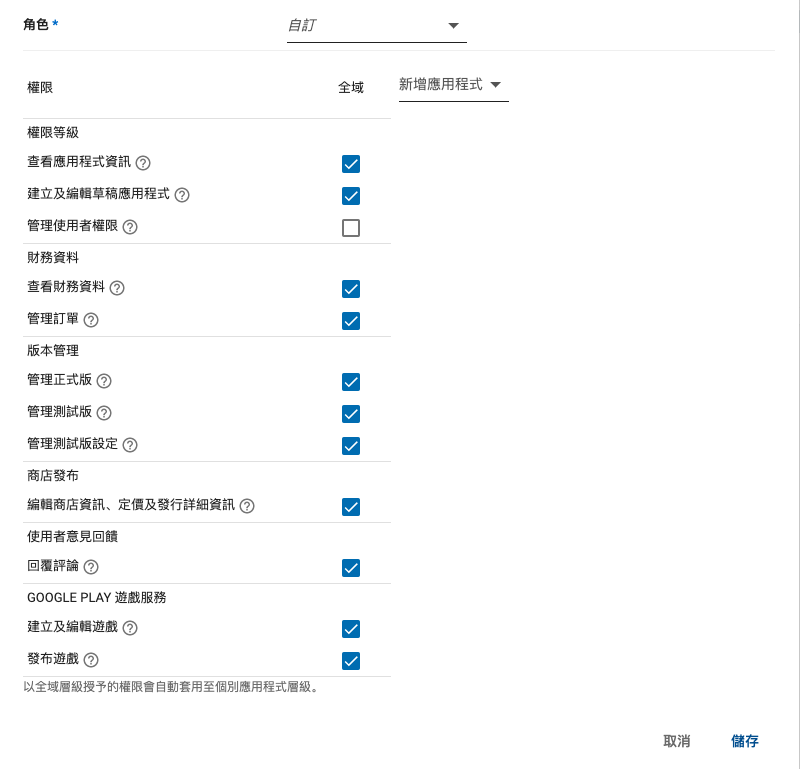
Receipt
文件中有提到傳入驗證的receipt需要包含一下內容
{
    packageName: 'The packge name of the item purchased',
    productId: 'The product ID of the item purchased',
    purchaseToken: 'PurchaseToken of the receipt from Google',
    subscription: true/false // if the receipt is a subscription, then true
}
packageName => 基本上我認為Hard code就可以了
productId => detail.purchaseInfo.purchaseData.productId
purchaseToken => detail.purchaseInfo.purchaseData.purchaseToken
subscription => 就看產品是一次性購買,還是需要按時付款
這邊的detail就是android-inapp-billing-v3中的TransactionDetails
除了上述的建置流程外,開發期間我還踩了一個坑,後端驗證的時候有看到這個錯誤訊息
"The project id used to call the google play developer api has not been linked"
我解決的方式是回到上面googleServiceAccount建置的步驟,重新核對了一次整個內容
後來發現由於測試的時候有切換連結不同的專案,導致Service Account並沒有對應到正確的專案
我把Service Account刪除,重新建置一個新的就能收到正確的回傳訊息了
 MarcusLiu
